HP Z600 HP Workstations - HP eSATA PCI cable kit installation - Page 5
Workstations
 |
UPC - 884962074053
View all HP Z600 manuals
Add to My Manuals
Save this manual to your list of manuals |
Page 5 highlights
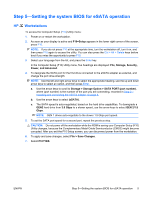
Step 5-Setting the system BIOS for eSATA operation HP Workstations To access the Computer Setup (F10) Utility menu: 1. Power on or restart the workstation. 2. As soon as your display is active and F10=Setup appears in the lower right corner of the screen, press F10. NOTE: If you do not press F10 at the appropriate time, turn the workstation off, turn it on, and then press F10 again to access the utility. You can also press the Ctrl + Alt + Delete keys before boot if you miss the opportunity to press F10. 3. Select your language from the list, and press the Enter key. In the Computer Setup (F10) Utility menu, five headings are displayed: File, Storage, Security, Power, and Advanced. 4. To designate the SATA port for the first drive connected to the eSATA adapter as external, and change the port drive strength: NOTE: Use the left and right arrow keys to select the appropriate heading, use the up and down arrow keys to select an option, and then press Enter. a. Use the arrow keys to scroll to Storage > Storage Option > SATA PORT (port number), where (port number) is the number of the port you are connecting, recorded in Step 2- Installing and connecting the eSATA adapter on page 4. b. Use the arrow keys to select (eSATA). c. The SATA speed is auto-negotiated, based on the hard drive capabilities. To downgrade a GEN2 hard drive from 3.0 Gbps to a slower speed, use the arrow keys to select GEN 2/1.5 Gbps. NOTE: GEN 1 drives auto-negotiate to the slower 1.5 Gbps port speed. 5. To set the SATA port speed for a second port, repeat the previous step. CAUTION: Do not power off the workstation while the ROM is saving your Computer Setup (F10) Utility changes, because the Complementary Metal-Oxide Semiconductor (CMOS) might become corrupted. After you exit the F10 Setup screen, you can disconnect power from the workstation. 6. To apply and save changes, select File > Save Changes. 7. Select F10=YES. ENWW Step 5-Setting the system BIOS for eSATA operation 5
-
 1
1 -
 2
2 -
 3
3 -
 4
4 -
 5
5 -
 6
6
 |
 |