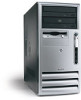
HP d325 HP Business Desktop d300 and dx6050 Series Personal Computers Service - Page 11
Installing the Operating System, 1.0.1 Installing or Upgrading Device Drivers - network driver
 |
View all HP d325 manuals
Add to My Manuals
Save this manual to your list of manuals |
Page 11 highlights
1 Installing the Operating System Depending on the model, Microsoft Windows 2000 Professional, Windows XP Home, or Windows XP Professional is preinstalled on the computer and will be configured automatically the first time the computer is turned on. Ä CAUTION: Do not add optional hardware devices to your computer until the operating system is successfully installed. Doing so may cause errors and may prevent the operating system from installing properly. Ä CAUTION: Once the automatic installation has begun, DO NOT TURN OFF THE COMPUTER UNTIL THE PROCESS IS COMPLETE. Turning off the computer during the installation process might damage the software that runs the computer. The first time the computer is turned on, the operating system is automatically installed. This takes approximately 10 minutes, depending on the system hardware configuration. At the beginning of the installation process, you are prompted to select the appropriate language for the operating system. Read and follow the instructions that appear on the screen to complete the installation. During this process, do not turn off your computer unless you are directed to do so. 1.0.1 Installing or Upgrading Device Drivers To install hardware devices such as a printer, a display adapter, or network adapter after the operating system installation is completed, the operating system needs access to the appropriate software drivers for the devices. The I386 directory and its subdirectories provide the HP- or Compaq-specific integration of the operating system for the computer model and include device drivers supported by Windows 2000. When prompted for the I386 directory on the operating system CD, replace the path specification with C:\I386 or use the browse button of the dialog box to browse the computer for the I386 folder. 1.0.2 Creating an Emergency Repair Diskette-Windows 2000 1. Click Start > Programs > Accessories > System Tools > Backup. 2. Select the menu option Tools, then select Create an Emergency Disk. 3. Follow the instructions that appear on the screen. 1.0.3 Using the Emergency Repair Diskette-Windows 2000 1. Insert the diskette into the diskette drive and restart the computer (you may boot the computer to the Windows 2000 CD on some computers). 2. Press Enter to start the repair process, then choose to repair the system. Service Reference Guide, d300, dx6050 319865-008 1-1
-
 1
1 -
2
-
3
-
4
-
5
-
 6
6 -
 7
7 -
 8
8 -
 9
9 -
 10
10 -
 11
11 -
 12
12 -
 13
13 -
 14
14 -
 15
15 -
 16
16 -
17
-
18
-
19
-
20
-
21
-
22
-
23
-
24
-
25
-
26
-
27
-
28
-
29
-
30
-
31
-
32
-
33
-
34
-
35
-
36
-
37
-
38
-
39
-
40
-
41
-
42
-
43
-
44
-
45
-
46
-
47
-
48
-
49
-
50
-
51
-
52
-
53
-
54
-
55
-
56
-
57
-
58
-
59
-
60
-
61
-
62
-
63
-
64
-
65
-
66
-
67
-
68
-
69
-
70
-
71
-
72
-
73
-
74
-
75
-
76
-
77
-
78
-
79
-
80
-
81
-
82
-
83
-
84
-
85
-
86
-
87
-
88
-
89
-
90
-
91
-
92
-
93
-
94
-
95
-
96
-
97
-
98
-
99
-
100
-
101
-
102
-
103
-
104
-
105
-
106
-
107
-
108
-
109
-
110
-
111
-
112
-
113
-
114
-
115
-
116
-
117
-
118
-
119
-
120
-
121
-
122
-
123
-
124
-
125
-
126
-
127
-
128
-
129
-
130
-
131
-
132
-
133
-
134
-
135
-
136
-
137
-
138
-
139
-
140
-
141
-
142
-
143
-
144
-
145
-
146
-
147
-
148
-
149
-
150
-
151
-
152
-
153
-
154
-
155
-
156
-
157
-
158
-
159
-
160
-
161
-
162
-
163
-
164
-
165
-
166
-
167
-
168
-
169
-
170
-
171
-
172
-
173
-
174
-
175
-
176
-
177
-
178
-
179
-
180
-
181
-
182
-
183
-
184
-
185
-
186
-
187
-
188
-
189
-
190
-
191
-
192
-
193
-
194
-
195
-
196
-
197
-
198
-
199
-
200
-
201
-
202
-
203
-
204
-
205
-
206
-
207
-
208
-
209
-
210
-
211
-
212
-
213
-
214
-
215
-
216
-
217
-
218
-
219
-
220
-
221
-
222
-
223
-
224
-
225
-
226
-
227
-
228
-
229
-
230
-
231
-
232
-
233
-
234
-
235
-
236
-
237
-
238
 |
 |