HP dx2100 Hardware Reference Guide - Page 13
the closed position, is fully inserted and properly seated. Make sure the latches are
 |
View all HP dx2100 manuals
Add to My Manuals
Save this manual to your list of manuals |
Page 13 highlights
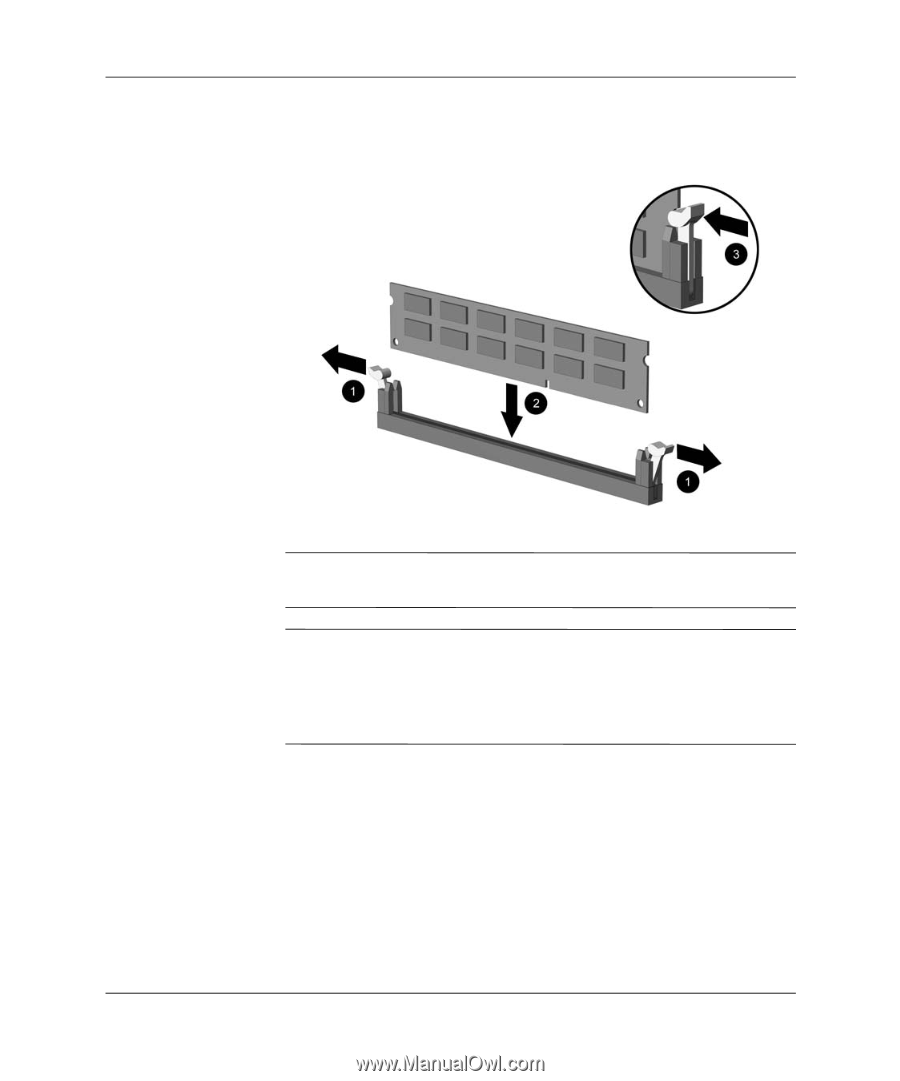
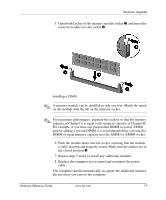
Hardware Upgrades 5. Open both latches of the memory module socket 1, and insert the memory module into the socket 2. Installing a DIMM ✎ A memory module can be installed in only one way. Match the notch on the module with the tab on the memory socket. ✎ For maximum performance, populate the sockets so that the memory capacity of Channel A is equal to the memory capacity of Channel B. For example, if you have one preinstalled DIMM in socket XMM1 and are adding a second DIMM, it is recommended that you install a DIMM of equal memory capacity into the XMM3 or XMM4 socket. 6. Push the module down into the socket, ensuring that the module is fully inserted and properly seated. Make sure the latches are in the closed position 3. 7. Repeat steps 5 and 6 to install any additional modules. 8. Replace the computer access panel and reconnect the power cable. The computer should automatically recognize the additional memory the next time you turn on the computer. Hardware Reference Guide www.hp.com 1-9
-
 1
1 -
2
-
3
-
4
-
5
-
6
-
7
-
 8
8 -
 9
9 -
 10
10 -
 11
11 -
 12
12 -
 13
13 -
 14
14 -
 15
15 -
 16
16 -
 17
17 -
 18
18 -
19
-
20
-
21
-
22
-
23
-
24
-
25
-
26
-
27
-
28
-
29
-
30
-
31
 |
 |