HP mt41 HP mt41 Mobile Thin Client Maintenance and Service Guide - Page 82
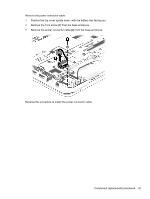
Reverse this procedure to install the system board., by sliding it up
 |
View all HP mt41 manuals
Add to My Manuals
Save this manual to your list of manuals |
Page 82 highlights
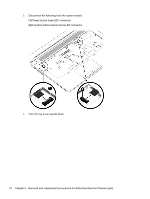
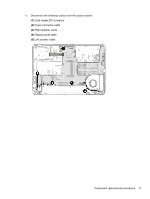
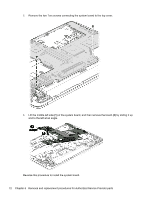
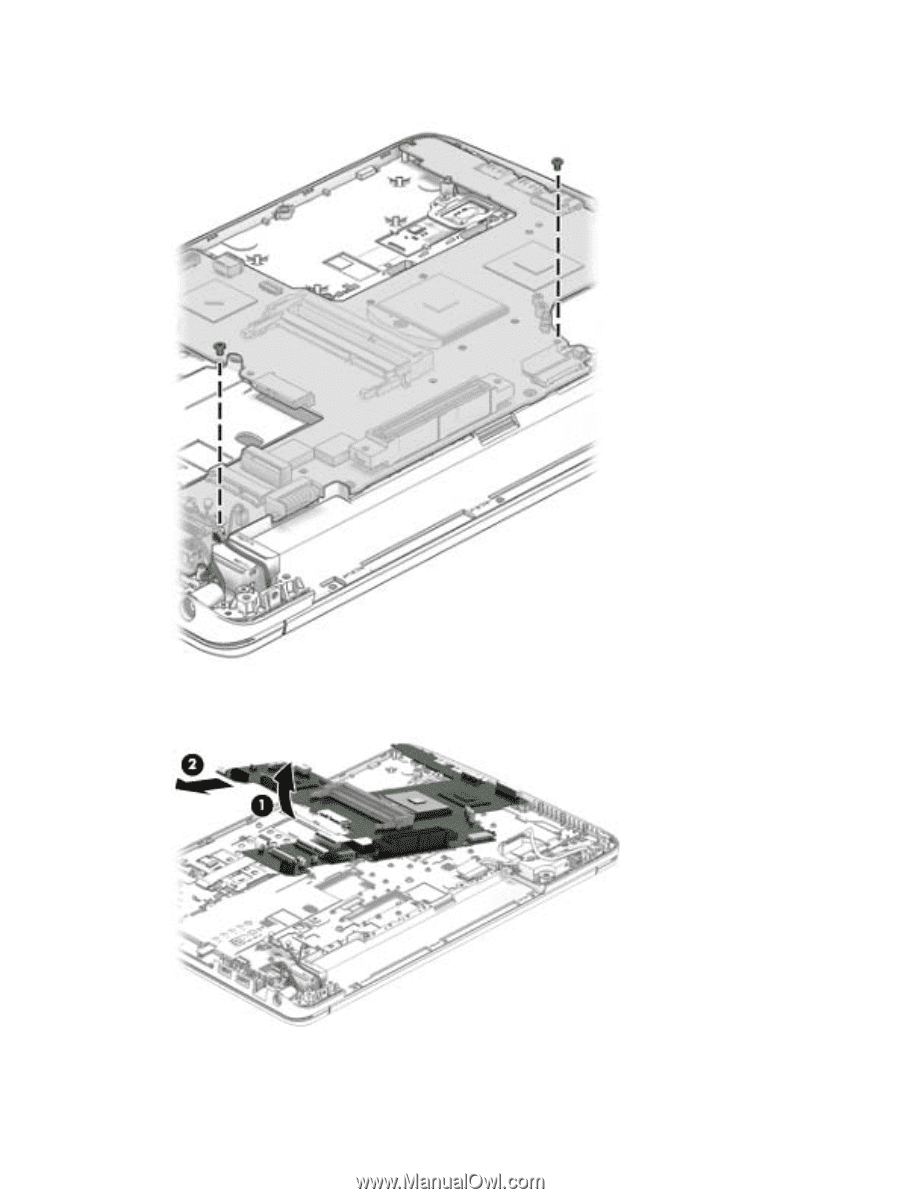
5. Remove the two Torx screws connecting the system board to the top cover. 6. Lift the middle left side (1) of the system board, and then remove the board (2) by sliding it up and to the left at an angle. Reverse this procedure to install the system board. 72 Chapter 6 Removal and replacement procedures for Authorized Service Provider parts
-
 1
1 -
2
-
3
-
4
-
5
-
6
-
7
-
8
-
9
-
10
-
11
-
12
-
13
-
14
-
15
-
16
-
17
-
18
-
19
-
20
-
21
-
22
-
23
-
24
-
25
-
26
-
27
-
28
-
29
-
30
-
31
-
32
-
33
-
34
-
35
-
36
-
37
-
38
-
39
-
40
-
41
-
42
-
43
-
44
-
45
-
46
-
47
-
48
-
49
-
50
-
51
-
52
-
53
-
54
-
55
-
56
-
57
-
58
-
59
-
60
-
61
-
62
-
63
-
64
-
65
-
66
-
67
-
68
-
69
-
70
-
71
-
72
-
73
-
74
-
75
-
76
-
 77
77 -
 78
78 -
 79
79 -
 80
80 -
 81
81 -
 82
82 -
 83
83 -
 84
84 -
 85
85 -
 86
86 -
 87
87 -
88
-
89
-
90
-
91
-
92
-
93
-
94
-
95
-
96
-
97
-
98
-
99
-
100
-
101
-
102
-
103
-
104
-
105
-
106
-
107
-
108
-
109
 |
 |
5.
Remove the two Torx screws connecting the system board to the top cover.
6.
Lift the middle left side
(1)
of the system board, and then remove the board
(2)
by sliding it up
and to the left at an angle.
Reverse this procedure to install the system board.
72
Chapter 6
Removal and replacement procedures for Authorized Service Provider parts