HP t410 HP Compaq Thin Client Imaging Tool - Page 2
Getting Started, The HP Add-On Con BIOS Settings may be downloaded - downloads
 |
View all HP t410 manuals
Add to My Manuals
Save this manual to your list of manuals |
Page 2 highlights
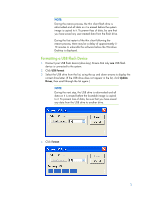
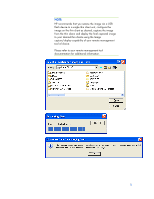
NOTE: This restore method will not work with all USB flash devices. USB flash devices with multiple partitions generally do not support this restore method. The range of USB flash devices available on the market constantly changes. Not all USB flash devices have been tested with the HP Thin Client Imaging Tool. Before using the utility, you must download the appropriate image from http://www.hp.com/#Support. By default, the XPe/WES thin client platforms have the boot-order set to USB first, followed by HDD/ATA Flash, and finally Network. It is recommended that you change the boot-order to Network first if you choose to restore the image via a remote management tool. This can be done locally through the BIOS setup or remotely by script execution of the HP Add-On (Configure BIOS Settings) through the remote management tool of your choice. Please consult the Configure_BIOS_Settings text file found within the HP Add-On (Configure BIOS Settings) for details about changing the boot order. The HP Add-On (Configure BIOS Settings) may be downloaded from http://www.hp.com/#Support. Getting Started Two deployment options are supported by this utility. You can choose to do one or both of the following: • Create a bootable flash image on a USB flash device (such as a drive key). • Unpack the components of the image to a directory for use in a custom deployment scenario. Download and run the Package-for-the-Web deliverable (an .exe file) that contains the original factory image for the thin client. The HP Thin Client Imaging Tool (CRStart.exe) runs automatically and displays the following dialog: Choose one of the deployment options: USB Format, or Deployment. Each option is described below. 2
-
 1
1 -
 2
2 -
 3
3 -
 4
4 -
 5
5 -
 6
6
 |
 |