HP t5325 Troubleshooting Guide: HP t5325 Thin Clients - Page 9
Installing the Rubber Feet,
 |
View all HP t5325 manuals
Add to My Manuals
Save this manual to your list of manuals |
Page 9 highlights
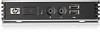
Installing the Rubber Feet To install the rubber feet: 1. Remove the feet from their backing. 2. Line up the hole in each foot with a VESA hole on the bottom of the thin client. Press the foot down firmly to secure it to the thin client. NOTE: The feet provide a protective cushion between the thin client and whatever surface it sits on or is mounted to. Figure 1-4 Installing the rubber feet Product features 3
-
 1
1 -
2
-
3
-
 4
4 -
 5
5 -
 6
6 -
 7
7 -
 8
8 -
 9
9 -
 10
10 -
 11
11 -
 12
12 -
 13
13 -
 14
14 -
15
-
16
-
17
-
18
-
19
-
20
-
21
-
22
-
23
-
24
-
25
-
26
-
27
-
28
-
29
-
30
-
31
-
32
-
33
-
34
-
35
-
36
-
37
-
38
-
39
-
40
-
41
 |
 |

Installing the Rubber Feet
To install the rubber feet:
1.
Remove the feet from their backing.
2.
Line up the hole in each foot with a VESA hole on the bottom of the thin client. Press the foot
down firmly to secure it to the thin client.
NOTE:
The feet provide a protective cushion between the thin client and whatever surface it
sits on or is mounted to.
Figure 1-4
Installing the rubber feet
Product features
3