Hitachi 55EX9K Owners Guide - Page 10
Remote Control Battery Installation And Replacement
 |
View all Hitachi 55EX9K manuals
Add to My Manuals
Save this manual to your list of manuals |
Page 10 highlights
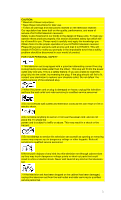
REMOTE CONTROL BATTERY INSTALLATION AND REPLACEMENT REMOTE CONTROL BATTERY INSTALLATION AND REPLACEMENT Open the battery cover of the remote transmitter by pushing the notched part of the cover with your fingers. a) Push batteries towards the springs and lift them out. b) Replace the old batteries with two new "AA" size batteries for the Genius Remote. c) Match the (+) and (-) marks in the battery compartment with the (+) and (-) terminal of the batteries. d) Replace the cover. 10
-
 1
1 -
2
-
3
-
4
-
 5
5 -
 6
6 -
 7
7 -
 8
8 -
 9
9 -
 10
10 -
 11
11 -
 12
12 -
 13
13 -
 14
14 -
 15
15 -
16
-
17
-
18
-
19
-
20
-
21
-
22
-
23
-
24
-
25
-
26
-
27
-
28
-
29
-
30
-
31
-
32
-
33
-
34
-
35
-
36
-
37
-
38
-
39
-
40
-
41
-
42
-
43
-
44
 |
 |

REMOTE CONTROL BATTERY INSTALLATION AND REPLACEMENT
10
REMOTE CONTROL BATTERY INSTALLATION AND REPLACEMENT
Open the battery cover of the remote transmitter by pushing the notched
part of the cover with your fingers.
a) Push batteries towards the springs and lift them out.
b) Replace the old batteries with two new "AA" size batteries for the
Genius Remote.
c) Match the (+) and (-) marks in the battery compartment with the (+) and
(-) terminal of the batteries.
d) Replace the cover.