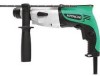
Hitachi DH22PG Instruction Manual - Page 10
HOW TO USE - hammer drill
 |
UPC - 717709011915
View all Hitachi DH22PG manuals
Add to My Manuals
Save this manual to your list of manuals |
Page 10 highlights
English ⅜ Dump particles after every two or three holes when drilling. ⅜ Please replace the drill bit after removing dust collector (B). 8. Selecting the driver bit Screw heads or bits will be damaged unless a bit appropriate for the screw diameter is employed to drive in the screws. 9. Confirm the direction of bit rotation (Fig. 6) The bit rotates clockwise (viewed from the rear side) by pushing the R-side of the push button. The L-side of the push button is pushed to turn the bit counterclockwise. R L L Push button ⅜ Pulling the trigger and pushing the stopper, it keeps the switched-on condition which is convenient for continuous running. When switching off, the stopper can be disconnected by pulling the trigger again. The switch stopper is unusable during reverse. 2. Rotation + Hammering This rotary hammer can be set to rotation and hammering mode by turning the change lever to the mark (Fig.7) Change lever L Fig. 6 RR HOW TO USE Fig. 7 (1) Mount the drill bit. (2) Pull the trigger switch after applying the drill bit tip to the drilling position (Fig. 8) CAUTION: To prevent accidents, make sure to turn the switch off and disconnect the plug from the receptacle when the drill pits and other various parts are installed or removed. The power switch should also be turned off during a work break and after work. 1. Switch operation ⅜ The rotation speed of the drill bit can be controlled steplessly by varying the amount that the trigger switch is pulled. Speed is low when the trigger switch is pulled slightly and increases as the switch is pulled more. To turn the switch OFF, release the trigger switch to its original position. However, the switch trigger can only be pulled in halfway during reverse and rotates at half the speed of forward operation. 10 Fig. 8 (3) Pushing the rotary hammer forcibly is not necessary at all. Pushing slightly so that drill dust comes out gradually is just sufficient. CAUTION: When the drill bit touches an iron reinforcing rod, the bit will stop immediately and the rotary hammer will react to revolve. Therefore please grip the side handle and handle tightly as shown in Fig. 8.
-
 1
1 -
2
-
3
-
4
-
 5
5 -
 6
6 -
 7
7 -
 8
8 -
 9
9 -
 10
10 -
 11
11 -
 12
12 -
 13
13 -
 14
14 -
 15
15 -
16
-
17
-
18
-
19
-
20
-
21
-
22
-
23
-
24
-
25
-
26
-
27
-
28
-
29
-
30
-
31
-
32
-
33
-
34
-
35
-
36
-
37
-
38
-
39
-
40
-
41
-
42
-
43
-
44
-
45
-
46
-
47
-
48
-
49
-
50
-
51
-
52
 |
 |
