Hitachi DH22PG Instruction Manual - Page 12
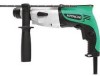
Using depth gauge Fig. 12, How to use the drill bit taper shank, and the taper shank adaptor. - power drill
 |
UPC - 717709011915
View all Hitachi DH22PG manuals
Add to My Manuals
Save this manual to your list of manuals |
Page 12 highlights
English (2) Driving in wood screws ⅜ Prior to driving in wood screws, make pilot holes suitable for them in the wooden board. Apply the bit to the screw head grooves and gently drive the screws into the holes. ⅜ After rotating the rotary hammer at low speed for a while until a wood screw in partly driven into the wood, squeeze the trigger more strongly to obtain the optimum driving force. CAUTION: Exercise care in preparing a pilot hole suitable for the wood screw taking the hardness of the wood into consideration. Should the hole be excessively small or shallow, requiring much power to drive the screw into it, the thread of the wood screw may sometimes be damaged. Drill bit Grip Taper shank adaptor Front cap Fig. 13 (4) To remove the drill bit (taper shank), insert the cotter into the slot of the taper shank adaptor and strike the head of the cotter with a hammer supporting on the rests. (Fig. 14) Cotter Taper shank adaptor 6. Using depth gauge (Fig. 12) (1) Loosen the knob on the side handle, and insert the depth gauge into the mounting hole on the side handle. (2) Adjust the depth gauge position according to the depth of the hole and tighten the knob bolt securely. Mounting hole Depth gauge Rests Fig. 14 Knob on side handle Fig. 12 7. How to use the drill bit (taper shank) and the taper shank adaptor. (1) Mount the taper shank adaptor to the rotary hammer. (Fig. 13) (2) Mount the drill bit (taper shank) to the taper shank adaptor. (Fig. 13) (3) Turn the switch ON, and drill a hole in prescribed depth. 12
-
 1
1 -
2
-
3
-
4
-
5
-
6
-
 7
7 -
 8
8 -
 9
9 -
 10
10 -
 11
11 -
 12
12 -
 13
13 -
 14
14 -
 15
15 -
 16
16 -
 17
17 -
18
-
19
-
20
-
21
-
22
-
23
-
24
-
25
-
26
-
27
-
28
-
29
-
30
-
31
-
32
-
33
-
34
-
35
-
36
-
37
-
38
-
39
-
40
-
41
-
42
-
43
-
44
-
45
-
46
-
47
-
48
-
49
-
50
-
51
-
52
 |
 |
