Hitachi G18DL Instruction Manual - Page 13
Prior To Operation - angle grinder
 |
UPC - 717709011717
View all Hitachi G18DL manuals
Add to My Manuals
Save this manual to your list of manuals |
Page 13 highlights
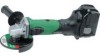
English NOTE: ⅜ Charging times may be longer depending on the surrounding temperature and battery conditions. ⅜ Charge time lamp indications are only a guide, and may vary depending on the surrounding temperature and battery conditions. ⅜ Remove the battery from the charger when not in use. ⅜ After the adjustment, ensure that the screw is securely tightened on the wheel guard in order to fix it completely. Regarding electric discharge in case of new batteries, etc. As the internal chemical substance of new batteries and batteries that have not been used for an extended period is not activated, the electric discharge might be low when using them the first and second time. This is a temporary phenomenon, and normal time required for recharging will be restored by recharging the batteries 2 - 3 times. Wheel guard How to make the batteries perform longer. ⅜ Recharge the batteries before they become Packing gland completely exhausted. Fig. 5 When you feel that the power of the tool becomes weaker, stop using the tool and recharge its battery. If you continue to use the tool and exhaust the electric current, the battery may be damaged and its life will become shorter. WARNING: If the wheel guard is not attached properly, a broken wheel may result in and cause death or serious injury. ⅜ Avoid recharging at high temperatures. A rechargeable battery will be hot immediately after use. If such a battery is recharged immediately after use, its internal chemical substance will deteriorate, and the battery life will be shortened. Leave the battery and recharge it after it has cooled for a while. 4. 5. Thoroughly check that the depressed center wheel is free of cracks, splits and other abnomalities before mounting. Make sure it is firmly clamped and has been properly mounted. Refer to page 15 of this manual for Depressed Center Wheel Assembly and Disassembly Test the grinder before using. PRIOR TO OPERATION Before actually beginning the grinding work, test the grinder by first clearing the area of all other 1. 2. 3. Power switch Ensure that the switch is in the OFF position. Check your work environment Ensure the following before operation: ⅜ No flammable gas, liquid, or object at worksite. ⅜ When grinding thin steel sheet it may cause a high booming noise. To avoid such noise, place a rubber mat under the workpiece. ⅜ Clear the area of children or unauthorized personnel. Mounting the wheel guard Be sure to mount the wheel guard at an angle that will protect the operator's body from injury by a broken wheel piece. [Installing Wheel Guard] ⅜ Slightly loosen the screw on the wheel guard. ⅜ Install the wheel guard to the packing gland, turn it to the angle suitable for operation, and 6. 7. personnel. Make sure the wheel guard is in place and that you are wearing eye protection. Turn the grinder "on", and make sure the grinder runs smoothly and shows no abnormalities. Duration of the trial run is as follows: When depressed center wheel is replaced 3 minutes or more When starting daily work ...... 1 minute or more Use only properly rated depressed center wheels. Use only depressed center wheels rated at 13,300 RPM or more. Using a depressed center wheel rated less can lead to wheel disintegration during operation and cause serious bodily injury. Check the push button. Make sure that the push button is disengaged by pushing push button two or three times before turning on the grinder. (Fig. 8) make adjustment. 13
-
 1
1 -
2
-
3
-
4
-
5
-
6
-
7
-
 8
8 -
 9
9 -
 10
10 -
 11
11 -
 12
12 -
 13
13 -
 14
14 -
 15
15 -
 16
16 -
 17
17 -
 18
18 -
19
-
20
-
21
-
22
-
23
-
24
-
25
-
26
-
27
-
28
-
29
-
30
-
31
-
32
-
33
-
34
-
35
-
36
-
37
-
38
-
39
-
40
-
41
-
42
-
43
-
44
-
45
-
46
-
47
-
48
-
49
-
50
-
51
-
52
 |
 |
