HoMedics AR-10 User Manual - Page 5
Cleaning and Maintenance - clean filter light
 |
View all HoMedics AR-10 manuals
Add to My Manuals
Save this manual to your list of manuals |
Page 5 highlights
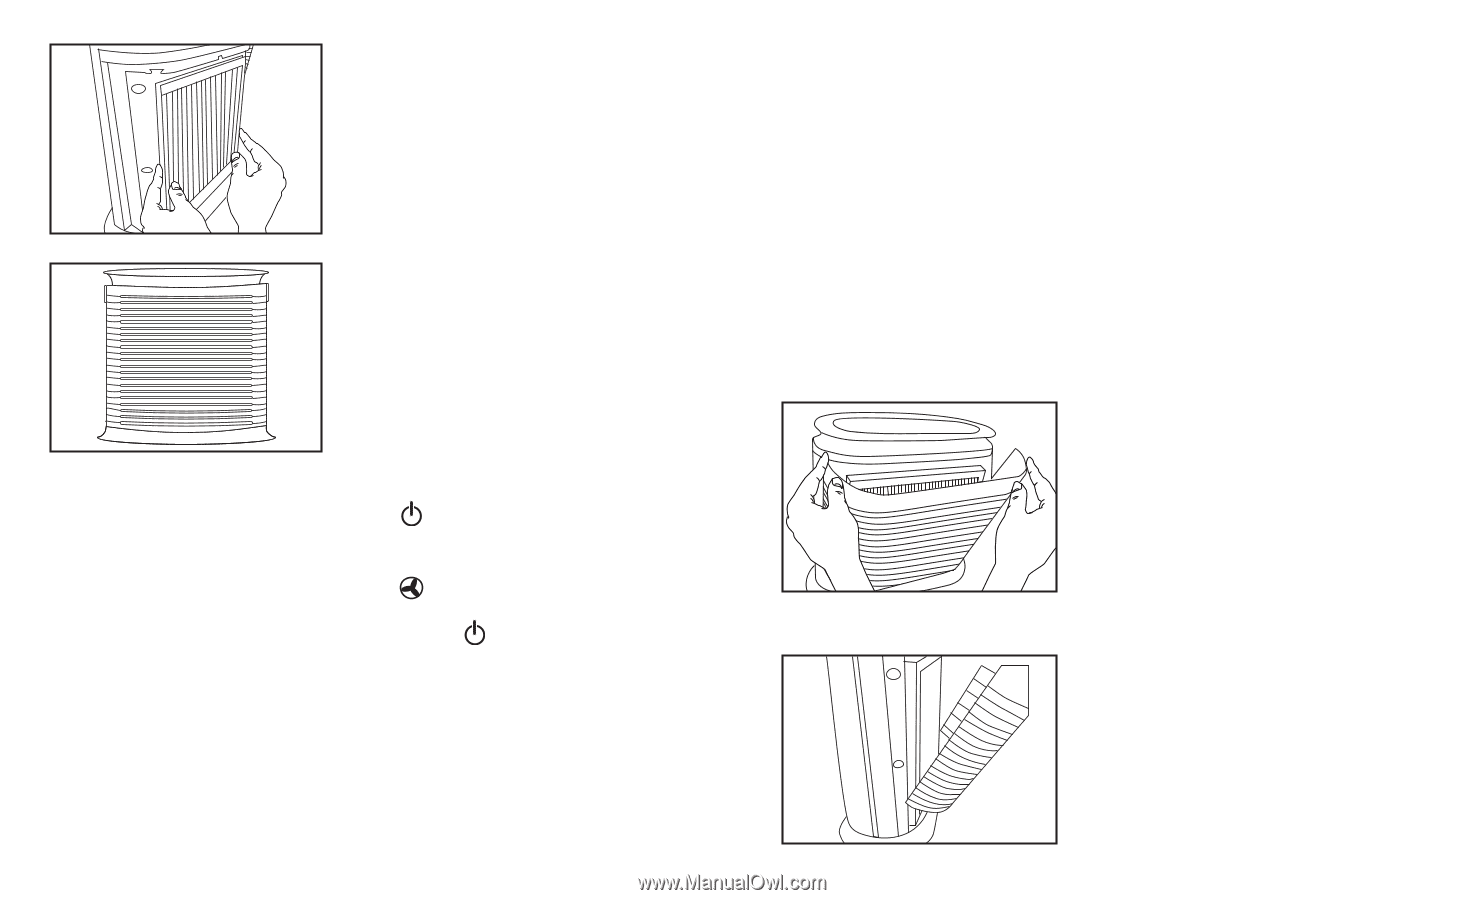
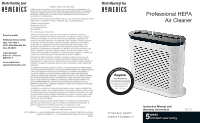
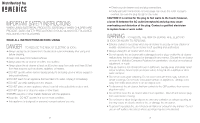
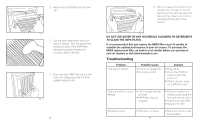
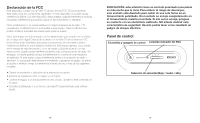
3. The HEPA filter will be resting inside the unit. Make sure that the filter is firmly seated inside of the unit. Fig. 3 4. Place the tabs at the bottom of the grill plate into the base of the unit. Gently push the grill plate back into place until you hear a click sound indicating that the grill is firmly latched. Connect the power cord into a standard AC outlet. Fig. 4 1. On/Off and Speed Settings • To turn the air cleaner on, press the ON/OFF button on the control panel. When the air cleaner is on, the LED light in the ON/OFF button on the control panel will be lit and the air cleaner will start to operate on LOW speed. • Once the air cleaner is ON, slide the SPEED speed settings. selector bar to select • To turn the air cleaner OFF, simply press the ON/OFF button on the control panel. Cleaning and Maintenance We recommend that the air cleaner be cleaned at least once a month and before storage. • Turn the air cleaner OFF at the main switch and unplug it from the outlet. • Use a dry cloth to clean the external surfaces of the air cleaner. • The grill plate may be cleaned with a damp cloth or the brush attachment of your vacuum cleaner. 8 DO NOT USE WATER, WAX, POLISH OR ANY CHEMICAL SOLUTION Clean Filter Indicator The air cleaner is equipped with a CLEAN FILTER indicator to let the user know when it is time to clean the HEPA filter, about every 2,800 hours of use. When the HEPA filter is ready to be cleaned, the LED CLEAN FILTER indicator will light up on the control panel. Once the HEPA filter has been cleaned, press and hold the CLEAN FILTER button to reset the Indicator until the LED indicator light flashes and turns off. Cleaning the HEPA Filter Make sure that the air cleaner is turned OFF and unplugged from the outlet before cleaning. 1. Open the front grill by gently pulling on the tabs on either side of the top of the grill plate. Fig. 5 2. Open the plate outward until the tabs at the bottom of the grill plate easily slide away from the unit. Fig. 6 9
-
 1
1 -
 2
2 -
 3
3 -
 4
4 -
 5
5 -
 6
6 -
 7
7 -
 8
8 -
 9
9 -
 10
10 -
 11
11 -
12
-
13
-
14
 |
 |