HoMedics SS-5010 Downloadable Instruction Book - Page 4
Listening to Nature Sounds - clock radio
 |
View all HoMedics SS-5010 manuals
Add to My Manuals
Save this manual to your list of manuals |
Page 4 highlights
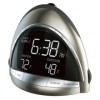
Assembly and Instructions for Use 1. Unpack the product and check to make sure everything is included (Fig. 1). 2. This unit is powered by a DC adaptor. 3. The battery power is designed only to provide MEMORY BACK-UP for the clock and alarm settings. One CR2032 battery (included) is inserted into the battery compartment if memory back-up is desired (in the event of power outages or if the unit is unplugged). The memory back up will keep track of the time and as soon as the power supply returns, the display will indicate the correct time, and the functions will become available again. 4. Attach the adaptor into the DC jack on the base of the unit (Fig. 3) and insert the cord into a 120V household outlet. Setting Time SETTING THE CLOCK (Fig. 3): 1. Slide the Time Zone switch to the correct zone. (P=Pacific/M=Mountain/ C=Central/E=Eastern) 2. Slide the 12/24 switch to the desired setting (24 indicates Military time). 3. Slide the DST switch to either ON or OFF to set your clock to automatically adjust for the Daylight Savings Time (DST). To set the DATE/TIME (Fig 1): Press and hold the DATE/TIME SET button. 1. The year will flash. Use the +/- buttons to set year. 2. When year is set, press DATE/TIME SET button. Month and day will flash. Press the +/- buttons to set month. When month is set, press the DATE/TIME SET and use the +/- buttons to set day. 3. When month and day are set, press DATE/TIME SET. Hour will flash. Use the +/buttons to set hour. NOTE: AM/PM choice will be made at this time. 4. When hour is set, press the DATE/TIME SET button. Minutes will flash. Use the +/buttons to set minutes. Minutes will flash for 10 seconds and then stop. Your clock is set. 6 Note: A PM indicator will appear in the upper left hand corner of the LCD display during the PM hours. Be sure to set the time for the correct 12-hour period - AM (morning) or PM (evening). Listening to Nature Sounds 1. Select the sound you wish to listen to and press the corresponding button (Fig. 1). 2. To adjust the volume, turn the VOLUME knob (Fig. 1) to your desired level. 3. When finished listening to the sounds you may turn them off by pressing the POWER button, or switch to the radio by pressing RADIO (Fig. 1). Note: When the unit is turned on it will always default to the last mode used. Listening to the Radio 1. Press the RADIO button (Fig. 1). 2. Press the RADIO button to choose AM/FM. 3. Rotate the TUNER (Fig. 1) to select a radio station. 4. To adjust the volume turn the VOLUME knob (Fig. 1) to your desired level. 5. When finished listening to the radio you may turn it off by pressing the POWER button. (Fig. 1) Note: Adjust the antenna on the back of the unit to better the radio reception if needed. (Fig. 3) Using the Auto-Timer When the power is on and you are listening to a nature sound or the radio you may set a timer so the unit will automatically turn off. 1. Toggle through the TIMER button (Fig. 1) until you find the time of your choice, 15, 30, 45 or 60 minutes. 2. To cancel the timer, toggle through the TIMER button until the LED light says "OFF" or press POWER (Fig. 1). 7
-
 1
1 -
 2
2 -
 3
3 -
 4
4 -
 5
5 -
 6
6 -
 7
7 -
 8
8 -
 9
9 -
 10
10 -
11
-
12
-
13
-
14
 |
 |
