HoMedics SS-5010 Downloadable Instruction Book - Page 5
Using the Projection Feature - clock
 |
View all HoMedics SS-5010 manuals
Add to My Manuals
Save this manual to your list of manuals |
Page 5 highlights
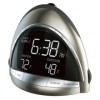
Setting and Using The Alarm Setting and using Alarm 1 or Alarm 2 (Individually) 1. Press and hold the Alarm 1 button. The hour will flash (Fig. 1) 2. Using the +/- buttons on the back (Fig. 3), set the hour. 3. Press the Alarm 1 button again and the minutes will flash. Use the +/- keys to set the minutes. 4. The Alarm 1 time will show under the main clock display. 5. To activate the alarm and choose a wake tone, press the Alarm 1 button to scroll through the wake tone options: Beep, Radio or Sound. (Fig. 1) NOTE: When using the sound mode, the unit will set to the last sound you listened to. If you wish to change it press the sound you wish to wake to and then press the POWER button (Fig 1). 6. Once your choice is made, a (%) will appear next to the Alarm 1 time. Your alarm is set. 7. To set a second alarm, repeat steps 1-6 above, using the Alarm 2 button. 8. When the alarm sounds you may: a. Press the SNOOZE button (Fig. 1). Your sleep time will be extended by 9 minutes. You may use this feature until you turn the alarm off. b. Turn OFF: Press the POWER button to turn off the alarm. Your alarm will turn off but remain set for the next day. If you wish to turn the alarm off completely or choose a different wake tone, repeat steps 1-6 in "SETTING AND USING THE ALARM" NOTE: If the alarm sounds for 30 minutes continuously it will automatically turn off. Using the "Nap" Feature 1. Press the snooze button to toggle through your choice of nap length (15, 30, 45 or 60 minutes). (Fig. 1) 2. Once set, the clock will display the time and indicate "nap" on the LCD screen. 3. When nap alarm sounds, press the power button to turn off. (Fig. 1) 8 Using the Projection Feature 1. To turn the projection feature on, press the projector ON/OFF button (Fig. 3) on the back of the unit. The time & outdoor temperature is now projected on the wall or ceiling. NOTE: If the projection feature is OFF, you may hit the SNOOZE button (Fig. 1) to trigger 5 seconds of projection. 2. The angle of the projector can be adjusted to angle on the ceiling or wall by moving the PROJECTOR TUBE (Fig. 3) forward or backward. 3. To turn the angle of the time & temperature that appears on the wall or ceiling, rotate the TIME ROTATION KNOB (Fig. 3) until you have reached your desired result. NOTE: The TIME ROTATION KNOB will rotate up to 350 degrees. 4. To focus the time & temperature on the wall or ceiling rotate the FOCUS KNOB (Fig. 3) until you have reached your desired result. Using Indoor Temperature The unit will begin reading indoor temperature when it is plugged in. Allow a few minutes for the correct temperature to register on the LCD display. (Fig. 2) Using Outdoor Temperature Be sure the SoundSpa unit is plugged in prior to the remote sensor battery installation. 9
-
 1
1 -
 2
2 -
 3
3 -
 4
4 -
 5
5 -
 6
6 -
 7
7 -
 8
8 -
 9
9 -
 10
10 -
 11
11 -
12
-
13
-
14
 |
 |
