HoMedics UHE-OW14 Downloadable Instruction Book - Page 4
Cool & Warm Mist Oscillating Ultrasonic Humidifier, How To Use
 |
View all HoMedics UHE-OW14 manuals
Add to My Manuals
Save this manual to your list of manuals |
Page 4 highlights
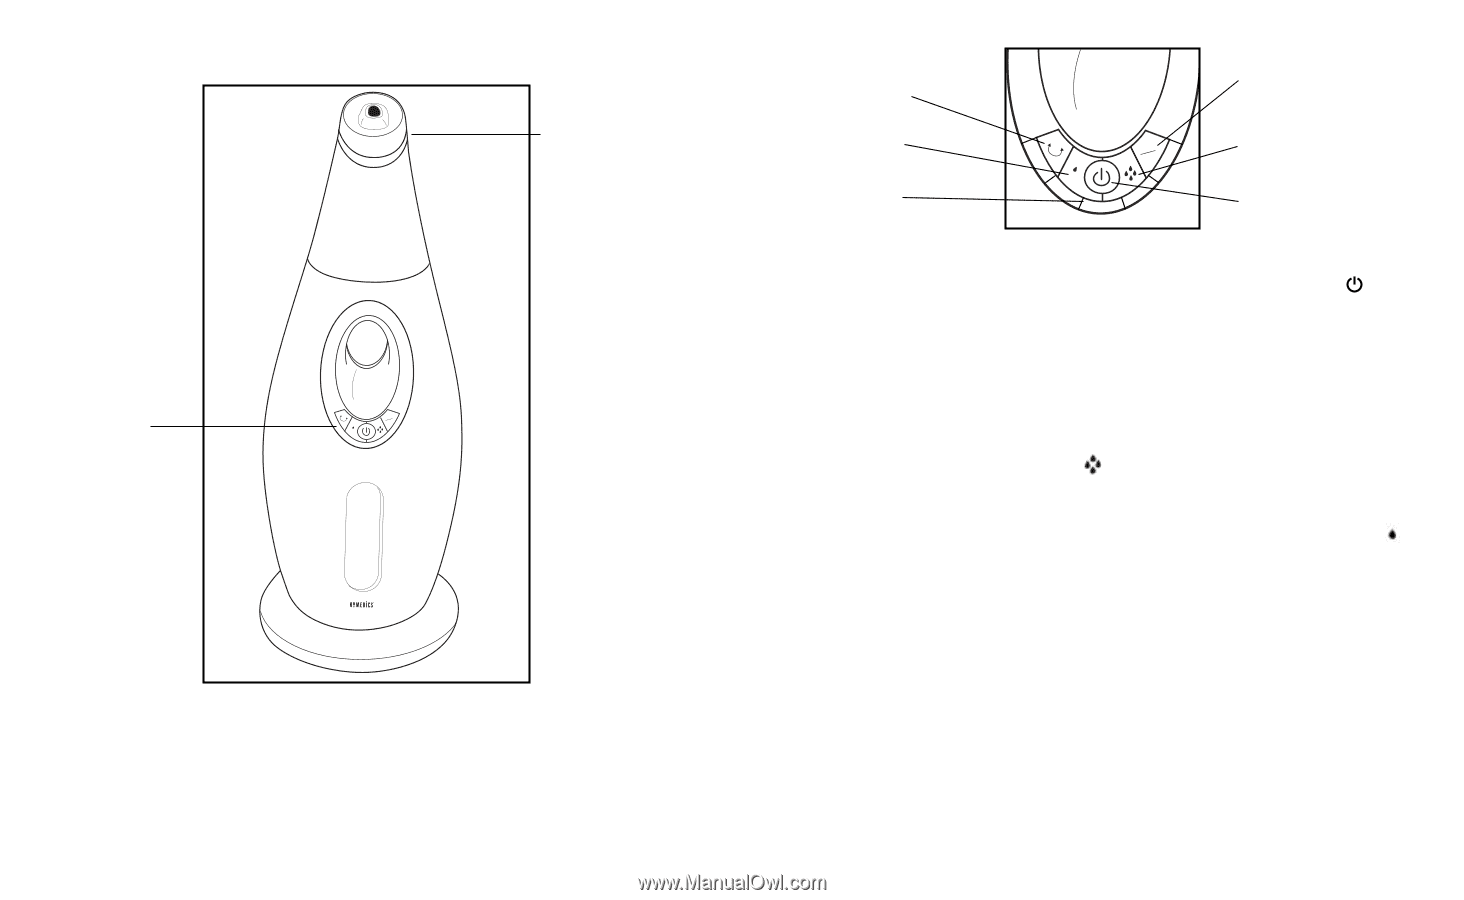
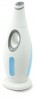
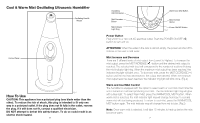
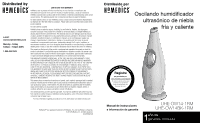
Cool & Warm Mist Oscillating Ultrasonic Humidifier Oscillating Head & Nozzle Control Panel HCEOAOT L Fig.1 How To Use CAUTION: This appliance has a polarized plug (one blade wider than the other). To reduce the risk of shock, this plug is intended to fit only one way in a polarized outlet. If the plug does not fit fully in the outlet, reverse the plug. If it still does not fit, contact a qualified electrician. DO NOT attempt to defeat this safety feature. To do so could result in an electric shock hazard. 6 Oscillating ON/OFF Button Warm/Cool Mist Button Mist Decrease Button Mist Indicator Light Ring HCEOAOT L Mist Increase Button Power ON/OFF Button Fig.2 Power Button Plug unit in to a 120 volt AC electrical outlet. Push the POWER ON/OFF ( ) button to turn unit on. ATTENTION: When the water in the tank is almost empty, the power will shut off to indicate to the user to refill water. Mist Increase and Decrease There are 5 different levels of mist output from Lowest to Highest. To increase the mist output, press the MIST INCREASE ( ) button until the desired mist output is reached. The selected mist level will correspond to the number of sections lit along the mist indicator light ring. When the maximum mist output has been reached, the indicator ring light will blink once. To decrease mist, press the MIST DECREASE ( ) button until the mist has decreased to the output level desired. When the minimum mist output level has been reached, the indicator ring light will blink once. (Fig.2) Warm and Cool Mist Control The humidifier is equipped with the option to select warm or cool mist. Each time the unit is turned on it will start producing cool mist. The mist indicator light ring will glow with a blue light. To select Warm Mist, press the WARM/COOL MIST button. When warm mist is selected, the mist indicator light ring will change from blue to red and warm mist will start being produced. To return to cool mist, press the WARM/COOL MIST button again. The mist indicator ring will change from red to blue. (Fig.2) Note: Once warm mist is selected, it will take 15 minutes to heat up before the mist becomes warm. 7
-
 1
1 -
 2
2 -
 3
3 -
 4
4 -
 5
5 -
 6
6 -
 7
7 -
 8
8 -
 9
9 -
 10
10 -
11
-
12
-
13
-
14
 |
 |