HoMedics WF-MN-MOON User Manual - Page 4
Danger
 |
View all HoMedics WF-MN-MOON manuals
Add to My Manuals
Save this manual to your list of manuals |
Page 4 highlights
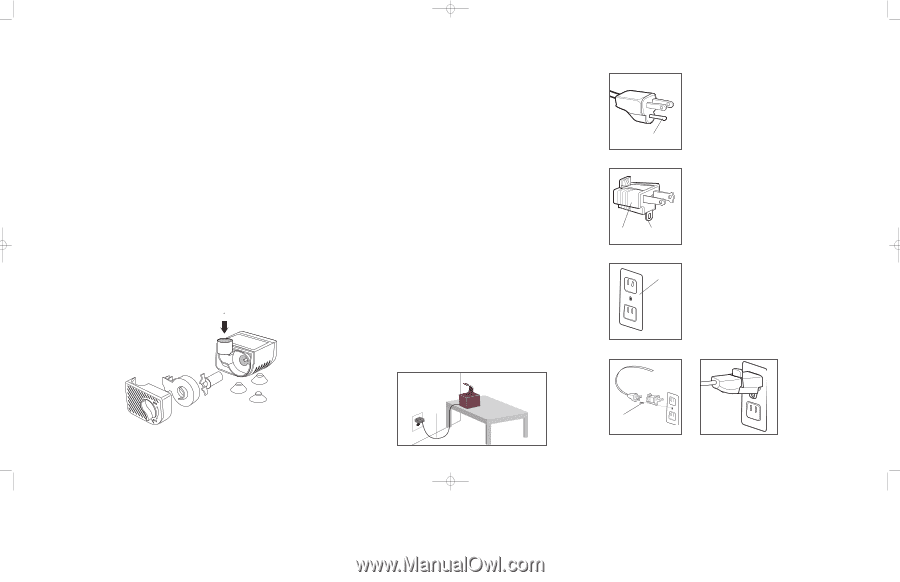
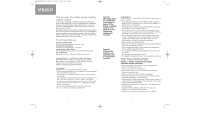
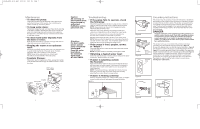
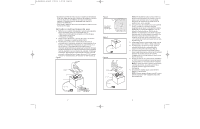
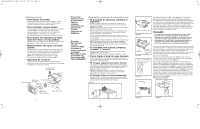
WF-MN-MOON_B_SP.qxd 2/20/06 5:23 PM Page 7 Maintenance: • To clean the pump: Unplug the fountain from the electrical outlet. Remove the pump from the base of the fountain. Use a small brush or stream of water to remove any debris. • To keep water clean: Periodically change the water and clean the product according to the water condition. Keeping the water clean prevents the water from becoming sticky and forming micro-organisms. An algaecide or humidifier/vaporizer treatment can be added to help keep it clean. • To clean hard water deposits from the base or rocks: Soak the base and rocks in a mixture of vinegar and water to clean and remove any mineral build-up. • Keeping the water at an optimum level: Add water periodically to keep water level at an optimum level to avoid shortening the life of the water pump. Fountain should be "OFF" when refilling to avoid overflow. NOTE: Never let the water pump run without water. This will also shorten the life of the water pump. • Fountain Storage: When not in use for long periods of time, unplug the fountain from the electrical outlet, empty the water and store in a cool, dry place. PVC Tubing Inserts Here Housing Impeller Pump Inlet Front Plate Flow Control Lever 6 Suction Feet Caution: All servicing of this fountain must be performed by authorized HoMedics service personnel only. Attention: For best results, please operate pump completely submerged. Keep the water level above the minimum water level AT ALL TIMES. Troubleshooting: • If the pump fails to operate, check the following: Check the household circuit breaker or plug unit into a different outlet to make sure the water pump is getting electrical power. NOTE: Always disconnect the unit from the electrical outlet before handling the water pump. Check the water pump discharge and tubing for kinks and obstructions. Algae build-up can be flushed out in any faucet. Remove the water pump inlet to access the impeller area. Turn the rotor to ensure it is not broken or jammed. Monthly maintenance will add to the life of your water pump. NOTE: Make sure that the electrical cord loops below the electrical outlet to form a "drip loop". This will prevent water from running down the cord into the electrical outlet (Fig. 5). • If the pump is loud, gurgles, spews, or "burps": Check the water level to make sure the water pump has enough water to function. NOTE: The pump must be completely submerged in water. • Obtaining a desired water level: Check the water level daily in the first week to measure the rate of evaporation. Refill with water as needed. • If water is splashing outside the fountain: Rocks that are hit by water and also touch the edge of the base will cause water to splash outside of the base and contribute to the splash factor. Expect some splash to occur as you get the rocks organized. NOTE: If splashing continues, rearrange the rocks by moving them away from the edge of the base. If this does not help, adjust the flow control valve to a lower setting. • If water is flowing unevenly: Check to see if the fountain is on a level surface. Then, run fingers across fountain surface to help spread the water distribution. Figure 5 Grounding Pin Figure A Adapter Figure B Tab for Grounding Screw Grounded Outlet Grounding Instructions This product must be grounded. If it should malfunction or breakdown, grounding provides a path of least resistance for the electric current to reduce the risk of electric shock. This product is equipped with a cord having an equipment-grounding conductor and a grounding plug. The plug must be plugged into an appropriate outlet that is properly installed and grounded in accordance with all local codes and ordinances. DANGER Improper connection of the equipment-grounding conductor can result in a risk of electric shock. Check with a qualified electrician or serviceman if you are in doubt as to whether the product is properly grounded. Do not modify the plug provided with the product - if it will not fit the outlet, have a proper outlet installed by a qualified electrician. This product is for use on a nominal 120-volt circuit, and has a grounding plug that looks like the plug illustrated in Figure A. A temporary adapter that looks like the adapter illustrated in Figure B may be used to connect this plug to a 2-pole receptacle as shown in Figure C if a properly grounded outlet is not available. The temporary adapter should be used only until a properly grounded outlet Figure C can be installed by a qualified electrician. The green-colored tab extending from the adapter must be connected to a permanent ground such as a properly grounded outlet box cover. Whenever the adapter is used, it must be held in place by a metal screw. See Figures D and E below. Figure C Drip Loop 7 Metal Screw Figure D Figure E 8
-
 1
1 -
 2
2 -
 3
3 -
 4
4 -
 5
5 -
 6
6 -
 7
7 -
 8
8
 |
 |