Honeywell HZ709 Owners Manual - Page 4
Step 1: Power, Step 2: Heat Output, Step 3: Timer Control - Auto Shut-off - hz 709 heater
 |
UPC - 092926346041
View all Honeywell HZ709 manuals
Add to My Manuals
Save this manual to your list of manuals |
Page 4 highlights
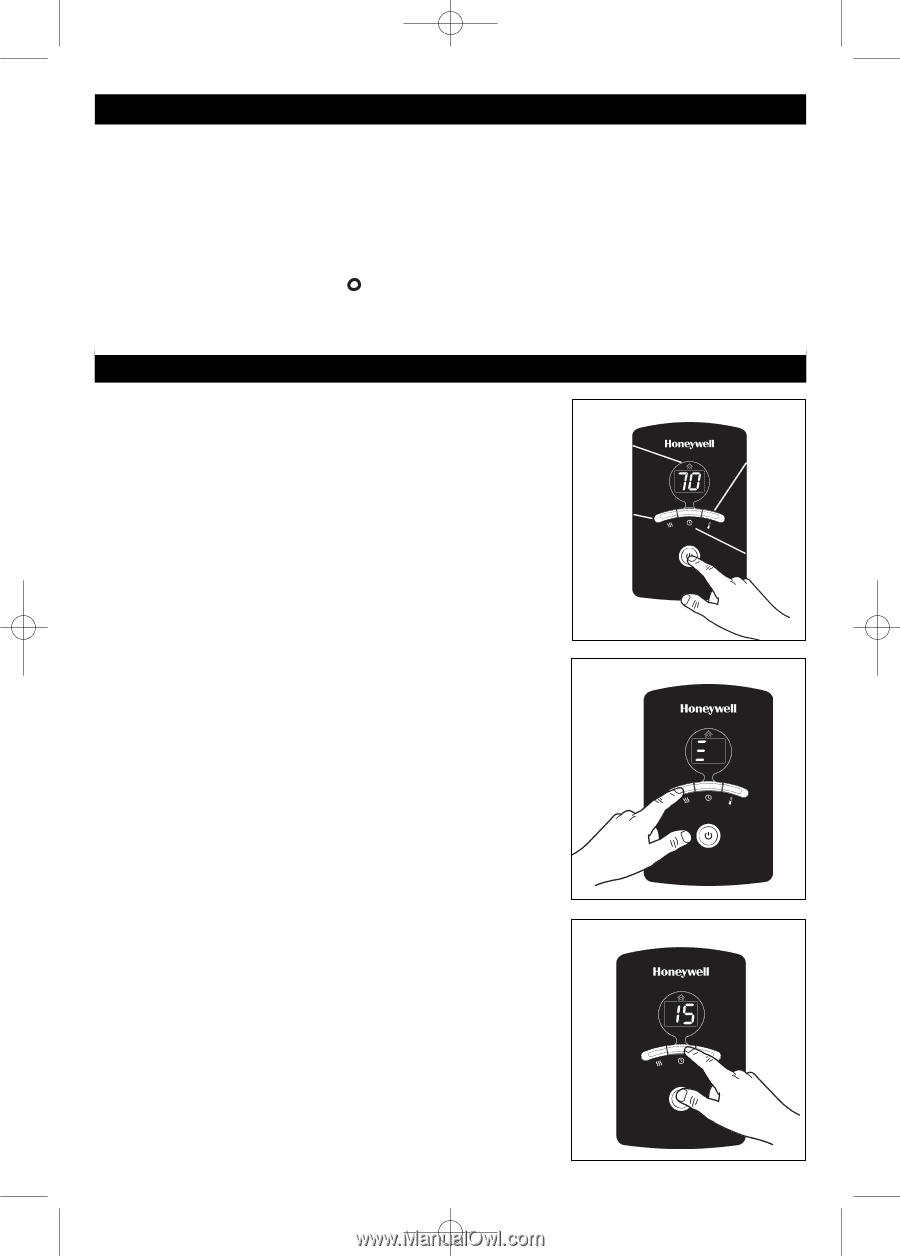
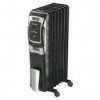
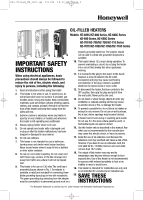
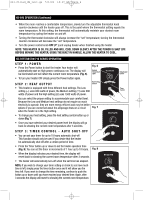
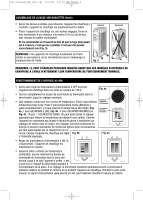
Oil-filled_OM_rev3.qx 5/1/06 10:17 AM Page 4 HZ-690 OPERATION (Continued) • When the room reaches a comfortable temperature, slowly turn the adjustable thermostat knob counter-clockwise until the heater goes off. This is the point where the thermostat setting equals the room temperature. At this setting, the thermostat will automatically maintain your desired room temperature by cycling the heater on and off. • Turning the thermostat clockwise will always increase the "set" temperature; turning the thermostat counter-clockwise will decrease the "set" temperature. • Turn the power control knob OFF ( ) and unplug heater when finished using the heater. NOTE: THIS HEATER IS OIL FILLED AND WILL COOL DOWN SLOWLY AFTER THE POWER IS SHUT OFF. BEFORE MOVING THE HEATER, USING THE BUILT IN HANDLE, ALLOW THE HEATER TO COOL. HZ-707/708/71009/S7E1R0ISEESROIEPSEROAPTEIROANTION STEP 1: POWER • Press the Power button to start the heater. Your heater will automatically start on High power, continuous run. The display will be illuminated and will reflect the current room temperature (Fig. 6). Fig. 6 Desired Temperature Light • To turn your heater OFF simply press the Power button again. STEP 2: HEAT OUTPUT Heat Setting Control • This heater is equipped with three different heat settings. The Low setting (-) uses 600 watts of power, the Medium setting (--) uses 900 watts of power and the High setting (---) uses 1500 watts of power. You can select the proper setting to accommodate your comfort level. Because the Low and Medium heat settings do not require as much electricity to operate, they are more energy efficient and may be better options if you are concerned about the amperage draw on a circuit when the heater is in the High setting. Fig. 7 • To change your heat setting, press the heat setting control button up or down (Fig. 7). • Once you have selected your desired power level the display will go back to showing the current room temperature after 3 seconds. STEP 3: TIMER CONTROL - AUTO SHUT-OFF • You can set your timer for up to 18 hours automatic shut-off. This function should only be used if you desire that the heater be automatically shut-off after a certain period of time. • Press the Timer button up or down to set the heater operation time (Fig. 8). You can set the timer in increments of 1 hour up to 18 hours. Fig. 8 • When the display indicates your desired time, the display will revert back to showing the current room temperature after 3 seconds. • The heater will automatically turn-off when the set time has elapsed. NOTE: If you wish to change your timer setting or check to see how much time is left, simply press the timer button once and it will show you the time left. If you want to change the time remaining, continue to push the button up or down until you have reached your desired time. Again, after 3 seconds the display will revert to showing the current room temperature. Temperature Control Timer Control
-
 1
1 -
 2
2 -
 3
3 -
 4
4 -
 5
5 -
 6
6 -
 7
7 -
 8
8 -
 9
9 -
 10
10 -
11
-
12
-
13
-
14
-
15
-
16
-
17
-
18
-
19
-
20
 |
 |