Hoover BH53110 Product Manual - Page 9
Mounting the Wall Bracket
 |
View all Hoover BH53110 manuals
Add to My Manuals
Save this manual to your list of manuals |
Page 9 highlights
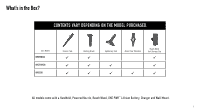
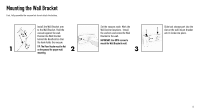
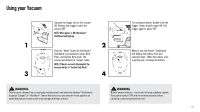
Mounting the Wall Bracket First, fully assemble the vacuum but do not attach the battery. Install the Wall Bracket arm to the Wall Bracket. Hold the vacuum against the wall. Position the Wall Bracket behind the Handheld so that the hook holds the vacuum. 1 2 TIP: The Floor Nozzle must be flat on the ground for proper wall mounting. Set the vacuum aside. Mark the Wall Anchor locations. Install the anchors and screw the Wall Bracket to the wall. IMPORTANT: Use BOTH screws to mount the Wall Bracket to wall. 3 Slide tool storage part into the slot on the wall mount bracket until it locks into place. 9
-
 1
1 -
2
-
3
-
 4
4 -
 5
5 -
 6
6 -
 7
7 -
 8
8 -
 9
9 -
 10
10 -
 11
11 -
 12
12 -
 13
13 -
 14
14 -
15
-
16
-
17
-
18
-
19
-
20
-
21
-
22
-
23
-
24
-
25
-
26
-
27
-
28
-
29
-
30
-
31
-
32
-
33
-
34
-
35
-
36
-
37
-
38
-
39
-
40
-
41
-
42
-
43
-
44
-
45
-
46
-
47
-
48
-
49
-
50
-
51
-
52
-
53
-
54
-
55
-
56
-
57
-
58
-
59
-
60
-
61
-
62
-
63
-
64
-
65
-
66
-
67
-
68
-
69
-
70
 |
 |
9
Mounting the Wall Bracket
First, fully assemble the vacuum but do not attach the battery.
Install the Wall Bracket arm
to the Wall Bracket. Hold the
vacuum against the wall.
Position the Wall Bracket
behind the Handheld so that
the hook holds the vacuum.
TIP:
The Floor Nozzle must be flat
on the ground for proper wall
mounting.
1
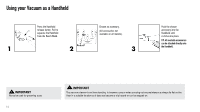
Set the vacuum aside. Mark the
Wall Anchor locations.
Install
the anchors and screw the Wall
Bracket to the wall.
IMPORTANT: Use BOTH screws to
mount the Wall Bracket to wall.
2
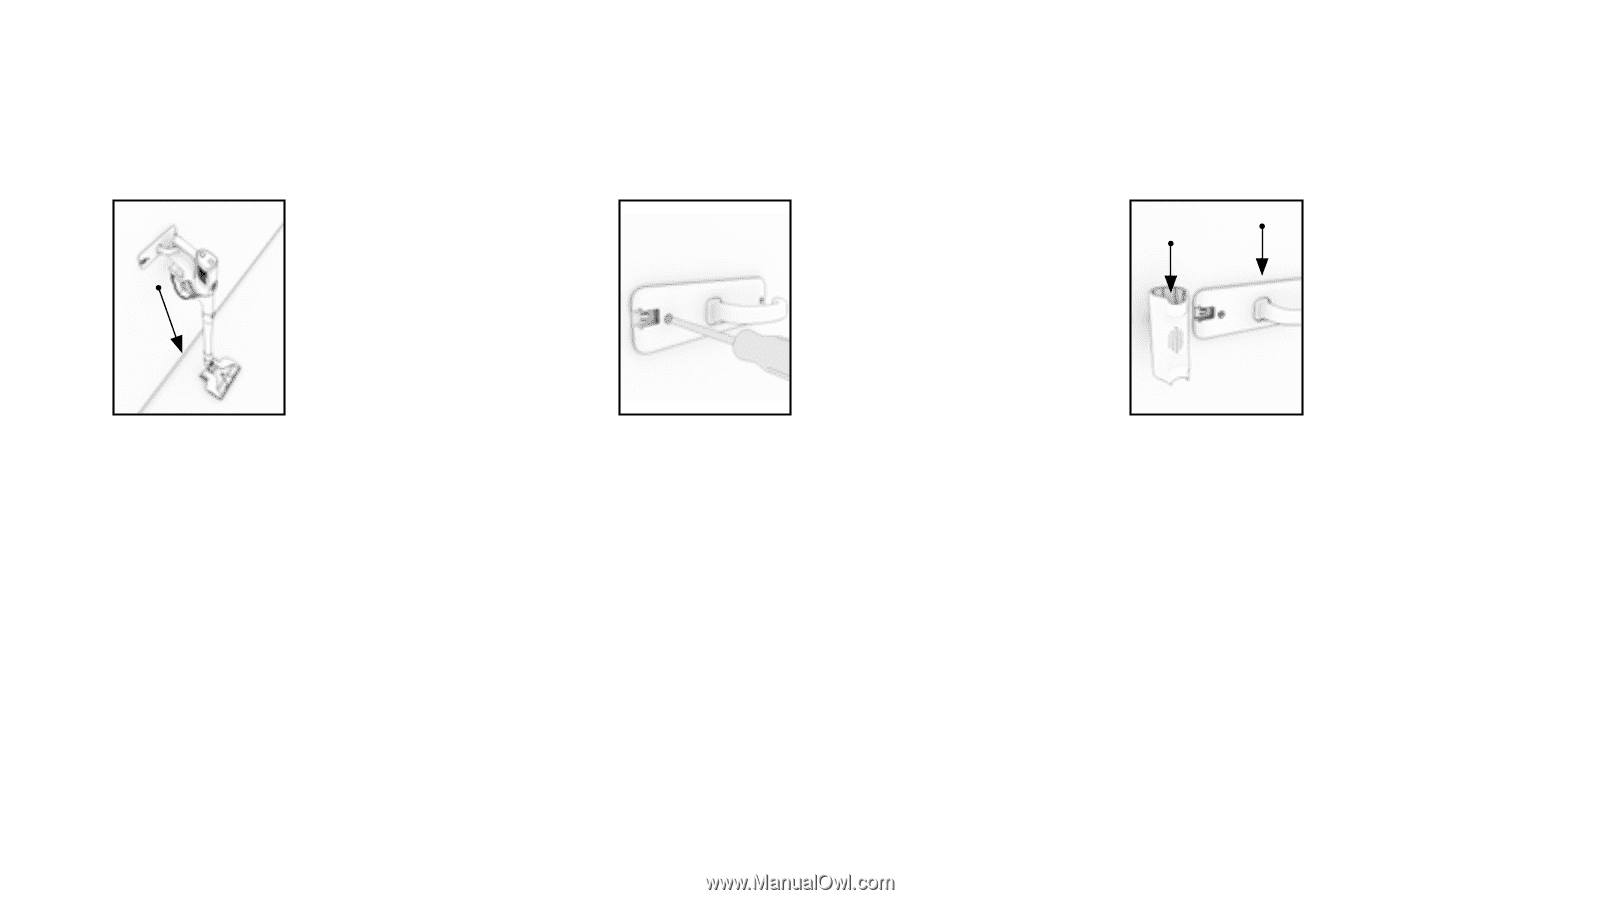
Slide tool storage part into the
slot on the wall mount bracket
until it locks into place.
3