Hoover F6039 Manual - Page 13
Maintenance
 |
View all Hoover F6039 manuals
Add to My Manuals
Save this manual to your list of manuals |
Page 13 highlights
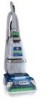
Cleaning upholstery 3-13 3-14 Read "Before you begin cleaning" instructions on page 9. Be sure to check the cleaning code on your upholstery. Use your deep cleaner only on upholstery marked "W" or "W/S". 1. Place handle in upright position. Agitator brushes will not rotate while handle is in upright position. 2. Fill clean solution tank with HOOVER Carpet/Upholstery Detergent according to instructions for Figs. 2a-8 to 2-14. 3. Attach tool to end of hose. Do not point tools toward people or pets. 4. Dry hands and plug deep cleaner into a properly grounded outlet. 5. Turn deep cleaner ON. If necessary, refer to "Before using tool" section to remove air from the system. A B 6. Gently press the tool onto the fabric. Press the trigger and slowly pull the nozzle over the fabric. 7. Overlap strokes by 1/2 inch to help prevent streaking. Make additional strokes without pressing the trigger to remove more moisture. 8. To clean in corners or creases, lift the tool one-half inch from the fabric and press the solution trigger. The crevice tool (included in some models) is very useful for this task. 9. Vacuum up the solution with the tool without pressing the trigger. A B 10. For heavily soiled areas, it may be necessary to repeat the cleaning process. Make crisscrossing strokes to the original pattern; overlap each pass. Make no more than 2 passes with the solution over any one area to prevent over-wetting and damage to fabric. If additional cleaning is necessary, wait until the upholstery is completely dry before using the tool again. 11. Empty recovery tank when the motor sound becomes higher pitched and there is a loss in suction (see "Automatic shut-off", Fig. 2-6). When finished cleaning, follow "After cleaning" instructions on page 9 and "After using tool" instructions on page 12. 4. Maintenance Removable brushes Your deep cleaner is equipped with removable brushes for easy cleaning. To remove brushes Disconnect cleaner from electrical outlet. To prevent possible leaking, remove clean solution tank and recovery tank. Set tanks aside. 4-1 Press handle release pedal to lower handle. Turn cleaner over so bottom is facing up. 4-2 B A B Grasp inner portion of brush (A) and pull brush assembly out slightly to reveal latches (B). 4-3 B B Press both latches (B) and pull brush block out. The brushes can be cleaned under running water. 4-4 CD F E D C To replace brushes Align posts (C) on both ends of brush assembly with slots (D) in cleaner housing. Make sure that the square post (E) also aligns with the square hole (F). Turn brushes slightly until post fits easily into hole. 4-5 Press brush firmly to snap into place. 13
-
 1
1 -
2
-
3
-
4
-
5
-
6
-
7
-
 8
8 -
 9
9 -
 10
10 -
 11
11 -
 12
12 -
 13
13 -
 14
14 -
 15
15
 |
 |
