Hoover F7425-900 Manual - Page 7
How to use - solution tank
 |
UPC - 073502024430
View all Hoover F7425-900 manuals
Add to My Manuals
Save this manual to your list of manuals |
Page 7 highlights
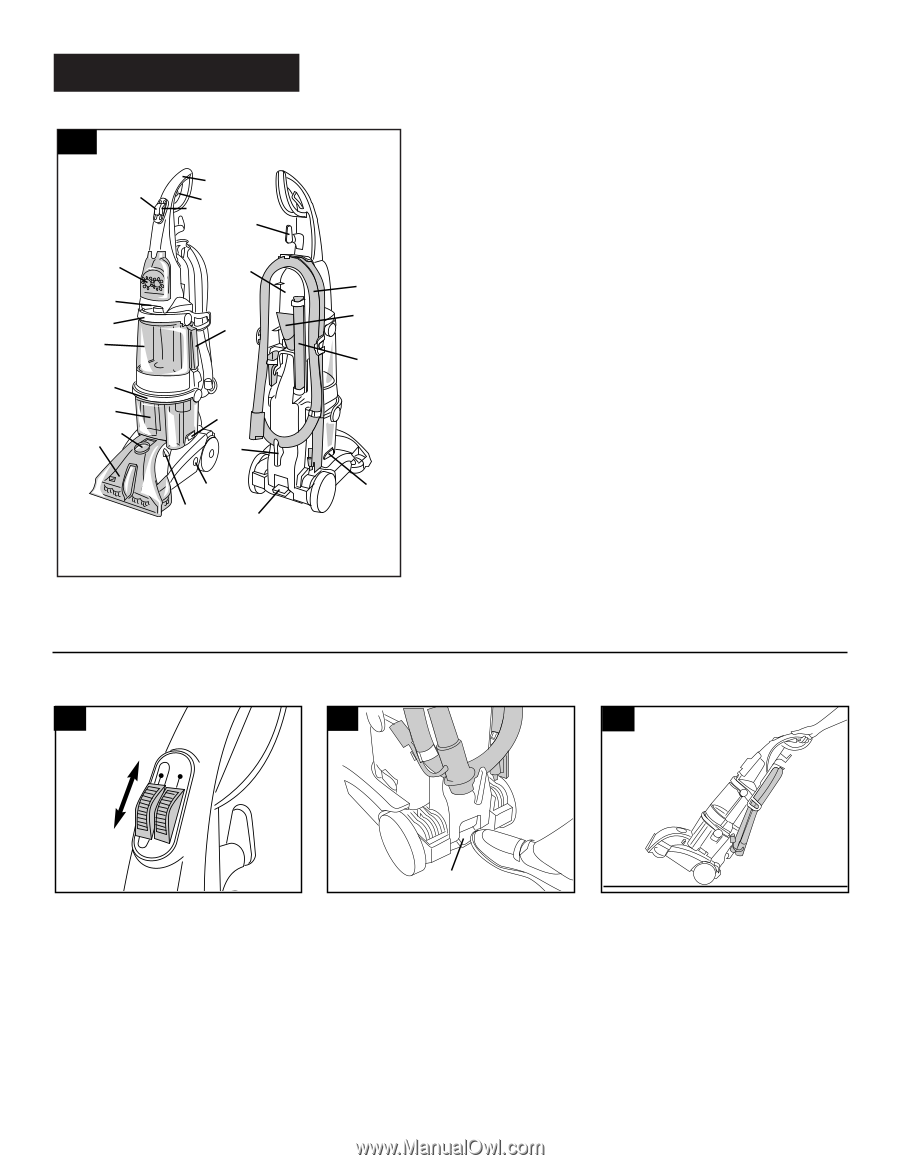
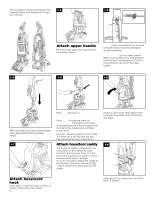
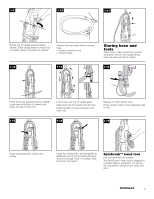
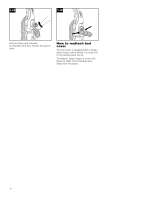
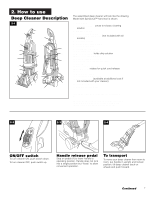
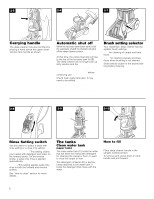
2. How to use Deep Cleaner Description 2-1 1 3 2 4 17 5 19 18 6 7 9 20 8 21 10 11 16 15 12 22 14 12 13 23 The assembled deep cleaner will look like the drawing. Model with SpinScrub™ hand tool is shown. 1. Hand grip 2. Solution trigger: press to release cleaning solution 3. ON/OFF switch 4. Rinse Setting switch 5. SpinScrub™ hand tool (not included with all models) 6. Carrying handle 7. Clean water tank handle 8. Clean water tank 9. Detergent container 10. Recovery tank handle 11. Recovery tank: holds dirty solution 12. Recovery tank latches 13. Brush setting selector 14. Solution tube connection port 15. Nozzle 16. Hose connection port 17. Cord hook: rotates for quick cord release 18. Hose 19. Hose/tool caddy 20. Stair/upholstery nozzle 21. Bare floor tool (available at additional cost if not included with your cleaner) 22. Cord/hose hook 23. Handle release pedal This deep cleaner is intended for household use. Operate deep cleaner only at voltage specified on data plate on back of cleaner. Plug deep cleaner into a properly grounded outlet. 2-2 2-3 2-4 WASH AUTO RINSE OFF Rinse ON ON/OFF switch To turn cleaner ON, push switch down. To turn cleaner OFF, push switch up. A Handle release pedal Step on pedal (A) to lower handle to operating position. Handle does not lock into a single position but "floats" to allow convenient operation. To transport To move your deep cleaner from room to room, put handle in upright and locked position, tilt deep cleaner back on wheels and push forward. Continued § 7
-
 1
1 -
 2
2 -
 3
3 -
 4
4 -
 5
5 -
 6
6 -
 7
7 -
 8
8 -
 9
9 -
 10
10 -
 11
11 -
 12
12 -
13
-
14
-
15
-
16
-
17
 |
 |