Hoover PowerScrub XL Pet Product Manual English - Page 2
Caution, Warning - carpet cleaner
 |
View all Hoover PowerScrub XL Pet manuals
Add to My Manuals
Save this manual to your list of manuals |
Page 2 highlights
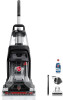
GETTING STARTED ASSEMBLY FULLY ASSEMBLE PRODUCT PRIOR TO USE. 1 Insert the handle into the base. 2 Align the groove on the backside of the clean water tank with the handle and drop straight down. OPERATION CAUTION: DO NOT USE THIS EXTRACTOR ON HARD FLOORS. USING THIS PRODUCT ON HARD FLOORS MAY SCRATCH OR DAMAGE YOUR FLOOR. QUICK CLEAN MODE NOTE: Feature included with select models only. CAUTION: Use extra care when cleaning on stairs. To avoid personal injury or damage, and to prevent the cleaner from falling, always place cleaner at bottom of stairs or on floor. Do not place cleaner on stairs or furniture, as it may result in injury or damage. WARNING: To reduce the risk of personal injury, unplug before cleaning or Emptying the dirt cup. 1 To engage Quick Clean Mode, turn knob counterclockwise until engaged. FILL THE CLEAN WATER TANK 1 Pull up to remove the Clean Water Tank. 2 Return to Deep Clean mode by turning knob clockwise. HOW TO USE 1 Plug the cord into an electrical outlet. 2 Remove the cap from the Clean Water Tank. Add warm water to fill line and replace cap. On/Off FILL THE SOLUTION TANK CLEANING FLUID SEE THE HOOVER'S SOLUTION GUIDE insert or visit Hoover.com/cleaning-solutions. 2 Turn unit ON/OFF with side pedal. 3 Recline unit with the middle pedal. Recline EMPTY THE RECOVERY TANK NOTE: To maintain proper suction, empty Tank when Red Bobber is visible. 1 Turn the cleaner off and unplug from electrical outlet. 2 Grab the Recovery Water Tank handle and lift up and outward to remove it. A second handle is provided on the back of the Recovery tank for carrying the tank. 3 Unlatch the tank lid and empty it. Rinse and allow to air dry. USING THE HOSE CAUTION: Always turn off appliance before connecting or disconnecting hose. CAUTION: Not to be used for grooming a pet. 1 Attach hose by opening the Hose Connection Port on the nozzle. 2 Hold open the Hose Solution Port door. Plug the Hose Solution Tube connector firmly into the Hose Solution Port. 3 To drain the hose, run the unit and do not press the spray button on the hose/tool end. REMOVING THE HOSE 1 Remove the Solution Tank by pulling it up and out. 2 Fill the solution tank and replace cap. 3 Slide and push the Solution Tank back into place. NOTE: Test for colorfastness in a small, hidden area. Gently rub surface with a dampened white cloth. Wait ten minutes and check for color removal or bleed with a white paper towel. NOTE: For the best results, vacuum carpet and upholstery thoroughly with a HOOVER® vacuum before use. 4 Squeeze trigger to apply water and cleaning solution. 5 Slowly push forward with trigger pressed to wash, then slowly pull backwards with trigger released to dry. NOTE: For Best Results, rinse the carpet after deep cleaning with clean water only. This will remove residual carpet cleaning solution from your carpets. To rinse with clean water only, remove the solution tank from the unit and then repeat steps 4 and 5. 1 Press the button and firmly pull up to remove the Hose Solution Tube from the Solution Port. 2 The Hose port Door is spring loaded to close automatically. Ensure the Hose Port Door is fully shut for the best performance. NOTE: To ensure maximum performance and to protect your carpet, be sure to place the handle in the upright position while using the hose.
-
 1
1 -
 2
2 -
 3
3 -
 4
4 -
 5
5 -
 6
6 -
 7
7 -
 8
8 -
9
-
10
-
11
-
12
 |
 |
