Hoover U5753960 Manual - Page 4
STEP 1 Attach handle - model
 |
View all Hoover U5753960 manuals
Add to My Manuals
Save this manual to your list of manuals |
Page 4 highlights
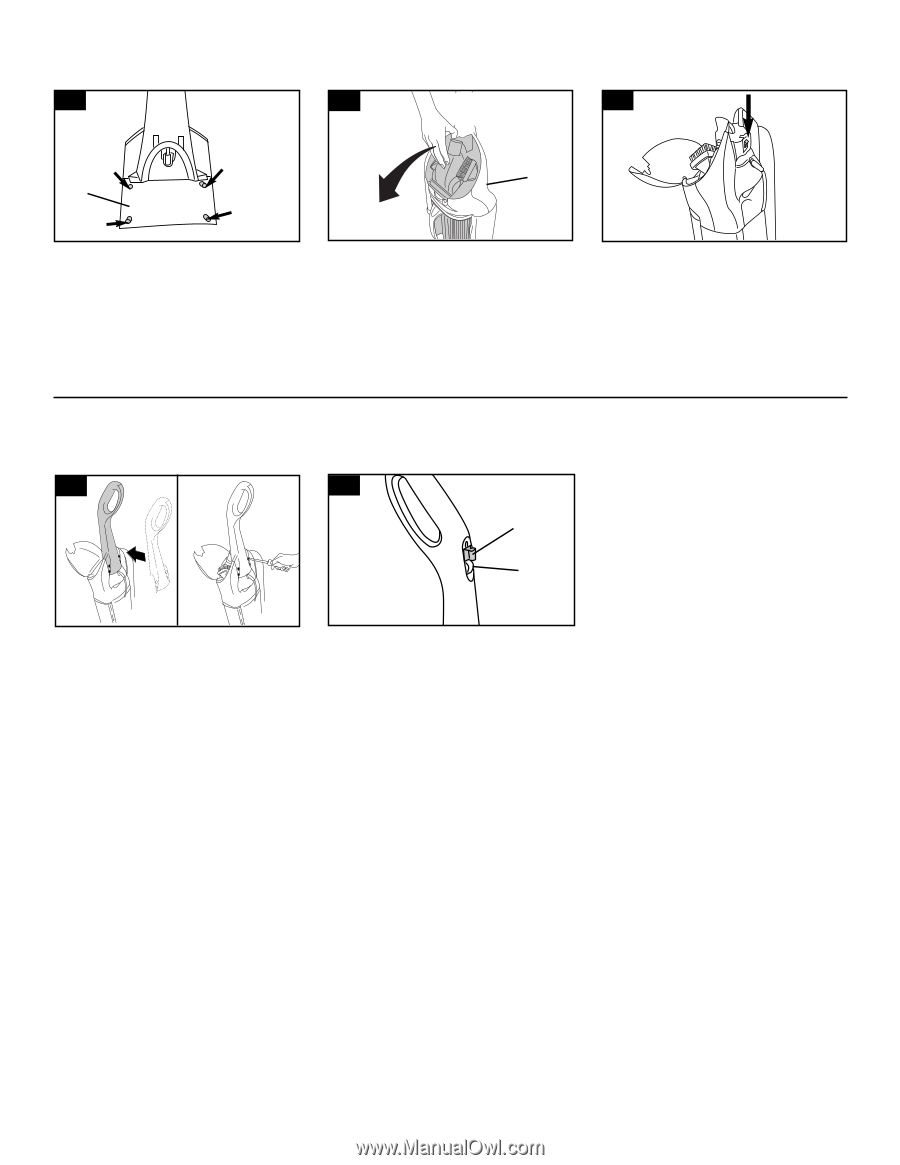
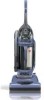
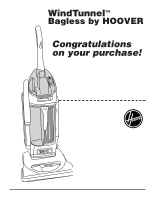
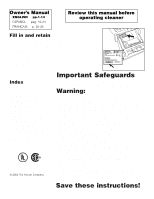
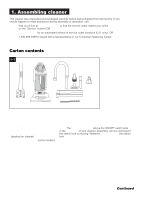
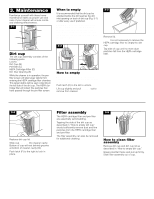
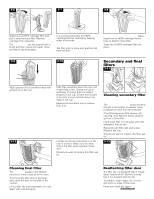
STEP 1 Attach handle 1-2 1-3 1-4 A FOR HANDLE ASSEMBLY REMOVE SEE SCREWS AND CARDBOARD. OWNER'S MANUAL FOR COMPLETE INSTRUCTIONS B Remove cardboard (A) and screws from handle section. Discard cardboard. Open tool cover on cleaner body (B). Remove powered hand tool (some models). Make sure that the switch is in the OFF position. 1-5 1-6 C D Slide handle section onto back of handle. Push screws into holes on back of handle. Tighten screws securely with a Phillips screwdriver. Remove powered hand tool (some models) from plastic bag and return it to the tool storage area. Remove switch lock (C) above ON/ OFF switch (D) by pulling it straight out. Dispose of switch lock. If switch lock has come off during assembly, make sure switch is in OFF position (down) before plugging into electrical outlet. 4
-
 1
1 -
 2
2 -
 3
3 -
 4
4 -
 5
5 -
 6
6 -
 7
7 -
 8
8 -
 9
9 -
 10
10 -
11
-
12
-
13
-
14
-
15
-
16
-
17
-
18
-
19
-
20
-
21
-
22
-
23
-
24
-
25
-
26
-
27
-
28
-
29
-
30
-
31
-
32
-
33
-
34
-
35
-
36
 |
 |