Hoover U6485 Manual - Page 5
Important - parts
 |
UPC - 073502029138
View all Hoover U6485 manuals
Add to My Manuals
Save this manual to your list of manuals |
Page 5 highlights
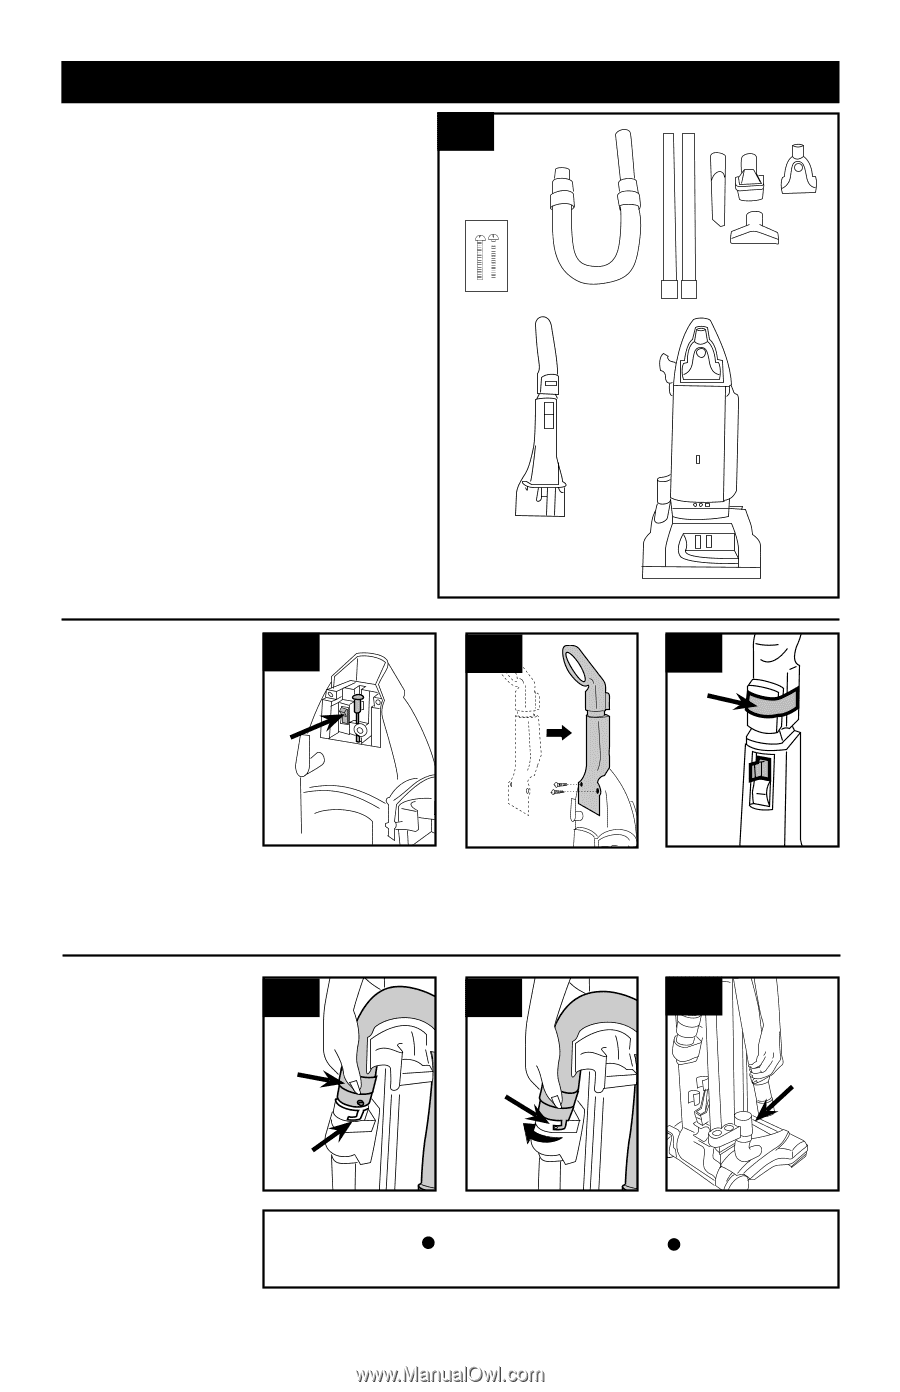
1. Cleaner ASSEMBLY Carton contents 1.1 Remove all parts from carton and identify each item shown. Make sure all parts are located before disposing of packing. 1.1 A A. Handle Screws B. Hose*, Cleaning Tools* and Wands* C. Handle D. Cleaner Body *Accessories may vary. C B D Attach handle 1.2 Looking at the back of the cleaner, make sure switch (A) is in the OFF position. 1.3 Push screws into holes on back of handle. 1.2 A Using a Phillips screw driver, tighten screws securely. 1.4 Remove label (D) from self-propel button. 1.3 1.4 D Attach hose 1.5 Align end of hose with projection (E) over slots (F) in dirt duct on back of handle. 1.6 Slide hose into (F) and twist hose to lock it into place. 1.7 Position hose over rack and into hose tube (G). 1.5 1.6 1.7 E F G F IMPORTANT Hose must be connected as shown for all operations. 5 Actual model may vary from images shown.
-
 1
1 -
 2
2 -
 3
3 -
 4
4 -
 5
5 -
 6
6 -
 7
7 -
 8
8 -
 9
9 -
 10
10 -
 11
11 -
12
-
13
-
14
-
15
-
16
-
17
-
18
-
19
-
20
-
21
-
22
-
23
-
24
-
25
-
26
-
27
-
28
-
29
-
30
-
31
-
32
-
33
-
34
-
35
-
36
-
37
-
38
-
39
-
40
-
41
-
42
-
43
-
44
-
45
-
46
-
47
-
48
-
49
-
50
-
51
-
52
-
53
-
54
 |
 |