Hoover UH20020RM Product Manual - Page 11
Belt And Brushroll
 |
View all Hoover UH20020RM manuals
Add to My Manuals
Save this manual to your list of manuals |
Page 11 highlights
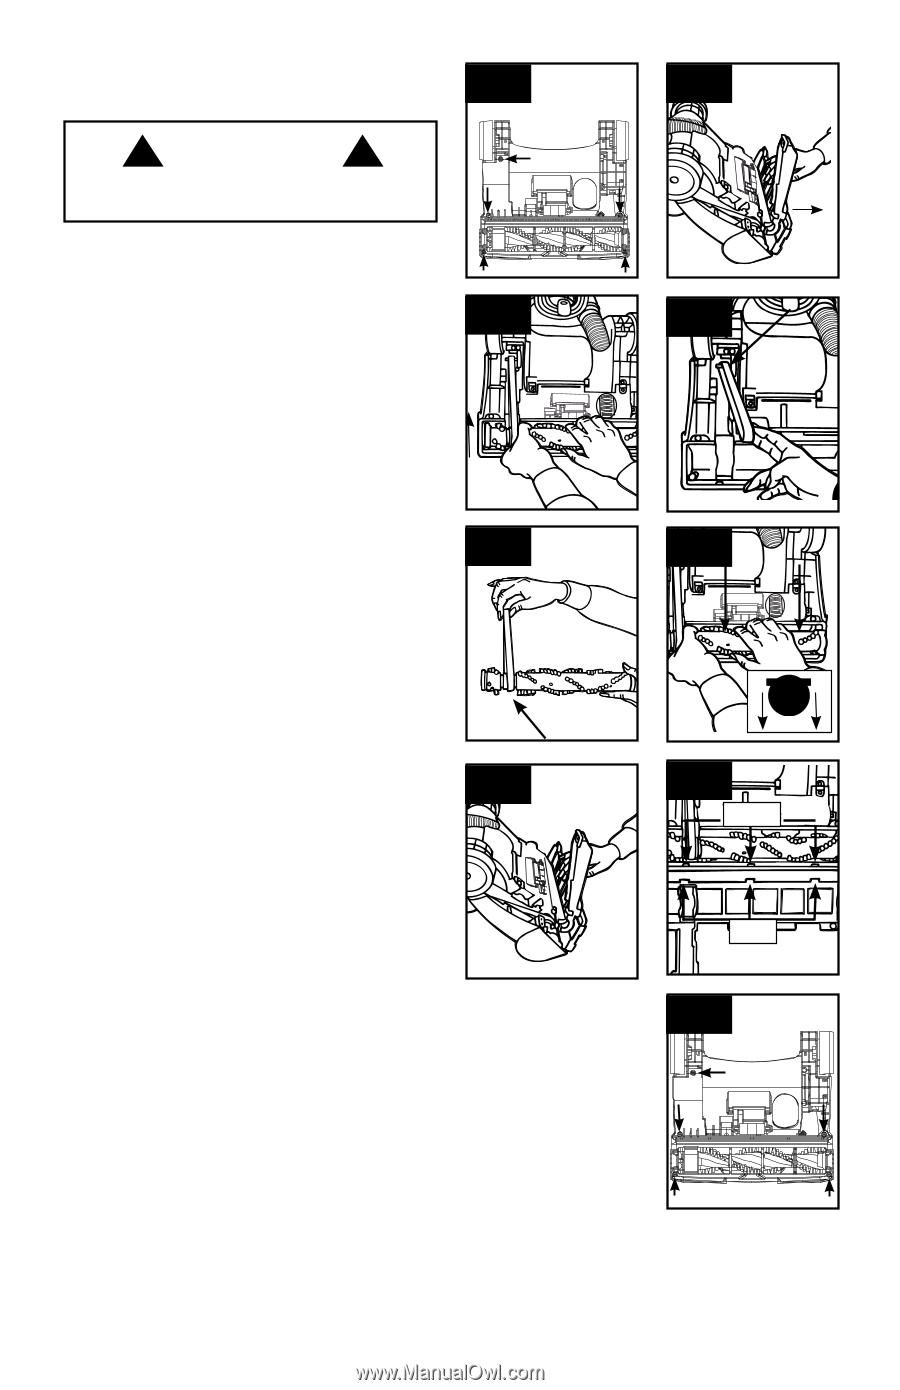
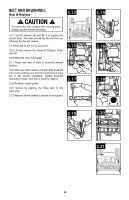
BELT and Brushroll How to Replace 3.13 ! CAUTION ! To reduce the risk of injury from moving parts, unplug vacuum before servicing. 3.13 Lay the cleaner flat and flip it to expose the nozzle base. The base should lay flat and face up. Remove the five (5) screws. 2.14 Pull and lift the nozzle guard off. 3.15 Lift and remove the brushroll. Dispose of the old belt. 3.16 Slide belt onto motorshaft. 3.17 Place new belt in area of brushroll without bristles. 3.18 With new belt in place, pull and slide brushroll into nozzle making sure that the brushroll end caps are in the correct orientation. Rotate brushroll manually to make sure belt is properly aligned. 3.19 Reattach nozzle guard. 3.20 Secure by aligning the three tabs in the base slots. 3.21 Replace all five screws to secure nozzle guard. 3.15 3.17 3.14 3.16 3.18 3.19 3.20 SLOTS SLOTS SLOTS SLOTS TABS TABS TABS TABS SLOTS 3.21 five (5) fiv TABS five (5) 11
-
 1
1 -
2
-
3
-
4
-
5
-
 6
6 -
 7
7 -
 8
8 -
 9
9 -
 10
10 -
 11
11 -
 12
12 -
 13
13 -
 14
14 -
 15
15 -
 16
16 -
17
-
18
-
19
-
20
-
21
-
22
-
23
-
24
-
25
-
26
 |
 |