Hoover UH70400 Manual - Page 5
Vacuum Assembly - tools
 |
UPC - 073502031902
View all Hoover UH70400 manuals
Add to My Manuals
Save this manual to your list of manuals |
Page 5 highlights
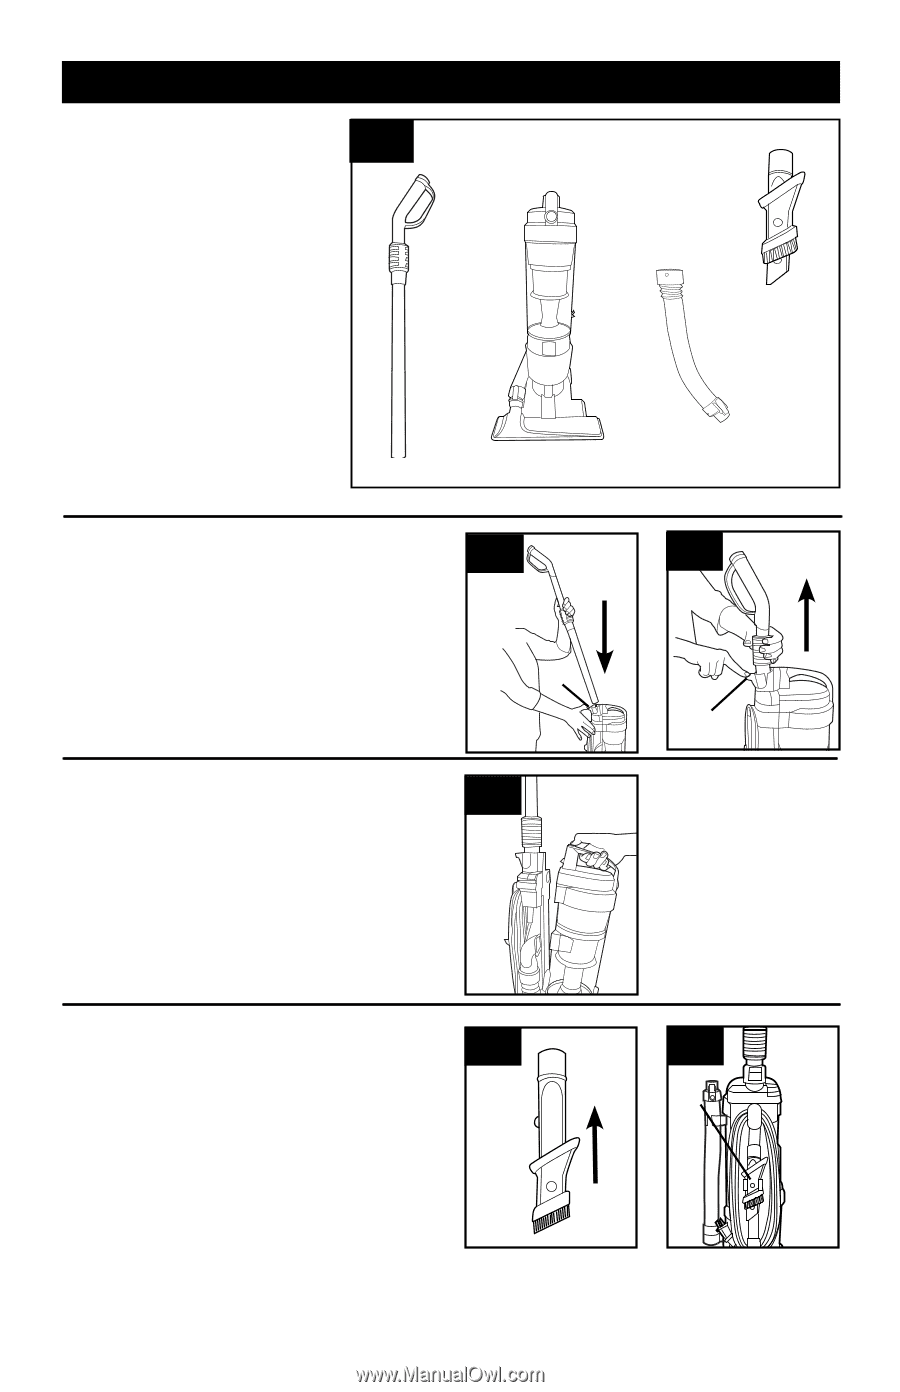
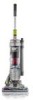
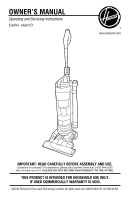
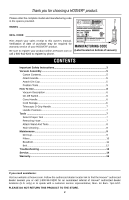
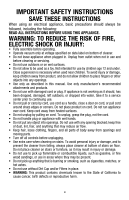
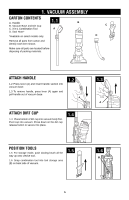
1. Vacuum ASSEMBLY Carton contents A. Handle B. Vacuum Base and Dirt Cup C. 3-in-1 Combination Tool D. Stair Hose* *Available on select models only. 1.1 A B C D Remove all parts from carton and identify each item shown. Make sure all parts are located before disposing of packing materials. Attach handle 1.2 Press lever (A) and Insert handle section into vacuum base. 1.3 To remove handle, press lever (A) again and pull handle out of vacuum base. 1.2 A Attach dirt cup 1.4 Place bottom of dirt cup into vacuum body first. Pivot cup into vacuum. Press down on the dirt cup release button to secure into place. 1.4 1.3 A Position Tools 1.5 For storage mode, push dusting brush all the way up onto crevice tool. 1.6 Snap combination tool into tool storage area (B) on back side of vacuum. 1.5 1.6 B 5
-
 1
1 -
 2
2 -
 3
3 -
 4
4 -
 5
5 -
 6
6 -
 7
7 -
 8
8 -
 9
9 -
 10
10 -
 11
11 -
12
-
13
-
14
-
15
-
16
-
17
-
18
-
19
-
20
-
21
-
22
-
23
-
24
-
25
-
26
-
27
-
28
-
29
-
30
-
31
-
32
-
33
-
34
-
35
-
36
-
37
-
38
-
39
-
40
-
41
-
42
-
43
-
44
-
45
 |
 |