Hoover UH72400 Product Manual - Page 19
Important, Warning - parts
 |
View all Hoover UH72400 manuals
Add to My Manuals
Save this manual to your list of manuals |
Page 19 highlights
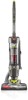
4. MAINTENANCE Familiarize yourself with these home maintenance tasks as proper use and care of your vacuum will ensure continued cleaning effectiveness. Any other servicing should be done by an authorized service representative. If appliance is not working as it should, has been dropped, damaged, left outdoors, or dropped into water, return it to a service center prior to continuing use. DIRT CUP: When to Empty 4.1 Empty the dirt cup before the dirt cup reaches the max line (A). Place the vacuum in the upright position before removing the dirt cup. ! WARNING ! To reduce the risk of personal injury - Unplug before cleaning or servicing. Do not use vacuum without dirt cup or filters in place. Very fine materials, such as face powder or cornstarch, may seal the filter and cause a reduction in performance. When using the vacuum for this type of dust, empty the cup and clean the filters often. 4.1 A 4.3 4.2 4.4 DIRT CUP: How to Empty B 4.2 Press dirt cup release button and pivot cup out. 4.3 Hold dirt cup over trash receptacle, push dirt cup A door release lever (A) to open dirt cup door (B). Close dirt cup door (B). Press firmly to secure. 4.4 Place bottom of dirt cup into vacuum body first. Pivot dirt cup into vacuum. Press down on the dirt cup release button to secure into place. FILTERS: When to Clean To maintain optimal performance, filters should be cleaned every two months under normal use. ! WARNING ! To reduce the risk of personal injury - Unplug before cleaning or servicing. Do not use vacuum without dirt cup or filters in place. 4.5 4.6 Rinsable Filter: How to Clean Remove dirt cup as described in Fig. 4.2. 4.5 Twist the dirt cup lid to open. 4.6 Remove rinsable filter. Rinse with water for two minutes or until water runs clear. Then squeeze out excess water. Allow 24 hours for filter to dry completely. Replace filter. Close lid securely by twisting dirt cup lid until it clicks as shown in Fig. 4.5. Replace dirt cup as described in Fig 4.4. Rinsable Filter: What to Buy When used and maintained properly, your Rinsable Filter should not need replacement within the warranty period. If desired, additional filter is available. Ask for Hoover® Part No. 303903001. IMPORTANT Allow filter to dry completely before replacing. Dry filter on edge so air circulates on both sides of filter. This may take up to 24 hours. 10
-
 1
1 -
2
-
3
-
4
-
5
-
6
-
7
-
8
-
9
-
10
-
11
-
12
-
13
-
 14
14 -
 15
15 -
 16
16 -
 17
17 -
 18
18 -
 19
19 -
 20
20 -
 21
21 -
 22
22 -
 23
23 -
 24
24 -
25
-
26
-
27
-
28
-
29
-
30
-
31
-
32
-
33
-
34
-
35
-
36
-
37
-
38
-
39
-
40
-
41
-
42
-
43
-
44
-
45
-
46
-
47
-
48
 |
 |
