Hoover WH20100 Manual - Page 10
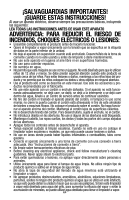
Important
 |
UPC - 073502033401
View all Hoover WH20100 manuals
Add to My Manuals
Save this manual to your list of manuals |
Page 10 highlights
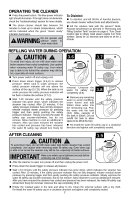
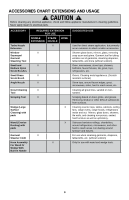
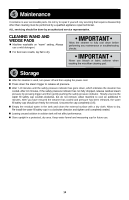
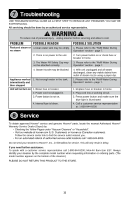
5 Maintenance It contains no user serviceable parts. Do not try to repair it yourself. Any servicing that requires disassembly other than cleaning must be performed by a qualified appliance repair technician. ALL servicing should be done by an authorized service representative. Cleaning Wand and wedge pads „„ Machine washable on "warm" setting. Always use a mild detergent. „„ For best care results, lay flat to dry. IMPORTANT Allow the steamer to fully cool down before performing any maintenance or troubleshooting checks. IMPORTANT Never use bleach or fabric softener when washing the microfiber cleaning pad. 6 Storage „„ After the steamer is used, turn power off and then unplug the power cord. „„ Press down the steam trigger to release all pressure. „„ Wait 7-10 minutes until the safety pressure indicator has gone down, which indicates the steamer has cooled. After 10 minutes, if the safety pressure indicator has not fully dropped, release residual steam pressure by pressing trigger and then gently pushing the safety pressure indicator. Slowly unscrew the water fill safety cap counter-clockwise, but do not remove. Allow machine to cool an additional 5 minutes. After you have ensured the steamer has cooled and pressure has been released, the water fill safety cap should turn freely for removal. Unscrew the cap completely (3.5). „„ Empty the residual water in the tank and clean the external surface with a dry cloth. Allow to dry. Re-install the water fill safety cap in a clockwise direction and tighten until completely sealed. „„ Leaving unused solution in solution tank will not affect performance. „„ Store upright in a protected, dry area. Keep water funnel and measuring cup for future use. 10
-
 1
1 -
2
-
3
-
4
-
 5
5 -
 6
6 -
 7
7 -
 8
8 -
 9
9 -
 10
10 -
 11
11 -
 12
12 -
 13
13 -
 14
14 -
 15
15 -
16
-
17
-
18
-
19
-
20
-
21
-
22
-
23
-
24
-
25
-
26
-
27
-
28
-
29
-
30
-
31
-
32
-
33
-
34
-
35
-
36
-
37
 |
 |