Hotpoint GSM1800NBB Installation Instructions - Page 6
Installation Instructions, CAUTION, BEFORE YOU BEGIN
 |
View all Hotpoint GSM1800NBB manuals
Add to My Manuals
Save this manual to your list of manuals |
Page 6 highlights
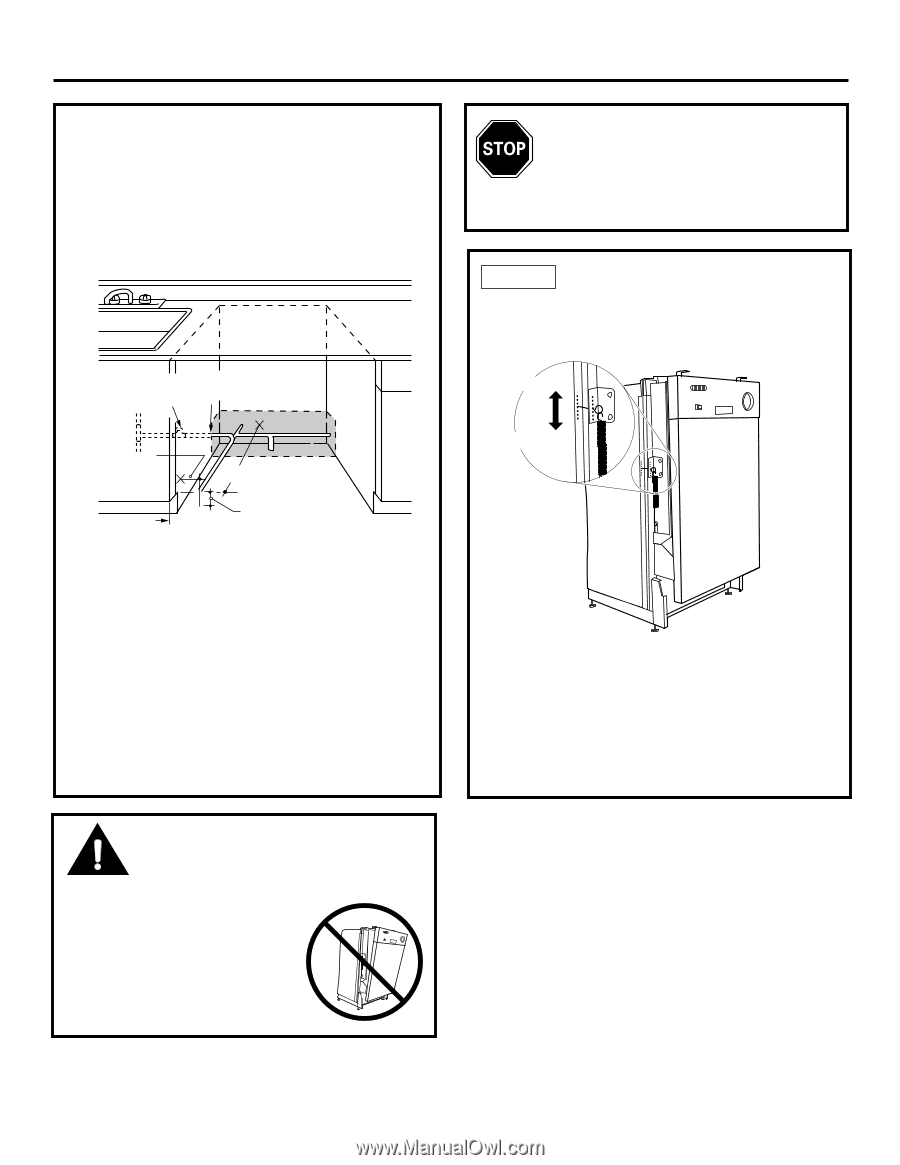
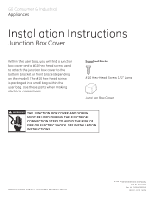
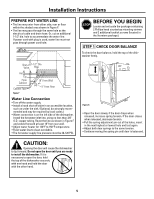
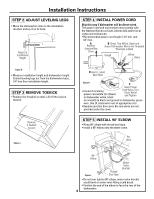
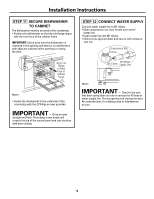
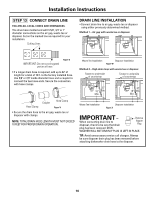
Installation Instructions PREPARE HOT WATER LINE • The line may enter from either side, rear or floor within the shaded area shown in Figure F. • The line may pass through the same hole as the electrical cable and drain hose. Or, cut an additional 1-1/2" dia. hole to accommodate the water line. If power cord with plug is used, water line must not pass through power cord hole. Shut-off 1-1/2" Dia. Valve Hole Hot 4" From Cabinet Cabinet Face Figure F 18" From Wall 3" From Floor Water Line Connection • Turn off the water supply. • Install a hand shut-off valve in an accessible location, such as under the sink. (Optional, but strongly recommended and may be required by local codes.) • Water connection is on the left side of the dishwasher. Install the hot water inlet line, using no less than 3/8" O.D. copper tubing. Route the line as shown in Figure F and extend forward at least 18" from rear wall. • Adjust water heater for 120°F to 150°F temperature. • Flush water line to clean out debris. • The hot water supply line pressure must be 20-120 PSI. BEFORE YOU BEGIN Locate and set aside the package containing 2 Phillips head countertop mounting screws and 2 additional toekick screws (located in the literature package). STEP 1 CHECK DOOR BALANCE To check the door balance, hold the top of the dishwasher firmly. Increase Decrease Figure G • Open the door slowly, if the door drops when released, increase spring tension. If the door closes when released, decrease tension. • Pull the spring adjustment pin out of the holes, insert in the next highest or lowest hole and test again. • Adjust both door springs to the same tension. • Continue moving the spring pin until door is balanced. CAUTION: Opening the door will cause the dishwasher to tip forward. Do not open the door until you are ready to install the dishwasher. If it is necessary to open the door, hold the top of the dishwasher securely with one hand and hold the door with the other hand. 5
-
 1
1 -
 2
2 -
 3
3 -
 4
4 -
 5
5 -
 6
6 -
 7
7 -
 8
8 -
 9
9 -
 10
10 -
 11
11 -
 12
12 -
13
 |
 |