Hotpoint HTX26EASWWW Installation Instructions - Page 13
Installation Instructions, EXHAUSTING THE DRYER cont.
 |
View all Hotpoint HTX26EASWWW manuals
Add to My Manuals
Save this manual to your list of manuals |
Page 13 highlights
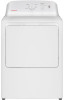
Installation Instructions EXHAUSTING THE DRYER (cont.) • DO cut duct as short as possible and install straight into wall. • DO use elbows when turns are necessary. Elbows • DO NOT bend or collapse ducting. Use elbows if turns are necessary. • DO NOT use excessive exhaust length. Cut duct as short as possible. • DO NOT crush duct against the wall. • DO NOT set dryer on duct. EXHAUST LENGTH Using exhaust longer than specified length will: • Increase the drying times and the energy cost. • Reduce the dryer life. • Accumulate lint, creating a potential fire hazard. The correct exhaust installation is YOUR RESPONSIBILITY. Problems due to incorrect installation are not covered by the warranty. The MAXIMUM ALLOWABLE length of the exhaust system depends upon the type of duct, number of turns, the type of exhaust hood (wall cap) and all conditions noted on the chart. • Internal elbows added for side or bottom vent conversions must be included in the total elbow count. • Any elbow greater than 45° should be treated as a 90° elbow; one elbow of 45° or less may be ignored. • Two 45° elbows will be treated like one 90° elbow. • For the side exhaust installations, add one 90° elbow to the chart. • For every additional 90° elbow, reduce the allowable vent system length by 10 feet. • When calculating the total vent system length, you must add all the straight portions and elbows of the system (including the transition duct). RECOMMENDED MAXIMUM LENGTH Exhaust Hood Types Recommended Use only for short run installations 4" DIA. 4" DIA. 4" DIA. No. of 90° Elbows 0 1 2 3 4 5 4" Rigid Metal 120 Feet 100 Feet 85 Feet 70 Feet 60 Feet 55 Feet 2-1/2" Rigid Metal 90 Feet 75 Feet 65 Feet 55 Feet 45 Feet 35 Feet 13
-
 1
1 -
2
-
3
-
4
-
5
-
6
-
7
-
 8
8 -
 9
9 -
 10
10 -
 11
11 -
 12
12 -
 13
13 -
 14
14 -
 15
15 -
 16
16 -
 17
17 -
 18
18 -
19
-
20
-
21
-
22
-
23
-
24
-
25
-
26
-
27
-
28
-
29
-
30
-
31
-
32
-
33
-
34
-
35
-
36
-
37
-
38
-
39
-
40
 |
 |
