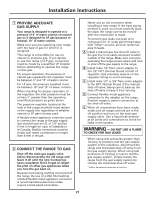
Hotpoint RGA724EKWH Installation Instructions - Page 30
LIGHT THE OVEN PILOT, on standing pilot models, LIGHT THE PILOTS cont., IF THE RANGE HAS ELECTRIC
 |
UPC - 084691131717
View all Hotpoint RGA724EKWH manuals
Add to My Manuals
Save this manual to your list of manuals |
Page 30 highlights
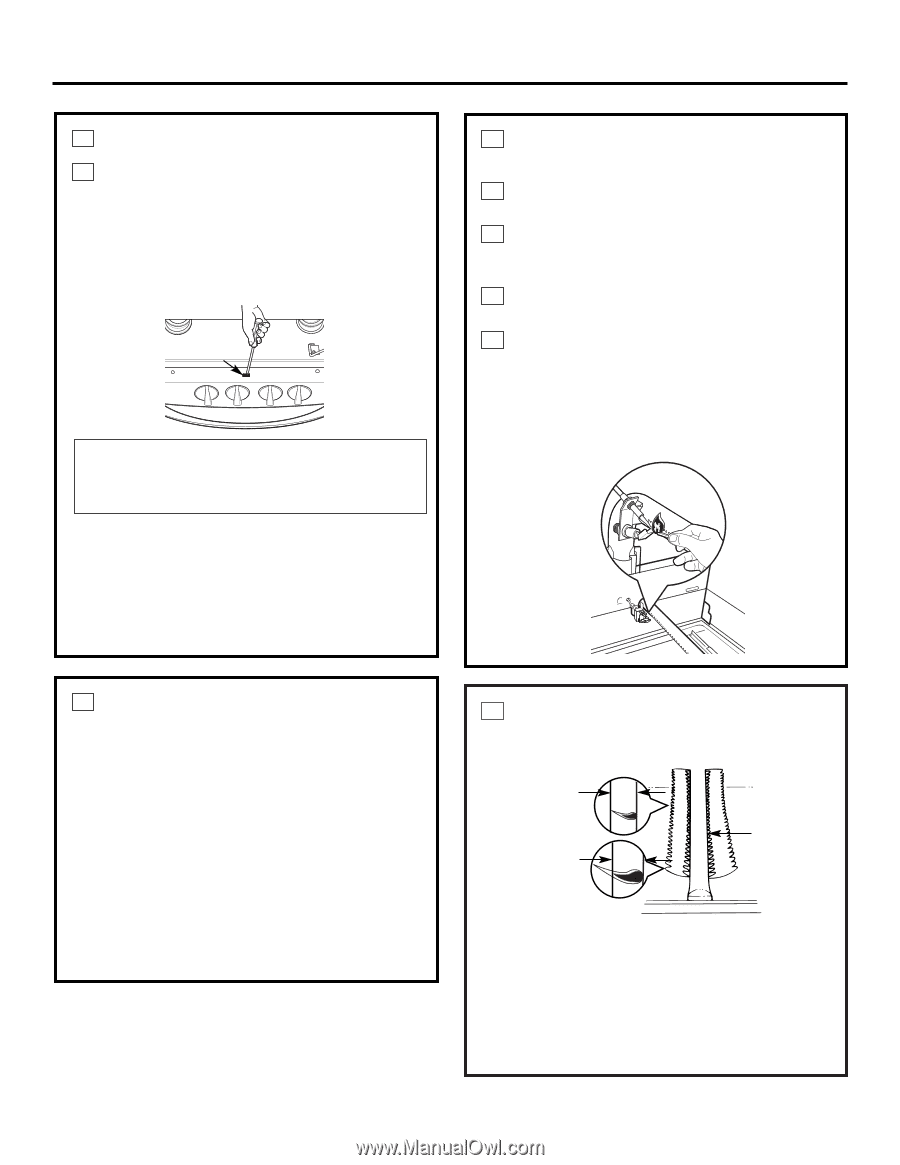
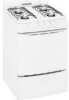
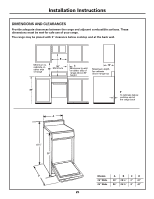
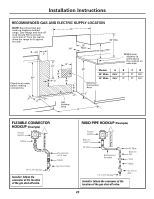
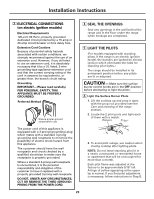
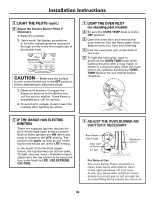
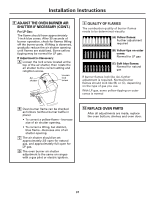
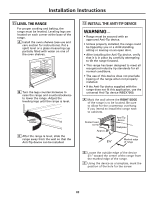
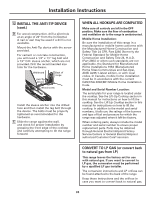
Installation Instructions 5 LIGHT THE PILOTS (cont.) B Adjust the Surface Burner Pilots if Necessary 1. Raise the cooktop. 2. Use a small flat-bladed screwdriver to turn the adjusting screw (accessed through a hole in the front right side of the burner box). Pilot adjustment CAUTION - Make sure the surface burner control knobs are in the OFF position before attempting to adjust the pilots. 3. Observe lit burners. Compare the flames to pictures in the Before you call for service section. If any flame is unsatisfactory, call for service. 4. To avoid pilot outage, slowly lower the cooktop after lighting the pilots. 7 LIGHT THE OVEN PILOT (on standing pilot models) A Be sure the OVEN TEMP knob is in the OFF position. B Open the oven door and remove the oven bottom. See the Removable Oven Bottom section in Care and Cleaning. C Find the oven pilot port at the back of the oven. D To light the oven pilot, push in and hold the OVEN TEMP knob while lighting the pilot with a long match or match in a match holder. Once the oven pilot is lit, continue holding the OVEN TEMP knob in for one minute before releasing. 6 IF THE RANGE HAS ELECTRIC IGNITION There are separate ignition devices for the left and right hand surface burners. Both of these ignitors are ON when any knob is turned to the LITE setting. The ignitors will spark as long as any of the top burner knobs are at the LITE setting. In the event of an electrical power failure, the top burners can still be used. To light a burner, hold a lit kitchen match adjacent to the top burner to be used and turn valve knob to LITE. USE EXTREME CAUTION. 8 ADJUST THE OVEN BURNER AIR SHUTTER IF NECESSARY Blue flames 1/2″ Natural gas Inner cone of flame 1″ L.P. gas Bake/broil burner For Natural Gas: The oven burner flame should be a clean, blue flame with distinct inner cones approximately 1/2 inch long. A soft, lazy flame with indistinct cones means too much gas or not enough air. A noisy lifting flame means too much air. 30
-
 1
1 -
2
-
3
-
4
-
5
-
6
-
7
-
8
-
9
-
10
-
11
-
12
-
13
-
14
-
15
-
16
-
17
-
18
-
19
-
20
-
21
-
22
-
23
-
24
-
 25
25 -
 26
26 -
 27
27 -
 28
28 -
 29
29 -
 30
30 -
 31
31 -
 32
32 -
 33
33 -
 34
34 -
 35
35 -
36
 |
 |