Hunter 28111 Operation Manual - Page 6
For Standard or Angled mounting, Hanging the Fan
 |
View all Hunter 28111 manuals
Add to My Manuals
Save this manual to your list of manuals |
Page 6 highlights
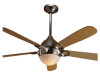
3 • Assembling and Hanging the Fan WARNING: Fan may fall if not assembled as directed in these installation instructions. 3-1. Unbundle the wires from the fan and remove the paper caution tag. Do not discard the tag until your installation is complete. For Standard or Angled mounting: 3-2. To assemble fan to hang down from a flat or angled ceiling, insert the downrod through the canopy, adapter cover, and canopy trim ring. Feed the wires from the fan through the downrod. 3-3. Using the provided Allen wrench, loosen the setscrew on the adapter to install the pipe and ball assembly. Note: When the pipe and ball assembly is fully installed, 2-3 threads on the pipe will still be visible; this is normal. Use the Allen wrench to securely retighten the setscrew. CAUTION: The adapter has a special coating on the threads. Do not remove this coating; the coating prevents the downrod from unscrewing. Once assembled, do not remove the downrod. Steps 3-2 - 3-3 Canopy Canopy Trim Ring Hanging the Fan: Note: To hang the fan, you must tilt the canopy to an almost vertical position so that the canopy slots sit on the ceiling plate hooks. 3-4. Raise the fan and align the slots in the canopy with the hooks on the ceiling plate. Go to 4 • Wiring the Fan. 3-5. Place the slots over the hooks to hang the fan. Ceiling Plate Hooks Downrod Adapter Cover Grommet Adapter Cover Setscrew Allen Wrench Step 3-5 6 41467-01 • 09/30/09 • Hunter Fan Company Canopy Slots
-
 1
1 -
 2
2 -
 3
3 -
 4
4 -
 5
5 -
 6
6 -
 7
7 -
 8
8 -
 9
9 -
 10
10 -
 11
11 -
 12
12 -
13
-
14
 |
 |
