Hunter 38221 Owner's Manual - Page 6
Using Your Air Purifier
 |
View all Hunter 38221 manuals
Add to My Manuals
Save this manual to your list of manuals |
Page 6 highlights
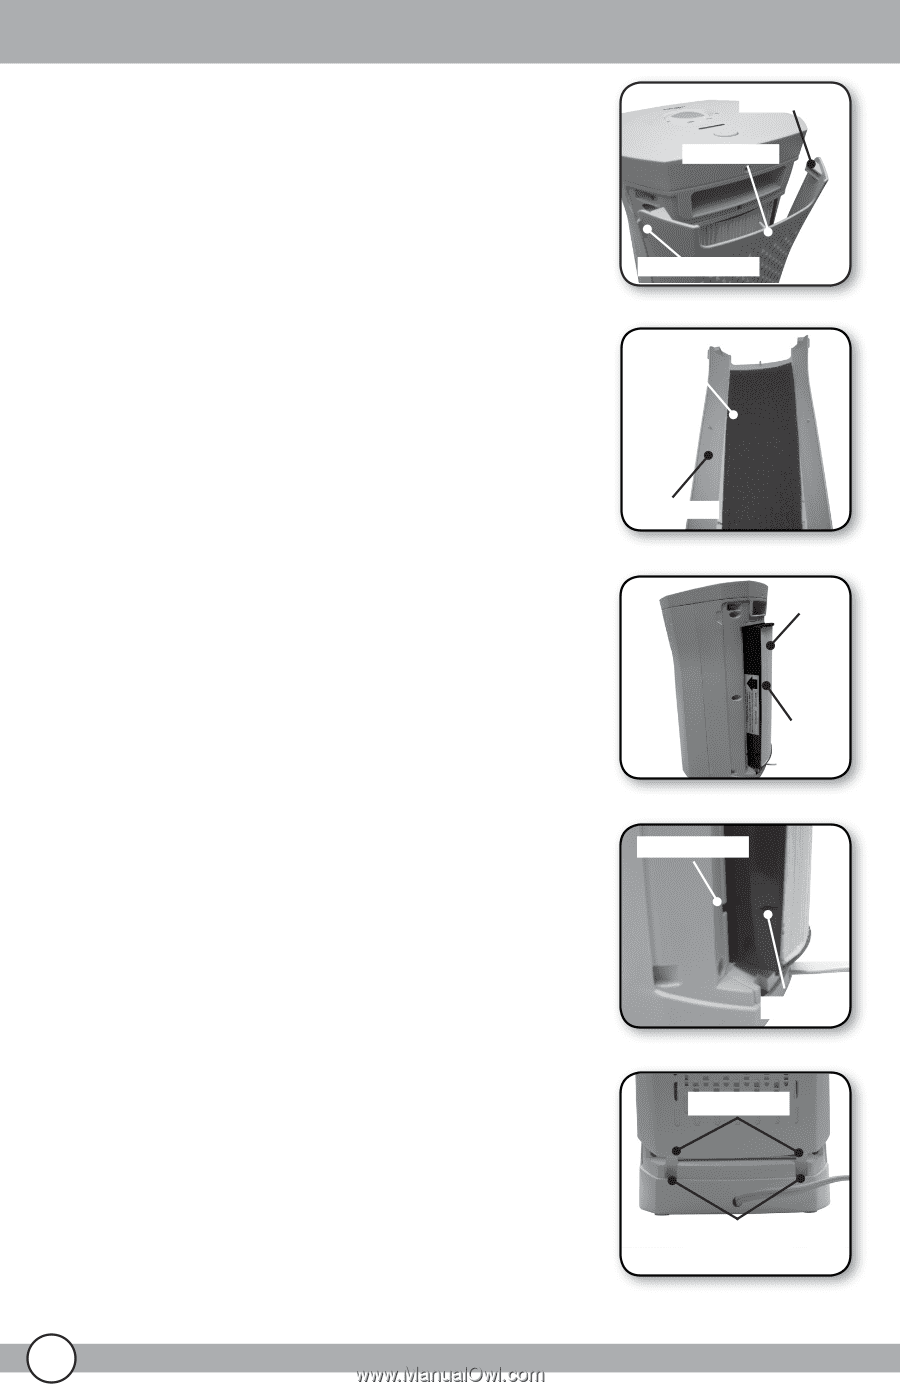
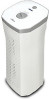
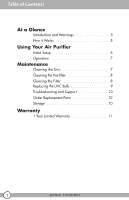
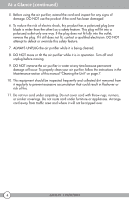
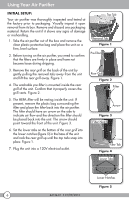
Using Your Air Purifier INITIAL SETUP: Your air purifier was thoroughly inspected and tested at the factory prior to packaging. Visually inspect it upon removal from its box. Remove and discard any packaging material. Return the unit if it shows any signs of damage or mishandling. 1. Take the air purifier out of the box and remove the clear plastic protective bag and place the unit on a firm, level surface. 2. Before turning on the air purifier, you need to confirm that the filters are firmly in place and have not become loose during shipping. 3. Remove the rear grill on the back of the unit by gently pulling the removal tabs away from the unit and lift the rear grill away. Figure 1. 4. The washable pre-filter is mounted inside the rear grill of the unit. Confirm that it properly covers the grill vents. Figure 2. 5. The HEPA filter will be resting inside the unit. If present, remove the plastic bag surrounding the filter and place the filter back into the air purifier. The filter should have an arrow on the side to indicate air flow and the direction the filter should be placed back into the unit. The arrow should point toward the front of the unit. Figure 3. 6. Set the lower tabs on the bottom of the rear grill into the lower notches (figure 5) in the base of the unit and rock the rear grill up until the top tabs snap into place. Figure 1. 7. Plug the unit into a 120V electrical outlet. Top Tab Rear Grill Removal Tab Figure 1 Pre-filter Rear Grill Figure 2 Filter Arrow Figure 3 Filter Notch Filter Tab Figure 4 Lower Tabs Lower Notches Figure 5 6 44134-01 • 01/09/2013
-
 1
1 -
 2
2 -
 3
3 -
 4
4 -
 5
5 -
 6
6 -
 7
7 -
 8
8 -
 9
9 -
 10
10 -
 11
11 -
 12
12
 |
 |