Hunter 38221 Owner's Manual - Page 8
Maintenance continued
 |
View all Hunter 38221 manuals
Add to My Manuals
Save this manual to your list of manuals |
Page 8 highlights
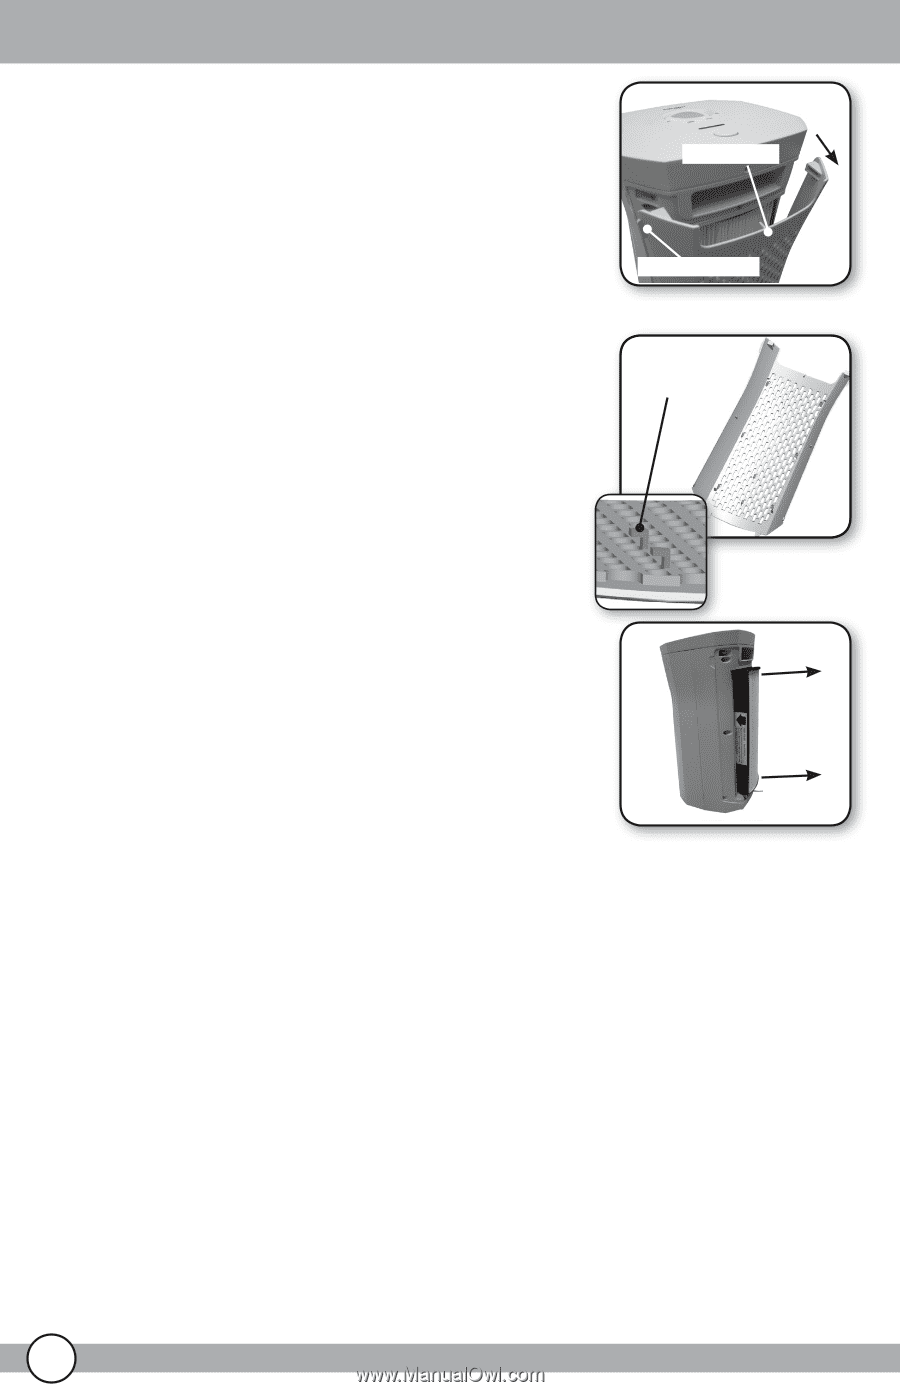
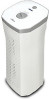
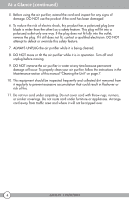
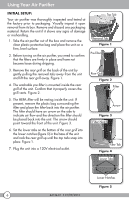
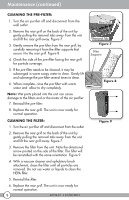
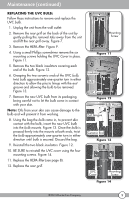
Maintenance (continued) CLEANING THE PRE-FILTER: 1. Turn the air purifier off and disconnect from the wall outlet. 2. Remove the rear grill on the back of the unit by gently pulling the removal tabs away from the unit and lift the rear grill away. Figure 7. 3. Gently remove the pre-filter from the rear grill, by carefully removing it from the filter supports that secure it to the rear grill. Figure 8. 4. Check the side of the pre-filter facing the rear grill for particle coverage. 5. If the pre-filter needs to be cleaned, it may be submerged in warm soapy water to clean. Gently lift and submerge the pre-filter several times to clean. 6. When complete, rinse the pre-filter with warm water and allow to dry completely. Note: Wet parts placed into the unit can cause damage to the filters and or the motor of the air purifier. 7. Reinstall the pre-filter. 8. Replace the rear grill. The unit is now ready for normal operation. CLEANING THE FILTER: 1. Turn the air purifier off and disconnect from the outlet. 2. Remove the rear grill on the back of the unit by gently pulling the removal tabs away from the unit and lift the rear grill away. Figure 7. 3. Remove the filter from the unit. Note the directional arrow printed on the side of the filter. The filter will be reinstalled with the same orientation. Figure 9. 4. With a vacuum cleaner and upholstery brush attachment, clean the filter until all particles are removed. Do not use water or liquids to clean the HEPA filter. 5. Reinstall the filter. 6. Replace the rear grill. The unit is now ready for normal operation. 8 44134-01 • 01/09/2013 Rear Grill Removal Tab Figure 7 Filter Supports Figure 8 Figure 9
-
 1
1 -
2
-
 3
3 -
 4
4 -
 5
5 -
 6
6 -
 7
7 -
 8
8 -
 9
9 -
 10
10 -
 11
11 -
 12
12
 |
 |