Hunter 40120 Owner's Manual - Page 14
Installing The Wall Plate
 |
View all Hunter 40120 manuals
Add to My Manuals
Save this manual to your list of manuals |
Page 14 highlights
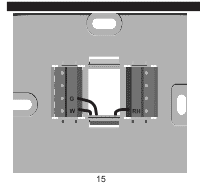
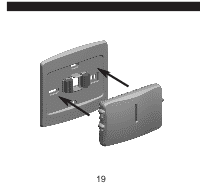
installing the thermostat, cont. INSTALLING THE WALL PLATE 2. Position the new wall plate on the wall and pull the labeled wires through the opening. 3. If the existing holes do not match those on the Hunter wall plate, or if there are no existing holes, level the wall plate and mark the wall for two holes. 4. Remove the wall plate and drill two 3/16" holes where marked. 5. Tap the plastic anchors into the holes until they are flush with the wall. 6. Reposition the wall plate on the wall, pulling the wires through the opening. Insert the mounting screws through the mounting holes and into the anchors. Verify that the thermostat is visually level and securely tighten both screws. 14
-
 1
1 -
2
-
3
-
4
-
5
-
6
-
7
-
8
-
 9
9 -
 10
10 -
 11
11 -
 12
12 -
 13
13 -
 14
14 -
 15
15 -
 16
16 -
 17
17 -
 18
18 -
 19
19 -
20
-
21
-
22
-
23
-
24
-
25
-
26
-
27
-
28
 |
 |

14
2. Position the new wall plate on the wall and pull
the labeled wires through the opening.
3. If the existing holes do not match those on the
Hunter wall plate, or if there are no existing
holes, level the wall plate and mark the wall for
two holes.
4. Remove the wall plate and drill two 3/16” holes
where marked.
5. Tap the plastic anchors into the holes until they
are flush with the wall.
6. Reposition the wall plate on the wall, pulling the
wires through the opening. Insert the mounting
screws through the mounting holes and into the
anchors. Verify that the thermostat is visually
level and securely tighten both screws.
INSTALLING THE THERMOSTAT, CONT.
INSTALLING THE WALL PLATE