Hunter 44132 Owner's Manual - Page 10
Setup, Setting Day and Time - installation
 |
View all Hunter 44132 manuals
Add to My Manuals
Save this manual to your list of manuals |
Page 10 highlights
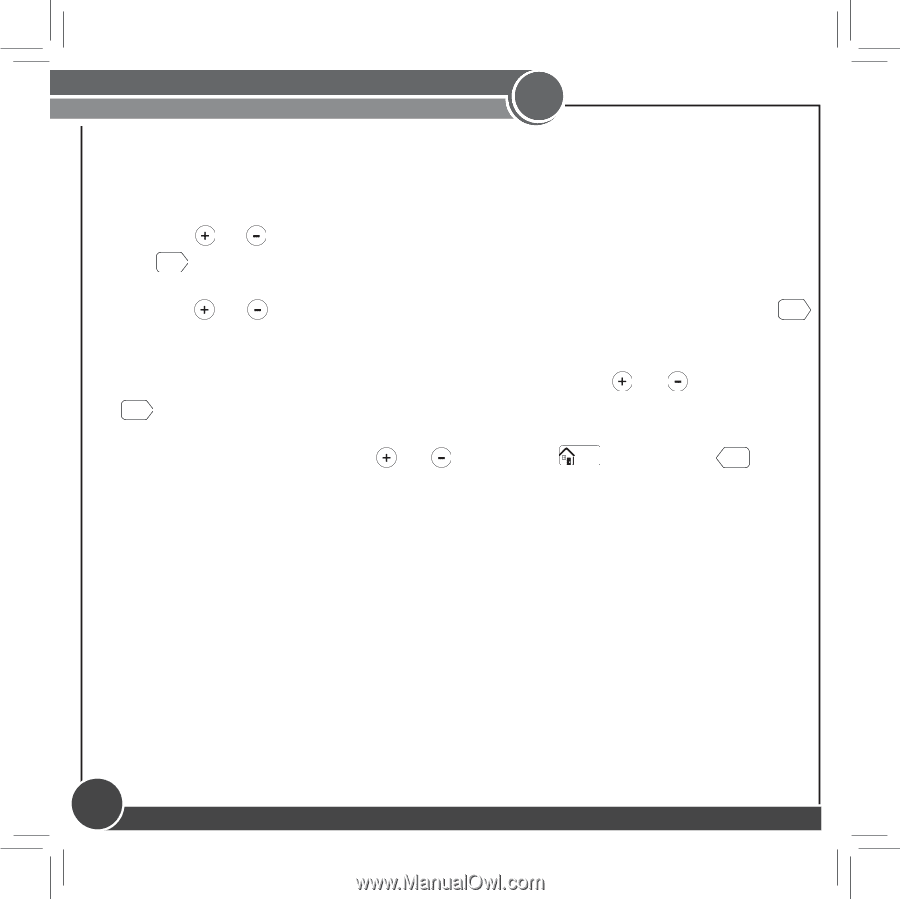
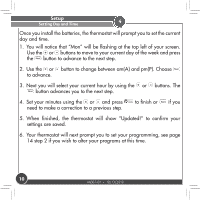
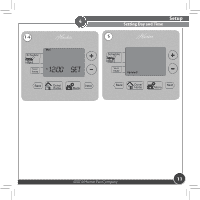
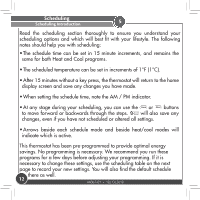
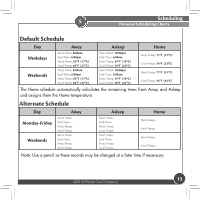
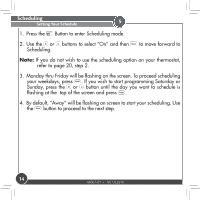
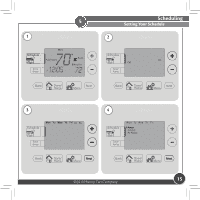
Setup Setting Day and Time 4 Once you install the batteries, the thermostat will prompt you to set the current day and time. 1. You will notice that "Mon" will be flashing at the top left of your screen. Use the or buttons to move to your current day of the week and press the Next button to advance to the next step. 2. Use the or button to change between am(A) and pm(P). Choose Next to advance. 3. Next you will select your current hour by using the or buttons. The Next button advances you to the next step. 4. Set your minutes using the or and press Done/ Home to finish or Back if you need to make a correction to a previous step. 5. When finished, the thermostat will show "Updated!" to confirm your settings are saved. 6. Your thermostat will next prompt you to set your programming, see page 14 step 2 if you wish to alter your programs at this time. 10 44067-01 • 10/13/2010
-
 1
1 -
2
-
3
-
4
-
 5
5 -
 6
6 -
 7
7 -
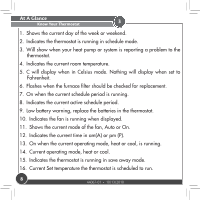 8
8 -
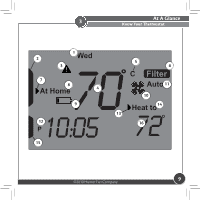 9
9 -
 10
10 -
 11
11 -
 12
12 -
 13
13 -
 14
14 -
 15
15 -
16
-
17
-
18
-
19
-
20
-
21
-
22
-
23
-
24
-
25
-
26
-
27
-
28
-
29
-
30
-
31
-
32
-
33
-
34
-
35
-
36
-
37
 |
 |