Hunter 90391 Owners Manual - Page 5
Fan Assembly, Unpacking
 |
View all Hunter 90391 manuals
Add to My Manuals
Save this manual to your list of manuals |
Page 5 highlights
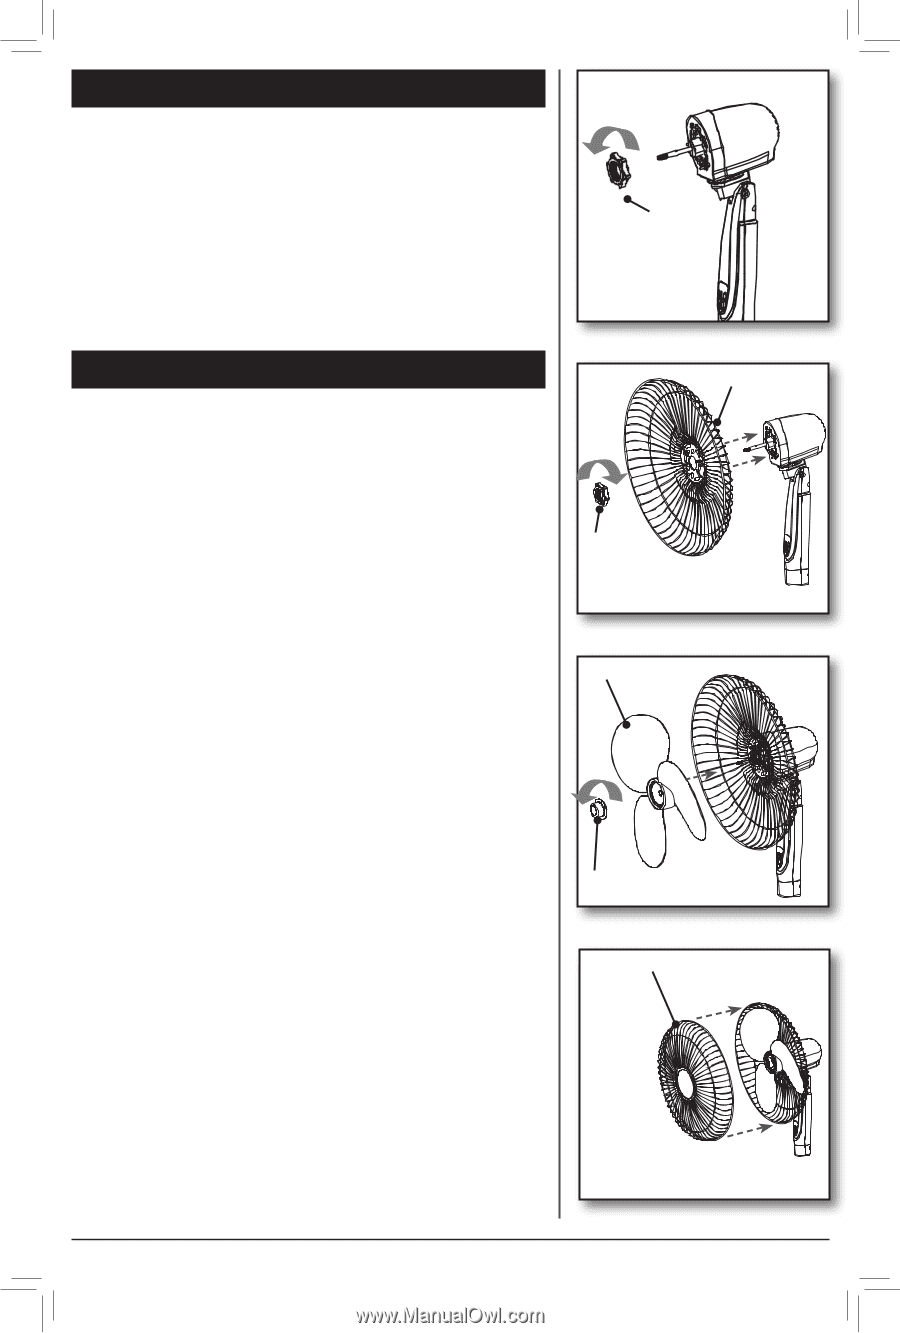
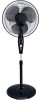
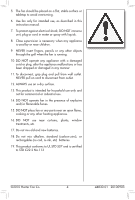
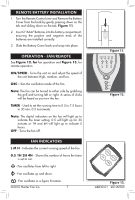
Unpacking As you unpack the fan, save the carton and packing materials in case you want to move or ship the unit in the future. Carefully remove all items from the box. NOTE: It is best to have someone hold the box while you lift the fan and the protective packaging out of the carton. Make sure all shipping materials are removed from fan before operating. Fan Assembly 1. Remove the Plastic Nut (2) from the fan motor housing . Figure 3. 2. Set the Rear Grill (3) against the front part of the Motor Housing with the handle facing up. The 3 pins on the motor housing should stick through the back of the Rear Grill. Figure 4. 3. Screw the Plastic Nut (2) onto the fan and tightenly firmly. Figure 4. 4. Remove the Plastic Sleeve from the motor housing shaft and discard. 5. Install the Fan Blade (4) by sliding it over the motor housing shaft, lining up the cut-outs on the back of the Blade with the Retaining Pins on the Motor shaft. Figure 5. 6. Screw the Spinner (1) onto the shaft counterclockwise until secure. Figure 5. 7. Open the clips on the Front Grill and remove the grill screw from the outside of the rear grill (5) ring. 8. Set the Front Gill (5) into the notch on the bottom of the Rear Grill (3) So the Hunter logo is facing rightside up. Figure 6. 9. Close the clips On the Front Grill to hold both Grill pieces in place. Insert the grill screw on the top of the fan grill and tighten securely. (2) Nut Figure 3. (3) Rear Grill (2) Nut (4) Fan Blade Figure 4. (1) Spinner Figure 5. (5) Front Guard Figure 6. ©2010 Hunter Fan Co. 5 44830-01 20100903
-
 1
1 -
 2
2 -
 3
3 -
 4
4 -
 5
5 -
 6
6 -
 7
7 -
 8
8 -
 9
9 -
 10
10 -
 11
11
 |
 |