Husqvarna 365 Operation Manual
Husqvarna 365 Manual
 |
View all Husqvarna 365 manuals
Add to My Manuals
Save this manual to your list of manuals |
Husqvarna 365 manual content summary:
- Husqvarna 365 | Operation Manual - Page 1
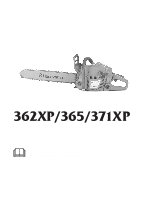
362XP/365/371XP Operator's manual (EPA) Please read these instructions carefully and make sure you understand them before using the saw. 101 90 43-95 - Husqvarna 365 | Operation Manual - Page 2
the operator´s hands must be used to operate the chain saw. Please see page 30 in your "Chain saw operator´s safety manual". Never operate a chain saw holding it with one hand only. Please see page 30 in your "Chain saw operator´s safety manual". Contact of the guide bar tip with any object should - Husqvarna 365 | Operation Manual - Page 3
is what? What is what 24 Assembly Mounting guide bar and chain 25 Fuel handling Fuelmix 26 Fuelling 27 Start and stop Start and stop 28 Maintenance Carburetor 29 Starter device 30 Air filter 31 Spark plug 31 Muffler 31 Needle bearing maintenance 31 Adjustment of the oil pump 31 Cooling - Husqvarna 365 | Operation Manual - Page 4
NEVER USE A CHAIN SAW THAT HAS FAULTY SAFETY EQUIPMENT! Carry out the inspection, maintenance and service routines listed in this section. 1 Chain brake ALWAYS HAVE A FIRST AID KIT NEARBY 4 - English 4 Right hand guard 5 Vibration damping system 6 Stop switch 7 Muffler 8 Cutting equipment (see " - Husqvarna 365 | Operation Manual - Page 5
SAFETY INSTRUCTIONS 1 Chain brake and front hand guard YOUR chain saw is equipped with a chain brake that is designed to stop the chain immediately if you get a kickback. The chain brake reduces the risk of accidents, but only You can prevent them. Take care when using your saw and make sure the - Husqvarna 365 | Operation Manual - Page 6
chain brake will be activated manually by the movement of your left hand. 3 Chain catcher The chain catcher is designed to catch the chain if it snaps or jumps off. This should not happen if the chain is properly tensioned (see section on "Assembly") and if the bar and chain are properly serviced - Husqvarna 365 | Operation Manual - Page 7
an approved type of spark arrestor mesh. For mufflers it is very important that you follow the instructions on checking, maintaining and servicing your saw (see the section on "Inspecting, maintaining and servicing chain saw safety equipment"). ! The muffler gets very hot in use and remains so for - Husqvarna 365 | Operation Manual - Page 8
SAFETY INSTRUCTIONS Inspecting, maintaining and servicing chain saw safety equipment ! SPECIAL TRAINING IS REQUIRED to service and repair chain saws. This is especially true of chain saw safety equipment. If your chain saw fails any of the checks described below take it to your SERVICE AGENT. - Husqvarna 365 | Operation Manual - Page 9
2 Throttle lock SAFETY INSTRUCTIONS 4 Right hand guard 1 Make sure the Start the saw and apply full throttle. Release the throttle control and check that the chain stops and remains stationary. If the chain rotates when the throttle is on idle setting you should check the carburetor idle adjustment - Husqvarna 365 | Operation Manual - Page 10
arrestor mesh this must be cleaned regularly. A blocked mesh will cause the engine to overheat and may lead to serious damage. Never use a muffler if the spark arrestor mesh is missing or defective. ! NEVER USE A CHAIN SAW WITH FAULTY SAFETY EQUIPMENT. CARRY OUT THE CHECKS AND MAINTENANCE MEASURES - Husqvarna 365 | Operation Manual - Page 11
your saw becomes worn or damaged you will need to replace it. Use only the type of bar and chain recommended by us. See the "Technical data" section to find out which equipment is recommended for your saw. Bar • LENGTH (inches/cm) • NUMBER OF TEETH ON BAR TIP SPROCKET (T). Small number = small tip - Husqvarna 365 | Operation Manual - Page 12
SAFETY INSTRUCTIONS 2 Sharpening your chain and adjusting raker clearance ! The risk of kickback is increased with a badly sharpened chain! A General information on sharpening cutting teeth • Never use a blunt chain. When the chain is blunt you have to exert more pressure to force the bar through - Husqvarna 365 | Operation Manual - Page 13
and cause serious or even fatal injury. • The more you use a chain the longer it becomes. It is therefore important to adjust the chain regularly to take up the slack. • Check the chain tension every time you refuel. NOTE! A new saw chain has a running-in period during which you should check the - Husqvarna 365 | Operation Manual - Page 14
oil flow is also adjustable. • The sizes of the chain oil tank and fuel tank have been chosen so that the saw will run out of fuel before running out of oil. This means that you should never run with a dry chain. However, this safety feature requires that you use the right sort of chain oil (if the - Husqvarna 365 | Operation Manual - Page 15
measures you should contact your service agent. D Lubricating the bar tip sprocket • Lubricate the bar tip sprocket each time you refuel. Use the special grease gun and a good quality bearing grease. F Checking wear on cutting equipment Saw chain Check the saw chain daily for: • Visible cracks in - Husqvarna 365 | Operation Manual - Page 16
necessary. • Whether the groove in the bar has become badly worn. Replace the bar if necessary. SAFETY INSTRUCTIONS HOW TO AVOID KICKBACK ! Kickback can happen very suddenly and violently; kicking the saw, bar and chain back at the user. If this happens when the chain is moving it can cause very - Husqvarna 365 | Operation Manual - Page 17
can lead to kickback if the kickback zone of the bar accidentally touches a branch, nearby tree or some other object. 7 Follow the instructions on sharpening and maintaining your bar and chain. When you replace the bar and chain use only combinations that are recommended by us. See the sections - Husqvarna 365 | Operation Manual - Page 18
FUEL CAP and FUEL LINES. Min. 3 m (10 ft) • Never start a chain saw unless the bar, chain and clutch cover are fitted correctly. (See section on "Assembly"). • Never start a chain saw indoors. Exhaust fumes can be dangerous. • Always store the chain saw and fuel away from any sources of sparks - Husqvarna 365 | Operation Manual - Page 19
tension can suddenly spring back into its natural position before or after you cut it. If you stand on the wrong side or start cutting in the wrong place it may strike you or your chain saw. This could make you lose control and cause a serious accident. Follow the instructions above, but do not use - Husqvarna 365 | Operation Manual - Page 20
before making a cut: 1 Make sure the bar will not jam in the cut. Two factors decide whether the chain will jam or the log will split. The first is how the log is supported and the second is whether it is in tension. In most cases you can avoid these problems by cutting in two stages; from the - Husqvarna 365 | Operation Manual - Page 21
2 The log is supported at one end. There is a high risk that it will split. A Start by cutting from below (about 1/3 of the way through). SAFETY INSTRUCTIONS 3 Tree felling technique ! It takes a lot of experience to fell a tree. Inexperienced users of chain saws should not fell trees. NEVER - Husqvarna 365 | Operation Manual - Page 22
INSTRUCTIONS C Clearing the trunk and preparing your retreat Remove any branches that are in the way. To do this it is best to work from the top down and keep the trunk between you and the chain Use full throttle and bring the bar and chain slowly into the tree. Make sure the tree does not start run - Husqvarna 365 | Operation Manual - Page 23
instructions" point 2 "Basic cutting technique". b) Decide which is the SAFEST way to release the tension and whether YOU are able to do it safely. In complicated situations the only safe method is to put aside your chain saw and use a winch. General advice: a) Position yourself so that you will - Husqvarna 365 | Operation Manual - Page 24
Cylinder cover. 2. Front handle. 3. Front hand guard. 4. Starter cover. 5. Chain oil tank. 6. Starter handle. 7. Adjuster screw, carburetor. 8. Choke control/Start throttle lock. 9. Rear handle. 10. Stop switch. Ignition on/off switch. 11. Fuel tank. 12. Muffler. 13. Bar tip sprocket. 14. Saw chain - Husqvarna 365 | Operation Manual - Page 25
side of the bar. Fit the clutch cover and locate the chain adjuster pin in the hole on the bar. Check that the drive links of the chain fit correctly on the drive sprocket and that the chain is in the groove on the bar. Tighten the bar nuts finger tight. Tension the chain by using the combination - Husqvarna 365 | Operation Manual - Page 26
the fuel tank should be emptied and cleaned. • This engine is certified to operate on unleaded gasoline. • When working at continuous high revs a higher octane rating is recommended. Two-stroke oil • For the best results use HUSQVARNA two-stroke oil, which is especially developed for chain saws - Husqvarna 365 | Operation Manual - Page 27
the fuel cap. Clean the fuel and chain oil tanks regularly. The fuel filter should be changed at least once a year. Contamination in the fuel tanks causes malfunction. Make sure the fuel is well mixed by shaking the container before fuelling. The volume of chain oil and fuel tanks are adjusted to - Husqvarna 365 | Operation Manual - Page 28
the saw engine without the bar, chain and clutch cover (chain brake) assembled - or else the clutch can come loose and cause personal injuries. • Always move the saw away from the fueling area before starting. • Place the saw on clear ground and make sure that the chain is not contacting anything - Husqvarna 365 | Operation Manual - Page 29
engine runs smoothly in every position. It should also be good margin to the rpm when the chain starts to rotate. ! Contact your servicing dealer, if the idle speed setting cannot be adjusted so that the chain stops. Do not use the saw until it has been properly adjusted or repaired. • The fuel - Husqvarna 365 | Operation Manual - Page 30
pop out and cause injuries. • Always be careful, when changing the recoil spring or the starter cord. Always wear safety goggles for eye protection. Tensioning the recoil spring • Lift the starter cord up in the notch on the starter pulley and turn the starter pulley 2 turns clockwise. NOTE! Check - Husqvarna 365 | Operation Manual - Page 31
• Starting problems • Engine power reduction • Unnecessary wear on the engine parts • Abnormal fuel consumption Clean the air filter daily or more often if the air is exceptionally dusty in the working area. • Disassemble the air filter by removing the air filter-cover and unscrew the filter. When - Husqvarna 365 | Operation Manual - Page 32
carburettor will overheat and lead to running problems or starting problems. Winter use During winter time, powder snow and cold weather can cause running problems, such as: • Too low engine temperature. • Icing on the air filter and carburetor. Therefore some special measures are required: • Partly - Husqvarna 365 | Operation Manual - Page 33
3 the sides of the bar. 4. Clean the spark plug and check the gap. The correct gap is 0,5 mm (0,020 inch). 5. Check the starter and the recoil spring. Clean the 5 fins on the flywheel. 6. Clean the cooling fins on the cylinder. 7. Clean or change the screen in the muffler. 7 8. Clean the - Husqvarna 365 | Operation Manual - Page 34
cu.in/cm3 Cylinder bore, inch/mm Stroke, inch/mm Idle speed, rpm Power, kW/ rpm 3,8/62,4 1,85/47 1,4/36 2 700 3,4/ 9 600 365 4,0/65,1 1,89/48 1,4/36 2 700 3,4/ 9 300 371XP 4,3/70,7 1,97/50 1,4/36 2 700 3,9/ 9 600 Recommended original and replacement bar and chain combinations These Husqvarna saw - Husqvarna 365 | Operation Manual - Page 35
, will be provided without charge to the owner if the part is under warranty. EMISSION CONTROL WARRANTY PARTS LIST 1. Carburetor and internal parts 2. Intake pipe, airfilter holder and carburetor bolts. 3. Airfilter and fuelfilter covered up to maintainance schedule. 4. Ignition System a) Spark Plug - Husqvarna 365 | Operation Manual - Page 36
´*3$G¶54¨ 1999W30
-
 1
1 -
 2
2 -
 3
3 -
 4
4 -
 5
5 -
 6
6 -
 7
7 -
8
-
9
-
10
-
11
-
12
-
13
-
14
-
15
-
16
-
17
-
18
-
19
-
20
-
21
-
22
-
23
-
24
-
25
-
26
-
27
-
28
-
29
-
30
-
31
-
32
-
33
-
34
-
35
-
36
 |
 |

362XP/365/371XP
101 90 43-95
Operator's manual
(EPA)
Please read these instructions carefully and make
sure you understand them before using the saw.