Husqvarna AR19H Owners Manual - Page 17
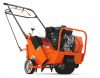
Rear Wheel Removal and Replacement: Model AR19
 |
View all Husqvarna AR19H manuals
Add to My Manuals
Save this manual to your list of manuals |
Page 17 highlights
Maintenance and Service Instructions Drive Wheel Shaft Removal and Replacement (Continued) 7. Pull sprocket and bearing from shaft. NOTE: Sprocket is double set screwed. To remove the bearings, you must first remove the collar by loosening the set screw, then insert pin punch into the hole next to the set screw and, using a hammer, with moderate striking, hit collar so that it rotates in the opposite direction the wheel would normally turn. If bearings are rusted in place they will have to be replaced along with the wheel and shaft. 8. Install bearings and sprocket loosely onto the shaft. Model AR19: hub side away from wheels. Model AR25 has 3 bearings. Wheel bearings should have hubs facing away from wheel. Wheel shaft bearing should have hub facing away from sprocket. 9. Bolt bearings into place. 10. Center the wheels between the wheel opening and the housing. Lock the collars in place and tighten set screws. 11. Align and tighten the sprocket (there are double set screws stacked two in each hole) use blue loctite with the key in place. 12. Replace the chain following procedures in section "Chain Removal and Replacement.(see page 16). 13. Adjust chain per section "Adjusting Chain Tension" and replace drive guard. (see page 17). Rear Wheel Removal and Replacement: Model AR19 1. Make sure unit is on level ground and engine is turned off. 2. Lower the rear wheel control handle to let the aerator rest on the tines. 3. Turn the rear wheel depth/stability control knob to adjust the rear wheels for minimum depth clockwise (more stability). 4. Remove the axle nut. Pull the axle bolt, then the wheel from the wheel carriage. 5. Install a new wheel with grease fitting facing out, with seals carefully in place on the wheel bushing.Insert axle bolt through wheel and wheel lift frame. Use washer and lock nut, tighten firmly. 6. Grease wheel bearings. Rear Wheel Removal and Replacement: Model AR25 1. Make sure unit is on level ground and the engine is shut off. 2. Lower the rear wheel control handle to let the aerator rest on the tines. 3. Turn the rear wheel depth/stability control knob to adjust the rear wheels for minimum depth clockwise for more stability. 4. Remove the hairpin cotter pin. (see Figure 18) 5. Slide the wheel assembly off the machine. (see Figure 18) 6. Install hairpin cotter pin into the axle when removed to prevent loss. Removable Wheel - Model AR25 Only Figure 18 17
-
 1
1 -
2
-
3
-
4
-
5
-
6
-
7
-
8
-
9
-
10
-
11
-
 12
12 -
 13
13 -
 14
14 -
 15
15 -
 16
16 -
 17
17 -
 18
18 -
 19
19 -
 20
20
 |
 |
