Husqvarna GT54CS Operation Manual - Page 5
Unassembled Parts, Assembly
 |
View all Husqvarna GT54CS manuals
Add to My Manuals
Save this manual to your list of manuals |
Page 5 highlights
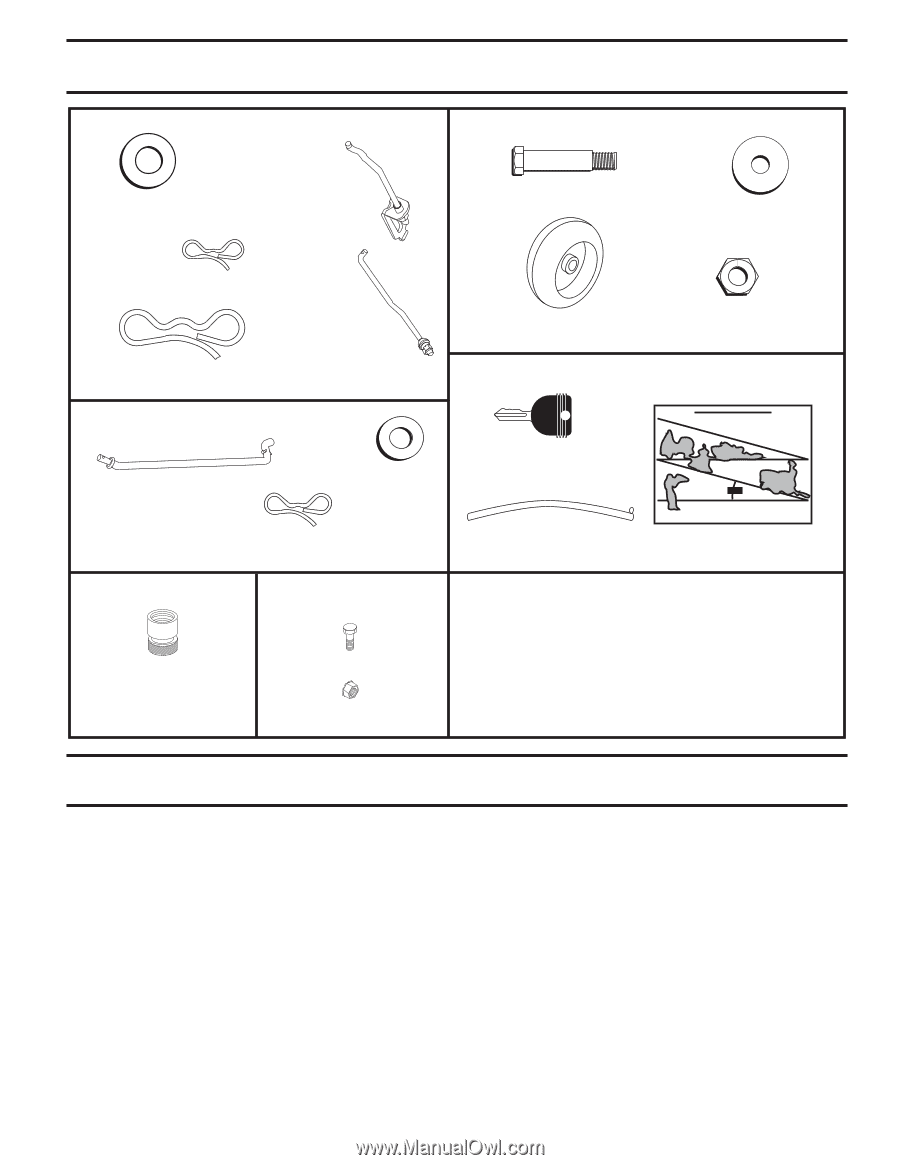
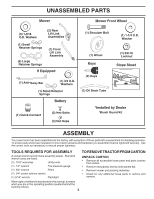
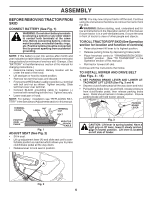
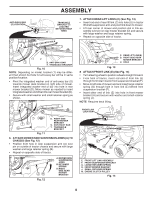
UNASSEMBLED PARTS Mower Mower Front Wheel (5) 1-3/16 O.D. Washers (2) Rear Lift Link Assemblies (1) Small Retainer Springs (1) Front Lift Link Assembly (5) Large Retainer Springs If Equipped (1) Anti-Sway Bar (1) 3/4 O.D. Washers (1) Small Retainer Springs Battery (1) Quick Connect (2) Hex Bolts (2) Nut Keps (1) Shoulder Bolt (1) 1-1/4 O.D. Washer (1) Wheel Keys (2) Keys (1) 3/8-16 Locknut Slope Sheet (1) Oil Drain Tube *Installed by Dealer *Brush Guard Kit ASSEMBLY Your new tractor has been assembled at the factory with exception of those parts left unassembled for shipping purposes. To ensure safe and proper operation of your tractor all parts and hardware you assemble must be tightened securely. Use the correct tools as necessary to ensure proper tightness. TOOLS REQUIRED FOR ASSEMBLY TO REMOVE TRACTOR FROM CARTON A socket wrench set will make assembly easier. Standard wrench sizes are listed. (2) 7/16" wrenches Utility knife (1) 1/2" wrench Tire pressure gauge (1) 3/4" wrench Pliers (1) 3/4" socket w/drive ratchet (1) 9/16" wrench Flashlight UNPACK CARTON • Remove all accessible loose parts and parts cartons from carton. • Remove end panels and lay side panels flat. • Remove mower and packing materials. • Check for any additional loose parts or cartons and remove. When right or left hand is mentioned in this manual, it means when you are in the operating position (seated behind the steering wheel). 5
-
 1
1 -
 2
2 -
 3
3 -
 4
4 -
 5
5 -
 6
6 -
 7
7 -
 8
8 -
 9
9 -
 10
10 -
 11
11 -
12
-
13
-
14
-
15
-
16
-
17
-
18
-
19
-
20
-
21
-
22
-
23
-
24
-
25
-
26
-
27
-
28
-
29
-
30
-
31
-
32
-
33
-
34
-
35
-
36
-
37
-
38
-
39
-
40
-
41
-
42
-
43
-
44
-
45
-
46
-
47
-
48
-
49
-
50
-
51
-
52
-
53
-
54
-
55
-
56
-
57
-
58
-
59
-
60
 |
 |