Husqvarna LC 121P Operation Manual - Page 4
Assembly - lawn mower
 |
View all Husqvarna LC 121P manuals
Add to My Manuals
Save this manual to your list of manuals |
Page 4 highlights
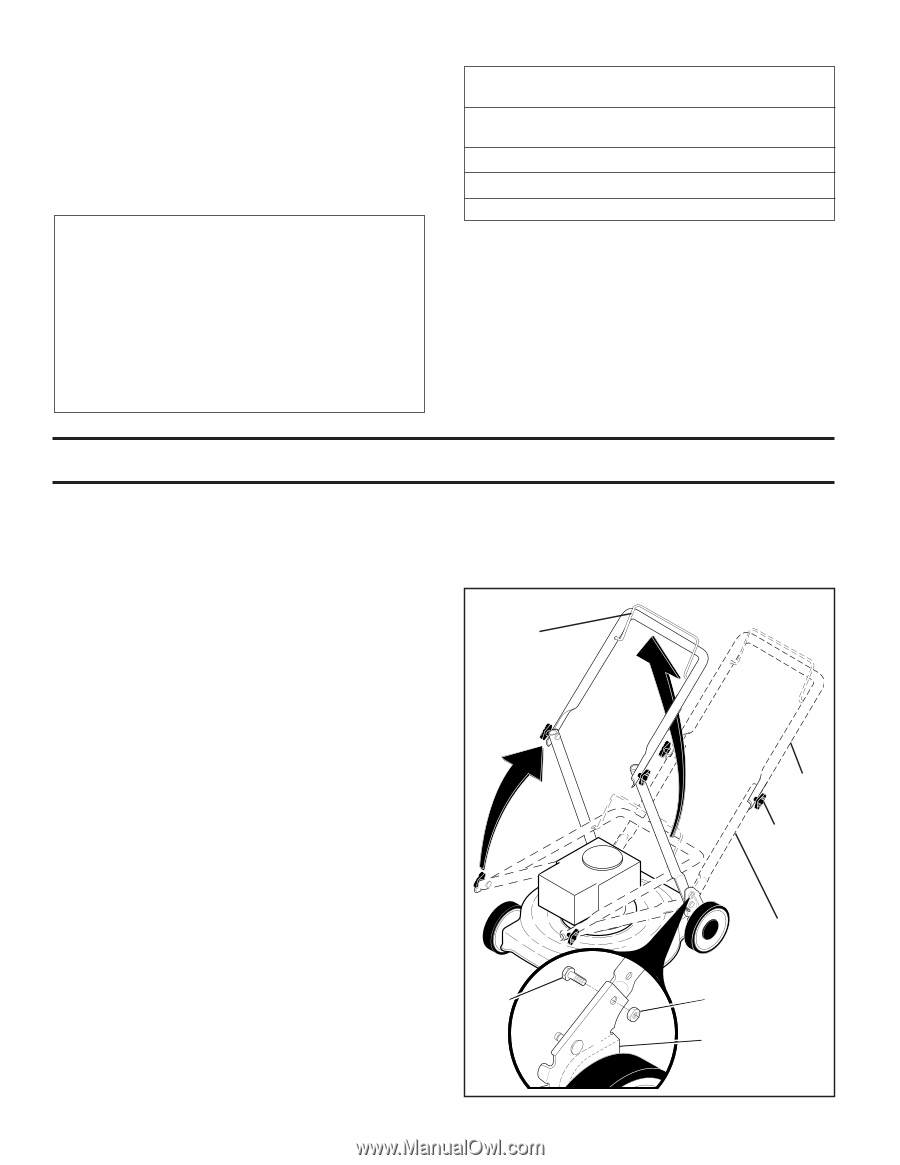
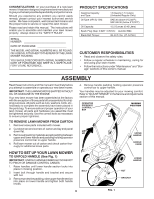
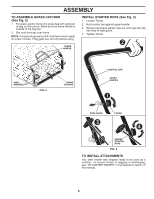
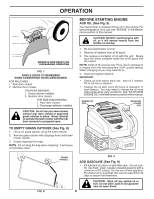
CONGRATULATIONS on your purchase of a new lawn mower. Ithasbeendesigned,engineeredandmanufactured to give you the best possible dependability and performance. Should you experience any problem you cannot easily remedy, please contact your nearest authorized service center. We have competent, well-trained technicians and the proper tools to service or repair this lawn mower. Please read and retain this manual. The instructions will enable you to assemble and maintain your lawn mower properly. Always observe the "SAFETY RULES". SERIAL NUMBER DATE OF PURCHASE THE MODEL AND SERIAL NUMBERS WILL BE FOUND ON A DECAL ATTACHED TO THE REAR OF THE LAWN MOWER HOUSING. YOU SHOULD RECORD BOTH SERIAL NUMBER AND DATE OF PURCHASE AND KEEP IN A SAFE PLACE FOR FUTURE REFERENCE. PRODUCT SPECIFICATIONS Gasoline Capacity and Type: 1.6 Quarts (1.51 Liters) (Unleaded Regular Only) Oil Type (API SJ-SN): SAE 30 (above 0°C/32°F); SAE 5W-30 (below 0°C/32°F) Oil Capacity: 15.5 Ounces (0.43 Liters) Spark Plug (Gap: 0.020" / 0.5mm): Autolite 3924 Blade Bolt Torque: 35-40 ft. lbs. (47-54 Nm) CUSTOMER RESPONSIBILITIES • Read and observe the safety rules. • Follow a regular schedule in maintaining, caring for and using your lawn mower. • Follow the instructions under "Maintenance" and "Storage" sections of this owner's manual. ASSEMBLY Read these instructions and this manual in its entirety before you attempt to assemble or operate your new lawn mower. IMPORTANT: THIS LAWN MOWER IS SHIPPED WITHOUT OIL OR GASOLINE IN THE ENGINE. Your new lawn mower has been assembled at the factory with the exception of those parts left unassembled for shipping purposes. All parts such as nuts, washers, bolts, etc., necessary to complete the assembly have been placed in the parts bag. To ensure safe and proper operation of your lawn mower, all parts and hardware you assemble must be tightened securely. Use the correct tools as necessary to ensure proper tightness. TO REMOVE LAWN MOWER FROM CARTON 1. Remove loose parts included with mower. 2. Cut down two end corners of carton and lay end panel down flat. 3. Remove all packing materials except padding between upper and lower handle and padding holding operator presence control bar to upper handle. 4. Roll lawn mower out of carton and check carton thorougly for additional loose parts. 4. Remove handle padding holding operator presence control bar to upper handle. Your handles may be adjusted for your mowing comfort. Refer to "ADJUST HANDLE" in the Service and Adjustments section of this manual. OPERATOR PRESENCE CONTROL BAR LIFT UP MOWING POSITION LIFT UP UPPER HANDLE HANDLE KNOB HOW TO SET UP YOUR LAWN MOWER TO UNFOLD HANDLE (See Fig. 1) IMPORTANT: UNFOLD HANDLE CAREFULLY SO AS NOT TO PINCH OR DAMAGE CONTROL CABLES. 1. Raise handles until lower handle section locks into place in mowing position. 2. Insert bolt through handle and bracket and secure with nut. 3. Remove protective padding, raise upper handle section into place on lower handle and tighten both handle knobs. BOLT LOWER HANDLE NUT BRACKET 4 FIG. 1
-
 1
1 -
 2
2 -
 3
3 -
 4
4 -
 5
5 -
 6
6 -
 7
7 -
 8
8 -
 9
9 -
 10
10 -
11
-
12
-
13
-
14
-
15
-
16
-
17
-
18
-
19
-
20
-
21
-
22
-
23
-
24
-
25
-
26
-
27
-
28
-
29
-
30
-
31
-
32
 |
 |