Husqvarna PZ 60P Installation Instructions - Page 2
Deck Belt Installation
 |
View all Husqvarna PZ 60P manuals
Add to My Manuals
Save this manual to your list of manuals |
Page 2 highlights
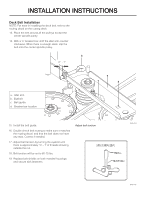
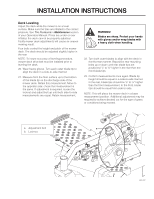
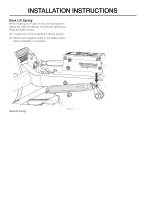
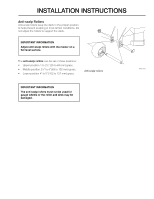
INSTALLATION INSTRUCTIONS Deck Belt Installation NOTE: For ease in installing the deck belt, refer to the routing decal on the cutting deck. 13. Place the belt around all the pulleys except the center spindle pulley. 14. With a ½" breaker bar, shift the idler arm counter clockwise. When there is enough slack, slip the belt onto the center spindle pulley. b 7/8" - 1" a c d a. Idler arm b. Eyebolt c. Belt guide d. Breaker bar location 15. Install the belt guide. 16. Double check belt routing to make sure it matches the routing decal, and that the belt does not have any twist. Correct if needed. 17. Adjust belt tension by turning the eyebolt until there is approximately 7/8" - 1" of threads showing outside the nut. 18. Belt tension will be set to 60-70 lbs. 19. Replace belt shields on both mandrel housings and secure with fasteners. Adjust belt tension 8065-054 8065-047
-
 1
1 -
 2
2 -
 3
3 -
 4
4 -
 5
5 -
 6
6 -
 7
7 -
 8
8
 |
 |
