Husqvarna SRD17530 Owners Manual - Page 9
Check For Proper Position Of Belts - mower
 |
View all Husqvarna SRD17530 manuals
Add to My Manuals
Save this manual to your list of manuals |
Page 9 highlights
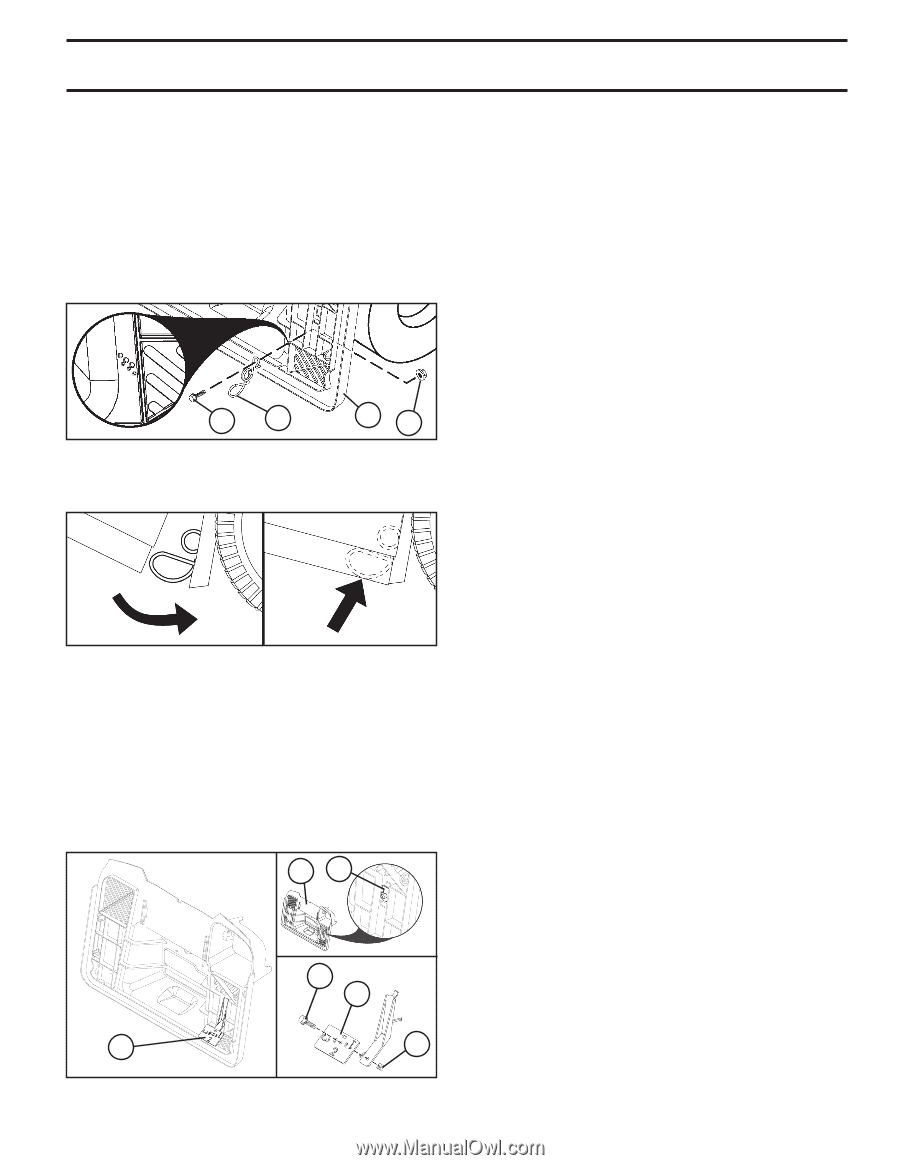
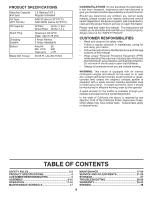
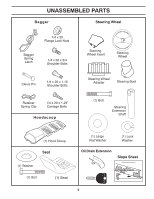
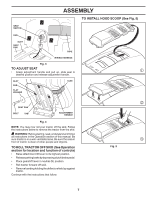
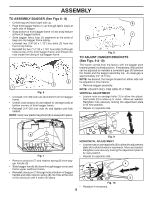
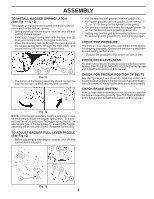
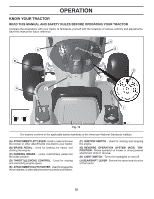
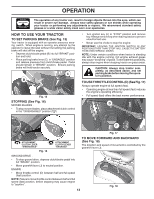
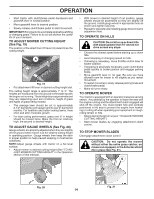
ASSEMBLY TO INSTALL BAGGER SPRING LATCH (See Fig. 11 & 12) The bagger spring latches are located on the back plate (1), one in each of the bottom corners. • Before installing, tractor engine must be shut off and parking brake engaged. • Install each bagger spring latch with the loop end (2) down and facing towards the bagger assembly. • Place the mounting bolt (3) through the curved end of the bagger spring latch, through the back plate, and secure with nut (4) as shown. Tighten firmly. 3 2 14 Fig. 11 • The bottom of the bagger assembly should contact the loop end so that it is held securely when closed. • For the heaviest/wet grasses, remove paddle (3). • For lighter grasses use the paddle (3) on setting "1", "2", or "3" ("3" being for the lightest or dry grass). • Choose your setting and rotate the bagger paddle (3) so that the desired number (setting) faces you. • Setting may be changed by loosening fasteners (4 and 5), removing/rotating paddle (3), and tightening again. CHECK TIRE PRESSURE The tires on your tractor were overinflated at the factory for shipping purposes. Correct tire pressure is important for best cutting performance. • Reduce tire pressure to PSI shown on side of tires. CHECK DECK LEVELNESS For best cutting results, mower housing should be properly leveled. See "TO LEVEL MOWER HOUSING" in the Service and Adjustments section of this manual. CHECK FOR PROPER POSITION OF BELTS See the figures that are shown for replacing motion and mower blade drive belts in the Service and Adjustments section of this manual. Verify that the belts are routed correctly. CHECK BRAKE SYSTEM After you learn how to operate your tractor, check to see that the brake is operating properly. See "TO CHECK BRAKE" in the Service and Adjustments section of this manual. Fig. 12 NOTE: If the bagger assembly height is adjusted, it may be necessary to adjust the bagger spring latch. To adjust, remove the nut (4) and move the bagger spring latch to the appropriate hole in the backplate (1), ensuring the bagger assembly will be securely closed. Retighten nut securely. TO ADJUST BAGGER FULL LEVER/PADDLE (See Fig 13) • Before adjusting, tractor engine must be shut off and parking brake engaged. 12 4 3 3 Fig. 13 5 9
-
 1
1 -
2
-
3
-
 4
4 -
 5
5 -
 6
6 -
 7
7 -
 8
8 -
 9
9 -
 10
10 -
 11
11 -
 12
12 -
 13
13 -
 14
14 -
15
-
16
-
17
-
18
-
19
-
20
-
21
-
22
-
23
-
24
-
25
-
26
-
27
-
28
-
29
-
30
-
31
-
32
-
33
-
34
-
35
-
36
-
37
-
38
-
39
-
40
-
41
-
42
-
43
-
44
-
45
-
46
-
47
-
48
-
49
-
50
-
51
-
52
-
53
-
54
-
55
-
56
-
57
-
58
-
59
-
60
-
61
-
62
-
63
-
64
-
65
-
66
-
67
-
68
 |
 |