Husqvarna W520 Owner Manual - Page 13
Operation
 |
View all Husqvarna W520 manuals
Add to My Manuals
Save this manual to your list of manuals |
Page 13 highlights
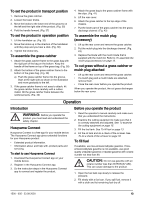
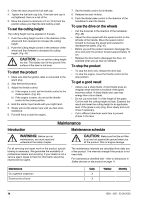
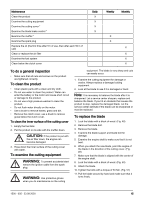
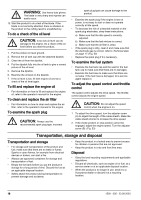
To set the product in transport position 1. Remove the grass catcher. 2. Loosen the lower knobs. 3. Move the knobs to the lower end of the grooves on the left and the right side of the product. (Fig. 35) 4. Fold the handle forward. (Fig. 37) To set the product in operation position 1. Lift the handlebar up. (Fig. 32) 2. Move the knobs up in the direction of the handlebar until they stop and you hear a click. (Fig. 36) 3. Tighten the knobs fully. To assemble the grass catcher 1. Attach the grass catcher frame to the grass bag with the rigid part of the bag on the bottom. Keep the handle of the frame on top of the grass bag. (Fig. 38) 2. Attach the bottom of the grass catcher frame to the bottom of the grass bag. (Fig. 39) a) Push the grass catcher frame into the groove. Start at the right side as shown in the illustration and move gradually to the left. 3. If the grass catcher frame is not easy to attach, hit the grass catcher frame carefully with a rubber mallet. Hit the grass catcher frame between the reinforcements. (Fig. 40) 4. Attach the grass bag to the grass catcher frame with the clips. (Fig. 41) 5. Lift the rear cover. 6. Attach the grass catcher to the top edge of the chassis. 7. Put the lower part of the grass catcher into the grass discharge channel. (Fig. 42) To assemble the mulch plug (accessory) 1. Lift up the rear cover and remove the grass catcher. 2. Put the mulch plug into the discharge channel. (Fig. 43) 3. Replace the blade with the mulch blade that is supplied with the mulch kit. Refer to To assemble the mulch plug (accessory) on page 13. To cut grass without a grass catcher or mulch plug attached • Lift up the rear cover and remove the grass catcher. • If a mulch plug and a mulch blade are attached, remove them. • Close the rear cover before you operate the product. When you operate the product, the cut grass discharges below the rear cover. Operation Introduction WARNING: Before you operate the product, you must read and understand the safety chapter. Husqvarna Connect Husqvarna Connect is a free app for your mobile device. The Husqvarna Connect app gives extended functions for your Husqvarna product: • Extended product information. • Information about, and help with, product parts and servicing. To start to use Husqvarna Connect 1. Download the Husqvarna Connect app on your mobile device. 2. Register in the Husqvarna Connect app. 3. Do the instruction steps in the Husqvarna Connect app to connect and register the product. Before you operate the product 1. Read the operator's manual carefully and make sure that you understand the instructions. 2. Examine the cutting equipment to make sure that it is correctly attached and adjusted. See To examine the cutting equipment on page 15. 3. Fill the fuel tank. See To fill fuel on page 13. 4. Fill the oil tank and do a check of the oil level. See To do a check of the oil level on page 16. To fill fuel If available, use low-emission/alkylate gasoline. If lowemission/alkylate gasoline is not available, use good quality unleaded gasoline or leaded gasoline with octane number not less than 90. CAUTION: Do not use gasoline with an octane number less than 90 RON (87 AKI). This can cause damage to the product. 1. Open the fuel tank cap slowly to release the pressure. 2. Fill slowly with a fuel can. If you spill fuel, remove it with a cloth and let remaining fuel dry off. 1500 - 005 - 23.09.2020 13
-
 1
1 -
2
-
3
-
4
-
5
-
6
-
7
-
 8
8 -
 9
9 -
 10
10 -
 11
11 -
 12
12 -
 13
13 -
 14
14 -
 15
15 -
 16
16 -
 17
17 -
 18
18 -
19
-
20
-
21
-
22
-
23
-
24
-
25
-
26
-
27
-
28
-
29
-
30
-
31
-
32
-
33
-
34
-
35
-
36
-
37
-
38
-
39
-
40
-
41
-
42
-
43
-
44
 |
 |