Husqvarna W520 Owner Manual - Page 15
To do a general inspection, To clean the product, CAUTION, To examine the cutting equipment, WARNING
 |
View all Husqvarna W520 manuals
Add to My Manuals
Save this manual to your list of manuals |
Page 15 highlights
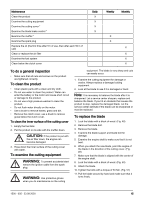
Maintenance Clean the product Examine the cutting equipment Examine the cutting cover * Examine the blade brake control * Examine the muffler * Examine the spark plug Replace the oil (the first time after 5 h of use, then after each 50 h of use) Clean or replace the air filter Examine the fuel system Clean below the clutch cover Daily X X X X Weekly Monthly X X X X X X To do a general inspection • Make sure that all nuts and screws on the product are tightened correctly. To clean the product • Clean plastic parts with a clean and dry cloth. • Do not use water to clean the product. Water can enter the battery or the motor and cause short circuit or damage to the product. • Do not use a high pressure washer to clean the product. • Do not flush water directly on the motor. • Use a brush to remove leaves, grass and dirt. • Remove the clutch cover, use a brush to remove grass below the clutch cover. To clean the inner surface of the cutting cover 1. Empty the fuel tank. 2. Put the product on its side with the muffler down. CAUTION: If the product is put with the air filter down, the engine can become damaged. 3. Hose down the inner surface of the cutting cover with water. To examine the cutting equipment WARNING: To prevent accidental start remove the ignition cable from the spark plug. WARNING: Use protective gloves when you do maintenance on the cutting equipment. The blade is very sharp and cuts can easily occur. 1. Examine the cutting equipment for damage or cracks. Always replace a damaged cutting equipment. 2. Look at the blade to see if it is damaged or blunt. Note: It is necessary to balance the blade after it is sharpened. Let a service center sharpen, replace and balance the blade. If you hit an obstacle that causes the product to stop, replace the damaged blade. Let the service center estimate if the blade can be sharpened or must be replaced. To replace the blade 1. Lock the blade with a block of wood. (Fig. 48) 2. Remove the blade bolt. 3. Remove the blade. 4. Examine the blade support and blade bolt for damage. 5. Examine the engine shaft to make sure that it is not bent. 6. When you attach the new blade, point the angles of the blade in the direction of the cutting cover. (Fig. 49) 7. Make sure that the blade is aligned with the center of the engine shaft. 8. Lock the blade with a block of wood. (Fig. 50) 9. Attach the blade. 10. Tighten the bolts with a torque of 50 Nm. (Fig. 51) 11. Pull the blade around by hand and make sure that it turns freely. 1500 - 005 - 23.09.2020 15
-
 1
1 -
2
-
3
-
4
-
5
-
6
-
7
-
8
-
9
-
 10
10 -
 11
11 -
 12
12 -
 13
13 -
 14
14 -
 15
15 -
 16
16 -
 17
17 -
 18
18 -
 19
19 -
 20
20 -
21
-
22
-
23
-
24
-
25
-
26
-
27
-
28
-
29
-
30
-
31
-
32
-
33
-
34
-
35
-
36
-
37
-
38
-
39
-
40
-
41
-
42
-
43
-
44
 |
 |
