IBM 1332 User Guide - Page 203
Multipurpose tray/lower deflector assembly removal, Remove the solenoid mounting screw C.
 |
View all IBM 1332 manuals
Add to My Manuals
Save this manual to your list of manuals |
Page 203 highlights
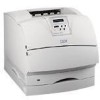
Infoprint 1332/1352/1372 Multipurpose tray/lower deflector assembly removal 1. Open the multipurpose tray to a position that allows the left and right tray hinge slots (A) to align with the rectangular mounting posts (B). Pull upward on each tray hinge to remove the tray from the two mounting posts. Warning: Be careful not to break the hinges. B A 2. Remove the upper paper deflector. See "Upper paper deflector assembly removal" on page 4-63. 3. Remove the solenoid mounting screw (C). 4. Remove the screws (D) mounting the multipurpose tray/lower deflector assembly. 5. Remove the multipurpose tray/lower deflector assembly. D(102) C(102) D(104) Repair information 4-47
-
 1
1 -
2
-
3
-
4
-
5
-
6
-
7
-
8
-
9
-
10
-
11
-
12
-
13
-
14
-
15
-
16
-
17
-
18
-
19
-
20
-
21
-
22
-
23
-
24
-
25
-
26
-
27
-
28
-
29
-
30
-
31
-
32
-
33
-
34
-
35
-
36
-
37
-
38
-
39
-
40
-
41
-
42
-
43
-
44
-
45
-
46
-
47
-
48
-
49
-
50
-
51
-
52
-
53
-
54
-
55
-
56
-
57
-
58
-
59
-
60
-
61
-
62
-
63
-
64
-
65
-
66
-
67
-
68
-
69
-
70
-
71
-
72
-
73
-
74
-
75
-
76
-
77
-
78
-
79
-
80
-
81
-
82
-
83
-
84
-
85
-
86
-
87
-
88
-
89
-
90
-
91
-
92
-
93
-
94
-
95
-
96
-
97
-
98
-
99
-
100
-
101
-
102
-
103
-
104
-
105
-
106
-
107
-
108
-
109
-
110
-
111
-
112
-
113
-
114
-
115
-
116
-
117
-
118
-
119
-
120
-
121
-
122
-
123
-
124
-
125
-
126
-
127
-
128
-
129
-
130
-
131
-
132
-
133
-
134
-
135
-
136
-
137
-
138
-
139
-
140
-
141
-
142
-
143
-
144
-
145
-
146
-
147
-
148
-
149
-
150
-
151
-
152
-
153
-
154
-
155
-
156
-
157
-
158
-
159
-
160
-
161
-
162
-
163
-
164
-
165
-
166
-
167
-
168
-
169
-
170
-
171
-
172
-
173
-
174
-
175
-
176
-
177
-
178
-
179
-
180
-
181
-
182
-
183
-
184
-
185
-
186
-
187
-
188
-
189
-
190
-
191
-
192
-
193
-
194
-
195
-
196
-
197
-
 198
198 -
 199
199 -
 200
200 -
 201
201 -
 202
202 -
 203
203 -
 204
204 -
 205
205 -
 206
206 -
 207
207 -
 208
208 -
209
-
210
-
211
-
212
-
213
-
214
-
215
-
216
-
217
-
218
-
219
-
220
-
221
-
222
-
223
-
224
-
225
-
226
-
227
-
228
-
229
-
230
-
231
-
232
-
233
-
234
-
235
-
236
-
237
-
238
-
239
-
240
-
241
-
242
-
243
-
244
-
245
-
246
-
247
-
248
-
249
-
250
-
251
-
252
-
253
-
254
-
255
-
256
-
257
-
258
-
259
-
260
-
261
-
262
-
263
-
264
-
265
-
266
-
267
-
268
-
269
-
270
-
271
-
272
-
273
-
274
-
275
-
276
-
277
-
278
-
279
-
280
-
281
-
282
-
283
-
284
-
285
-
286
-
287
-
288
-
289
-
290
-
291
-
292
-
293
-
294
-
295
-
296
-
297
-
298
-
299
-
300
-
301
-
302
-
303
-
304
-
305
-
306
-
307
-
308
-
309
-
310
-
311
-
312
-
313
-
314
-
315
-
316
-
317
-
318
-
319
-
320
-
321
-
322
-
323
-
324
-
325
-
326
-
327
-
328
-
329
-
330
-
331
-
332
 |
 |

Repair information
4-47
Infoprint 1332/1352/1372
Multipurpose tray/lower deflector assembly removal
1.
Open the multipurpose tray to a position that allows the left and right tray hinge slots (A) to align
with the rectangular mounting posts (B). Pull upward on each tray hinge to remove the tray from
the two mounting posts.
Warning:
Be careful not to break the hinges.
2.
Remove the upper paper deflector. See
“Upper paper deflector assembly removal” on
page 4-63
.
3.
Remove the solenoid mounting screw (C).
4.
Remove the screws (D) mounting the multipurpose tray/lower deflector assembly.
5.
Remove the multipurpose tray/lower deflector assembly.
B
A
D(102)
D(104)
C(102)