IBM 2889 Hardware Maintenance Manual - Page 34
remove, hard-disk, password
 |
View all IBM 2889 manuals
Add to My Manuals
Save this manual to your list of manuals |
Page 34 highlights
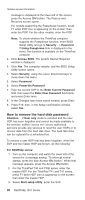
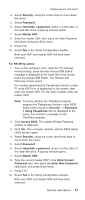
Related service information message is displayed at the lower-left of the screen, press the Access IBM button. The Rescue and Recovery screen opens. For models supporting the Passphrase function, press F1 while POP icon is appearing on the screen; then enter the POP. For the other models, enter the POP. Note: To check whether the ThinkPad computer supports the Passphrase function, enter BIOS Setup Utility and go to Security --> Password. If Using Passphrase item is displayed in the menu, this function is available on the ThinkPad computer. 2. Click Access BIOS. The system Restart Required window is displayed. 3. Click Yes. The computer restarts, and the BIOS Setup Utility screen opens. 4. Select Security, using the cursor directional keys to move down the menu. 5. Select Password. 6. Select Power-On Password. 7. Type the current SVP in the Enter Current Password field. then leave the Enter New Password field blank, and press Enter twice. 8. In the Changes have been saved window, press Enter. 9. Press F10; then, in the Setup confirmation window, select Yes . How to remove the hard-disk password Attention: If User only mode is selected and the user HDP has been forgotten and cannot be made available to the servicer, neither Lenovo nor Lenovo authorized servicers provide any services to reset the user HDPs or to recover data from the hard disk drive. The hard disk drive can be replaced for a scheduled fee. To remove a user HDP that has been forgotten, when the SVP and the master HDP are known, do the following: For R50/R50p series: 1. Turn on the computer and watch the lower left of the screen for a message saying, "To interrupt normal startup, press the blue Access IBM button." When that message appears, press the Access IBM button. 2. For the ThinkPad T40 and T40p series, enter the master HDP. For the ThinkPad T41 and T41 series, press F1 while HDP icon is appearing on the screen; then enter the master HDP. 3. Select Start setup utility. Enter the SVP. 30 R50/R50p, R51 Series
-
 1
1 -
2
-
3
-
4
-
5
-
6
-
7
-
8
-
9
-
10
-
11
-
12
-
13
-
14
-
15
-
16
-
17
-
18
-
19
-
20
-
21
-
22
-
23
-
24
-
25
-
26
-
27
-
28
-
 29
29 -
 30
30 -
 31
31 -
 32
32 -
 33
33 -
 34
34 -
 35
35 -
 36
36 -
 37
37 -
 38
38 -
 39
39 -
40
-
41
-
42
-
43
-
44
-
45
-
46
-
47
-
48
-
49
-
50
-
51
-
52
-
53
-
54
-
55
-
56
-
57
-
58
-
59
-
60
-
61
-
62
-
63
-
64
-
65
-
66
-
67
-
68
-
69
-
70
-
71
-
72
-
73
-
74
-
75
-
76
-
77
-
78
-
79
-
80
-
81
-
82
-
83
-
84
-
85
-
86
-
87
-
88
-
89
-
90
-
91
-
92
-
93
-
94
-
95
-
96
-
97
-
98
-
99
-
100
-
101
-
102
-
103
-
104
-
105
-
106
-
107
-
108
-
109
-
110
-
111
-
112
-
113
-
114
-
115
-
116
-
117
-
118
-
119
-
120
-
121
-
122
-
123
-
124
-
125
-
126
-
127
-
128
-
129
-
130
-
131
-
132
-
133
-
134
-
135
-
136
-
137
-
138
-
139
-
140
-
141
-
142
-
143
-
144
-
145
-
146
-
147
-
148
-
149
-
150
-
151
-
152
-
153
-
154
-
155
-
156
-
157
-
158
-
159
-
160
-
161
-
162
-
163
-
164
-
165
-
166
-
167
-
168
-
169
-
170
-
171
-
172
-
173
-
174
-
175
-
176
-
177
-
178
-
179
-
180
-
181
-
182
-
183
-
184
-
185
-
186
-
187
-
188
-
189
-
190
-
191
-
192
-
193
-
194
-
195
-
196
-
197
-
198
-
199
-
200
-
201
-
202
-
203
-
204
-
205
-
206
-
207
-
208
-
209
-
210
-
211
-
212
-
213
-
214
-
215
-
216
-
217
-
218
-
219
-
220
-
221
-
222
-
223
-
224
-
225
-
226
-
227
-
228
-
229
-
230
-
231
-
232
 |
 |
