IBM x3455 User Manual - Page 44
Installing, drive, Removing, assembly
 |
UPC - 000435947109
View all IBM x3455 manuals
Add to My Manuals
Save this manual to your list of manuals |
Page 44 highlights
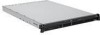
Installing a drive in the rear hard disk drive cage The following notes describe the types of hard disk drives that the server supports and other information that you must consider when you install a hard disk drive: v The server supports two 25.4 mm (1-inch), slim, 3.5-inch non-hot-swap hard disk drives. v The server does not support hot-swap hard disk drives. v The server comes with a front hard disk drive cage and a rear hard disk drive cage. In the standard configuration, the server comes with a hard disk drive in the front drive cage. You can install an additional hard disk drive in the rear drive cage. The rear drive cage is adjacent to the power supply. v A non-hot-swap hard disk drive does not require a backplane or tray, and it does not have indicator LEDs. However, you must install the drive in either the front or rear drive cage that comes with the server. v The front hard disk drive cage is under the CD or DVD drive assembly. Therefore, you must remove the CD or DVD drive assembly to access the front hard disk drive cage. If you decide to replace the hard disk drive in the front drive cage, follow the instructions in "Replacing the front hard disk drive" on page 36. v You can install either two SAS hard disk drives or two SATA hard disk drives in the server. The server does not support combining SAS and SATA drives in the same configuration. Operating the server with an unsupported hard disk drive configuration might cause unpredictable results. For a list of supported drives for the server, see http://www.ibm.com/servers/eserver/serverproven/compat/us/. v If you install only one hard disk drive, for faster startup, install it in the primary startup device location; that is, the front drive cage. If you install a second hard disk drive, install it in the rear drive cage. v You do not have to set any jumpers or switches on the hard disk drives before you install the drives in the server. Removing the rear hard disk drive cage assembly Before you can install a hard disk drive in the rear hard disk drive cage or remove a drive from this drive cage, you must first remove this drive cage from the server. To remove the rear hard disk drive cage assembly, complete the following steps. Rear hard disk drive cage Retention latch 30 System x3455 Types 7984 and 7986: User's Guide
-
 1
1 -
2
-
3
-
4
-
5
-
6
-
7
-
8
-
9
-
10
-
11
-
12
-
13
-
14
-
15
-
16
-
17
-
18
-
19
-
20
-
21
-
22
-
23
-
24
-
25
-
26
-
27
-
28
-
29
-
30
-
31
-
32
-
33
-
34
-
35
-
36
-
37
-
38
-
 39
39 -
 40
40 -
 41
41 -
 42
42 -
 43
43 -
 44
44 -
 45
45 -
 46
46 -
 47
47 -
 48
48 -
 49
49 -
50
-
51
-
52
-
53
-
54
-
55
-
56
-
57
-
58
-
59
-
60
-
61
-
62
-
63
-
64
-
65
-
66
-
67
-
68
-
69
-
70
-
71
-
72
-
73
-
74
-
75
-
76
-
77
-
78
-
79
-
80
-
81
-
82
-
83
-
84
-
85
-
86
-
87
-
88
-
89
-
90
-
91
-
92
-
93
-
94
-
95
-
96
-
97
-
98
-
99
-
100
-
101
-
102
-
103
-
104
-
105
-
106
-
107
-
108
-
109
-
110
-
111
-
112
 |
 |
