Image Fitness Renew 900 Canadian English Manual - Page 8
Assembly
 |
View all Image Fitness Renew 900 manuals
Add to My Manuals
Save this manual to your list of manuals |
Page 8 highlights
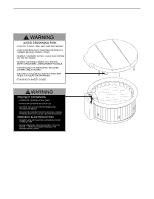
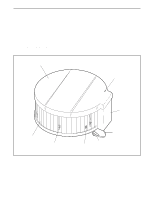
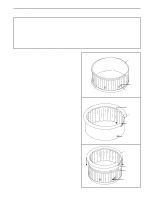
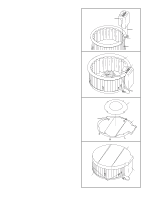
ASSEMBLY Before beginning assembly, carefully read the following information and instructions: • Place all parts in a cleared area and remove the packing materials; do not dispose of the packing materials until assembly is completed. • Assembly requires two people. • Assembly requires the included air pump. • Read each assembly step before you begin. • During assembly, make sure that all parts are oriented as shown in the drawings. 1. Before beginning assembly, be sure that you have read and understand the information in the box above and on the previous page. Unfold the pre-assembled Fabric Spa Surround (8) and Side Panels (1, 2) until the assembled unit is round. Check the self-attaching connections between the Fabric Spa Surround (8) and Side Panels (1, 2) to be sure that all connections are firm. Be sure that all six cover buckles are fully inserted through the slots in the Side Panels (1, 2). 2. Unfold the Inflatable Spa Liner (9). Attach the nozzle on the included air pump to the valve on the side of the Inflatable Spa Liner (9). Use the air pump to fill the sides of the Inflatable Spa Liner with air. Attach the nozzle on the air pump to the valve on the floor of the Inflatable Spa Liner (9). Use the air pump to fill the bottom of the Inflatable Spa Liner with air. Attach the nozzle on the air pump to the valve on top of the Inflatable Spa Liner (9). Use the air pump to fill the cushion on top of the Inflatable Spa Liner with air. 3. Be sure that the flap on the Fabric Spa Surround (8) is on the outside of the Fabric Spa Surround and Side Panels (1, 2). Insert the Inflatable Spa Liner (9) into the Fabric Spa Surround. Align the valve in the Inflatable Spa Liner with the hole in the Fabric Spa Surround and the Inflation Side Panel (2). Flip the flap on the Fabric Spa Surround (8) over the low section of the Inflatable Spa Liner (9). 1 1, 2 2 3 8 8 Buckle Slot Inflate here second 9 Inflate here third Inflate here first 9 8-Flap 1, 2 Valve must be visible in this hole
-
 1
1 -
2
-
 3
3 -
 4
4 -
 5
5 -
 6
6 -
 7
7 -
 8
8 -
 9
9 -
 10
10 -
 11
11 -
 12
12 -
 13
13 -
14
-
15
-
16
-
17
-
18
-
19
-
20
-
21
-
22
-
23
 |
 |
