Insignia IS-PA040720 User Manual (English) - Page 2
Functions And Controls, Power Supply, Connections, Headphone Control
 |
View all Insignia IS-PA040720 manuals
Add to My Manuals
Save this manual to your list of manuals |
Page 2 highlights
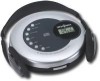
FUNCTIONS AND CONTROLS 12 2 5 9 3 10 13 16 17 18 20 1 11 8 4 14 7 15 6 19 17 7 15 8 14 18 1. DC INPUT JACK Jack for 4.5V external power supply 2. MODE/RIGHT(4) CD AUDIO/MP3: select the different playing possibilities; REPEAT 1/ ALL/DIR., INTRO, RANDOM, and MP3 file SEARCH-RIGHT. RADIO: Select the FM Stereo mode ON/OFF. 3. RESUME/LEFT(3) CD AUDIO/MP3: Stores and continues playback from the last track played, and MP3 file SEARCH-LEFT. 4. MENU/ESP CD AUDIO: Anti-shock protection ON/OFF. MP3: Select the MP3 file search function by MENU. 5. Display Window LCD function display 6. FUNCTION SWITCH Set the switch to CD or RADIO 7. PLAY/PAUSE Turns the set on, starts and interrupts CD play 8. TUNING UP CD AUDIO/MP3: Skip or fast search tracks forward. RADIO: Press the TUNING UP button to select the next frequency. 9. PRESET UP/UP(5) 10. ENTER/CLEAR 11. HOLD 12. PRESET DN/DN(66) 13. PROG 14. STOP 15. TUNING DN 16. LINE OUT JACK 17. PHONE JACK 18. VOLUME 19. OPEN SWITCH 20. DBBS SWITCH MP3: Select the MP3 file SEARCH-UP. RADIO: Select the next preset station number. Confirm the MENU selected/Cancel the program play Lock the controls on your CD player to prevent accidental button presses. Slide HOLD to "ON" ev en if the HOLD function is working. MP3: Select the MP3 file SEARCH-DOWN. RADIO: Select the previous preset number. Select the program mode and enter the program. Stops CD play, and switches the set off CD AUDIO/MP3: Skip or fast search tracks backward. RADIO: Press the TUNING DOWN button to select the previous frequency. Connect to an external amplifier 3.5mm headphone jack Adjusts the volume Opens the CD lid DYNAMIC BASS BOOST: Switches the bass enhancement on/off EN-3 POWER SUPPLY Use with regular batteries 1. Open the battery compartment door, located on the bottom of the unit, by sliding the door and lift it up. (Do not remove the battery door). 2. Insert 2 x 1 .5V /UM-3/AA size alkaline batteries, following the co rrect polarity, as indicated in the battery compartment. 3. Close the ba ttery compartment door. Note: If the symbol " LOW BATTERY " appears in the display, batteries are weak and should be replaced. Use withAC/DC adaptor(not included) 1. Insert the DC plug, at the end of the AC/DC adaptor cord, into the DC 4.5 V INPUT socket located on the back of the unit. 2. Connect the AC/DC adaptor into a 120V ~ 60Hz AC power outlet. Notes: • If the AC adaptor is conn ected when regular batteries are installed, the power supply automatically switches to the AC power source. • Make sure that the AC/DC adaptor matches with your household voltage before connect- ing it into the wall outlet. • When not using AC power, disconnect the AC/DC adaptor from the wall outlet. • Do not tou ch the AC/DC adaptor with wet hands. CONNECTIONS External Audio System Connect the stereo connection cable (not included) into the LINE OUT jack of the unit and the CD/AUX of your audio system. (Do not connect it to the amplifier phono jack.) Note: Always switch off the power before making any connections between the CD player and other audio system. • If the CD player interferes with the TV or radio reception, move the CD player away from TV set or radio receiver. HEADPHONE CONTROL Connect the stereo headphones (included) to the Phones jack . EN-4
-
 1
1 -
 2
2 -
 3
3 -
 4
4 -
 5
5 -
 6
6 -
 7
7
 |
 |
