Insignia NS-19E310NA15 User Manual (English) - Page 43
Select a channel, Adjust the volume, View channel information, Use INlink, Turn INlink on or off
 |
View all Insignia NS-19E310NA15 manuals
Add to My Manuals
Save this manual to your list of manuals |
Page 43 highlights
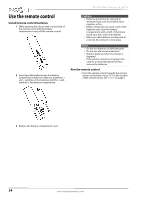
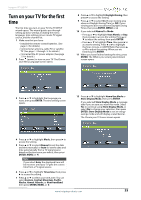
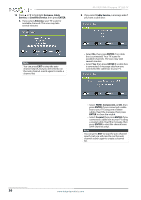
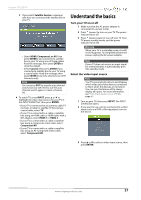
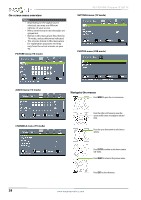
Insignia 19" LED TV Select a channel • Press CH or CH to go to the next or previous channel on the memorized channel list. • Press the number buttons to enter the channel number you want, then wait for the channel to change or press ENTER to immediately change the channel. • To select a digital sub-channel, press the number buttons to select the main digital channel, press (sub-channel), then press the number button for the sub-channel. Wait for the channel to change, or press ENTER to immediately change the channel. For example, to tune to channel 5.1, press 5, (sub-channel), then 1. Note Button presses must be within three seconds of each other. • Press (return) to go to the last viewed channel. • Press FAVORITE to open the favorite channel list, press S or T to highlight a channel, then press ENTER. For information about setting up a favorite channel list, see "Set up a favorite channel list" on page 53. Note If a list has more than one page, press S or T to scroll through the pages. Adjust the volume • Press VOL+ or VOL- to increase or decrease the volume. • Press MUTE to turn off the sound. Press MUTE again to turn the sound back on. View channel information • Press INFO* to view an information banner. The information banner shows the current program information such as channel number, video input source, and resolution. • Digital channel information-Displays the channel number, station name, channel label, broadcast program name, TV rating, signal type, audio information, resolution, current time, signal strength, day of the week, date and current program start and end times, if provided by the broadcaster. • Analog channel information-Displays channel number, channel label (if present), signal type, audio information, day of the week, date, and resolution, if provided by the broadcaster. Use INlink INlink lets you control HDMI CEC-compatible devices connected to the HDMI jacks on your TV using the remote control that came with your TV. To use INlink, you must set the INlink Control setting on the SETTINGS · INlink menu to On. Notes • HDMI cables must be used to connect HDMI CEC-compatible devices to your TV. • The connected device's HDMI CEC feature must be turned on. • If you connect an HDMI device that is not HDMI CEC-compatible, none of the INlink Control features work. • Depending on the connected HDMI device, some INlink Control features may not work. Turn INlink on or off 1 Press MENU. The on-screen menu opens. 2 Press W or X to highlight SETTINGS, then press T or ENTER. The SETTINGS menu opens. 3 Press S or T to highlight INlink, then press ENTER. The SETTINGS · INlink menu opens. 4 Press S or T to highlight INlink Control, then press ENTER. 5 Press S or T to highlight On or Off, then press ENTER. 6 Press MENU to return to the previous menu, or press EXIT to close the menu. www.insigniaproducts.com 39
-
 1
1 -
2
-
3
-
4
-
5
-
6
-
7
-
8
-
9
-
10
-
11
-
12
-
13
-
14
-
15
-
16
-
17
-
18
-
19
-
20
-
21
-
22
-
23
-
24
-
25
-
26
-
27
-
28
-
29
-
30
-
31
-
32
-
33
-
34
-
35
-
36
-
37
-
 38
38 -
 39
39 -
 40
40 -
 41
41 -
 42
42 -
 43
43 -
 44
44 -
 45
45 -
 46
46 -
 47
47 -
 48
48 -
49
-
50
-
51
-
52
-
53
-
54
-
55
-
56
-
57
-
58
-
59
-
60
-
61
-
62
-
63
-
64
-
65
-
66
-
67
-
68
-
69
-
70
-
71
-
72
-
73
-
74
-
75
-
76
-
77
-
78
-
79
-
80
 |
 |
