Insignia NS-PRCL01 Quick Setup Guide (English) - Page 1
Insignia NS-PRCL01 Manual
 |
View all Insignia NS-PRCL01 manuals
Add to My Manuals
Save this manual to your list of manuals |
Page 1 highlights
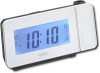
Quick Setup Guide NS-PRCL01 Projection Clock Radio Congratulations on your purchase of a high-quality Insignia product. Your NS-PRCL01 represents the state of the art in projection clock radio design and is designed for reliable and trouble-free performance. Package contents • Projection clock radio • AC-DC adapter • CR2032 x 1 battery • User Guide • Quick Setup Guide Step 1 Get to know your Projection Clock Radio Check out the front, side, and back panels to familiarize yourself with button controls and connection options. See your User Manual for more information on buttons and LED. Front Top LED 1 TUNING+/TIME+ 2 TUNING-/TIME3 PRESET+ 4 PRESET- 5 VOLUME+ 6 VOLUME7 Backup battery slot 8 DCIN 6V jack 9 ANT 10 SPEAKER 1 RADIO ON/OFF 2 AM/FM 3 SLEEP 4 PRESET MEMORY 5 SNOOZE/DIMMER 6 TIME SET 7 ALARM 1 8 ALARM 2 9 PROJECT 10 ROTATE 11 Projector lens 12 LCD DISPLAY 13 Projector focus-adjustment ring 14 Projector unit 1 RADIO 2 SLEEP 3 SNOOZE 4 VOL 5 MEM 6 Alarm 2 7 Preset station number 8 Main display 9 Alarm 1 Step 2 Install the backup battery Install the backup battery to maintain the correct time in case the AC power fails. 1 Make sure that the AC adapter is unplugged from the power outlet. 2 Turn your clock radio around so the back is facing forward, then unscrew the circular backup battery cover. 3 Insert one CR2032 button cell battery (included) into the battery compartment. Make sure that the + symbol on the battery is facing out. 4 Reinstall the backup battery slot cover. 5 Plug the AC adapter into your clock radio and a power outlet. Step 3 Plug in your Projection Clock Radio using the AC adapter 1 Place your clock radio in a convenient place near a power outlet within range of the AC adapter. 2 Plug the AC adapter into the power outlet. 3 Plug the AC adapter into the DCIN 6V jack on the radio.
-
 1
1 -
 2
2
 |
 |
